Hello everyone! So, obviously, I've been absent. Again. This summer has been incredibly busy and fun, which has not left me much time to blog. Also, I was hired by a co worker of my mothers to create a scrapbook for her sister, so that pretty much took up all of my crafting time for the past few months. But it's done, and super cute, so expect a post on that later. I'm going to try to ease my way back into blogging, maybe just a few posts per week, but I appreciate all of my subscribers sticking with me!
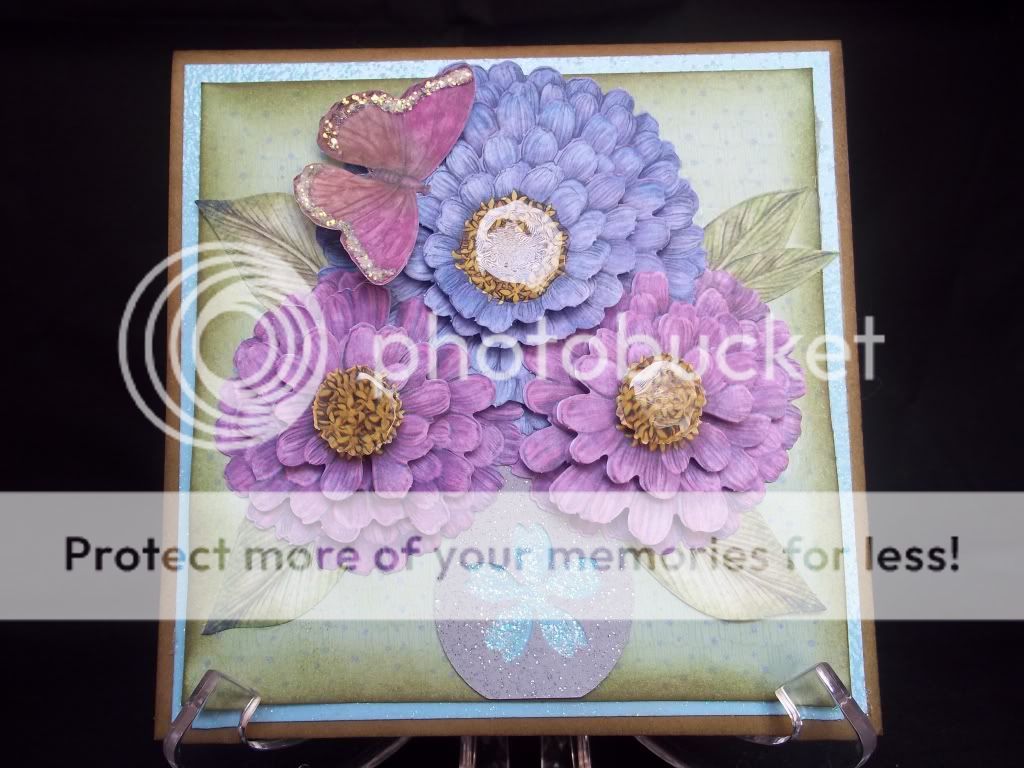
I made this card before I started the scrapbook project using a die-cut flower pad from K & Company. I don't usually buy this type of thing, since I have my Cricut, but the flowers looked too cute to pass up.
I simply punched out each of the die cut flowers, and all of it's layers, and popped them up on pop dots to add dimension.
I added Glossy Accents to each of the flower centers. I love the shine :)
The only Cricut cut I used was the vase from Pagoda. I didn't have my Gypsy with me at the time, so I couldn't hide the flower in the center. I wish I would have, but I think it still looks cute.
The butterfly is also from the K & Company pad. I added Stickles to the outside of the wings.
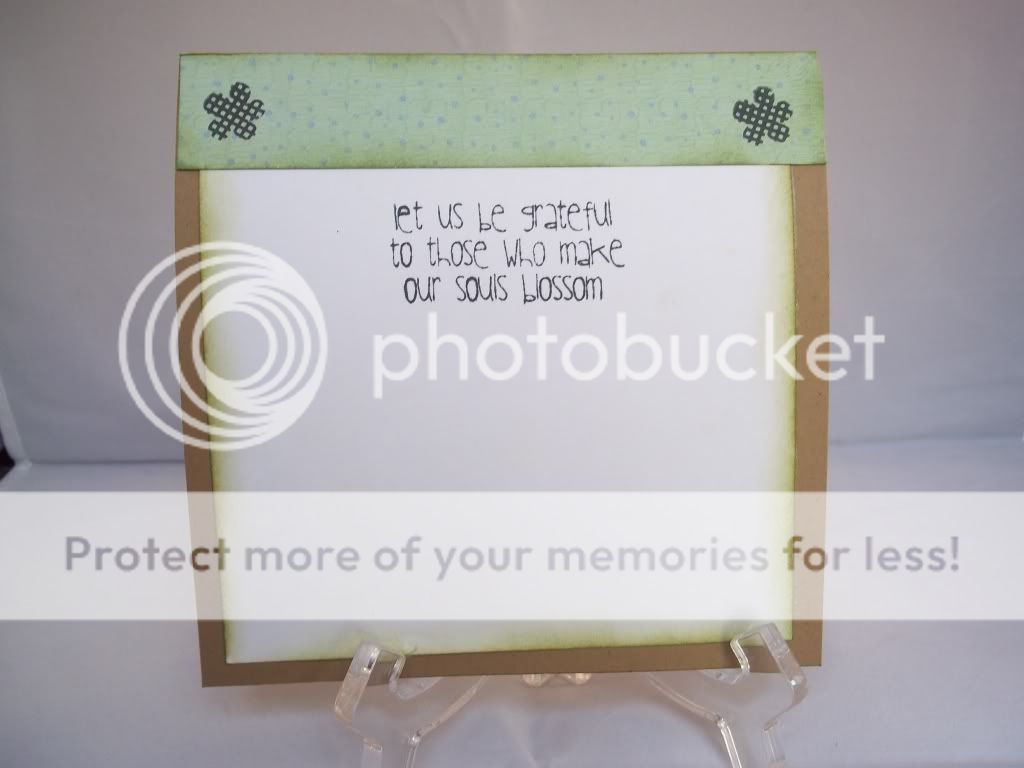
I've really gotten into decorating the inside of my cards. I would usually just leave them blank, but I've started using coordinating paper to give it a little extra touch. The sentiment and flower stamps are both from a Pink By Design Stamp of The Month Set. Seriously, if you haven't checked out PBD, please do. She has the cutest stamps!
I hope you enjoyed this card, and it's good to be back :)
Showing posts with label Card. Show all posts
Showing posts with label Card. Show all posts
Wednesday, July 13, 2011
An (almost) totally non-Cricut card!
Monday, April 25, 2011
Have a Doggone Good Birthday!
Hello everyone! I hope you had a FABULOUS Easter weekend. I had a very busy few days filled with family, friends, and fun, and now I'm EXHAUSTED! I wanted to share a birthday card with you I made a few weeks ago.
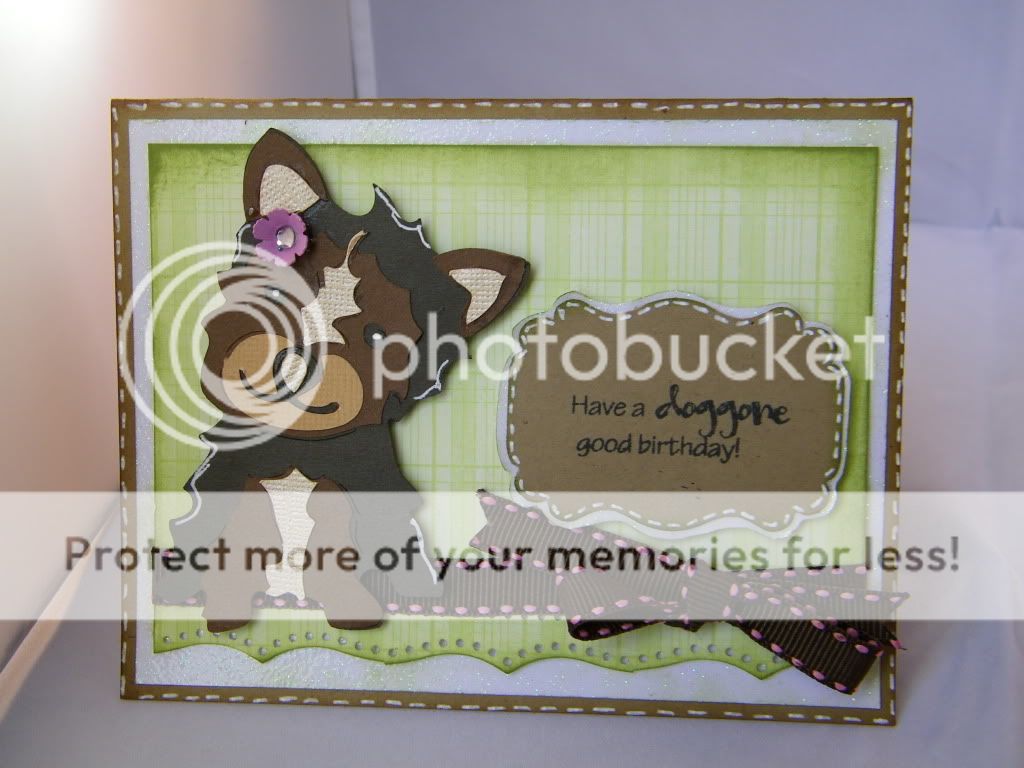
I bought the Four-Legged Friends Cricut Lite cartridge on Black Friday and I've only used it once since I bought it. I really wanted to break it out and use it again, and the perfect opportunity came when I needed to make a birthday card for my boyfriends mother. She has a little Yorkie named Molly, and I thought the Yorkie from Four-Legged Friends would be PERFECT on her card!
I cut the yorkie at 3 3/4" out of Recollections cardstock. I gave her a little shading with my white gel pen and also gave her dots for her eyes. The metal flower is from Making Memories and gives her the perfect feminine touch. The dogs from this cartridge are pretty easy to layer. The only con is that the cartridge booklet gives them really strange color combinations so it's hard to see what colors go where. But I think she turned out really cute!
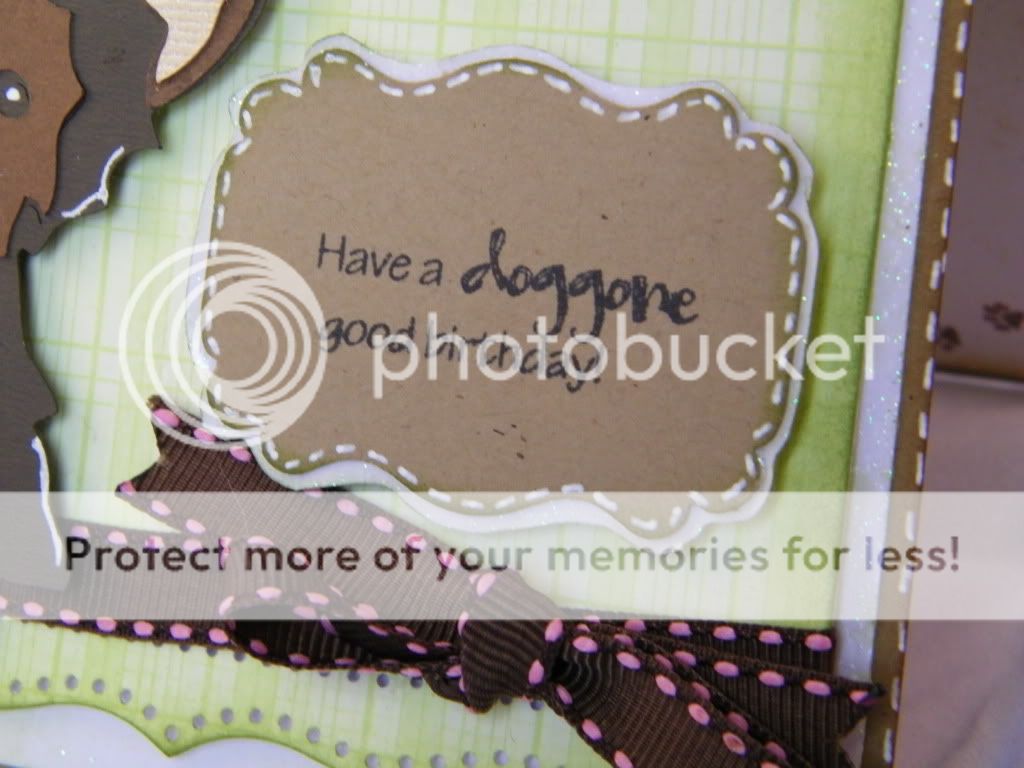
"Have a Doggone good birthday!" is from the Pink By Design Furry Friends stamp set. I punched it out with an EK Succes punch, matted it with the white glitter paper, and stitched around it and the base of the card. I finished the card with a really cute ribbon that continues the stitching in pink.
But I didn't stop there!
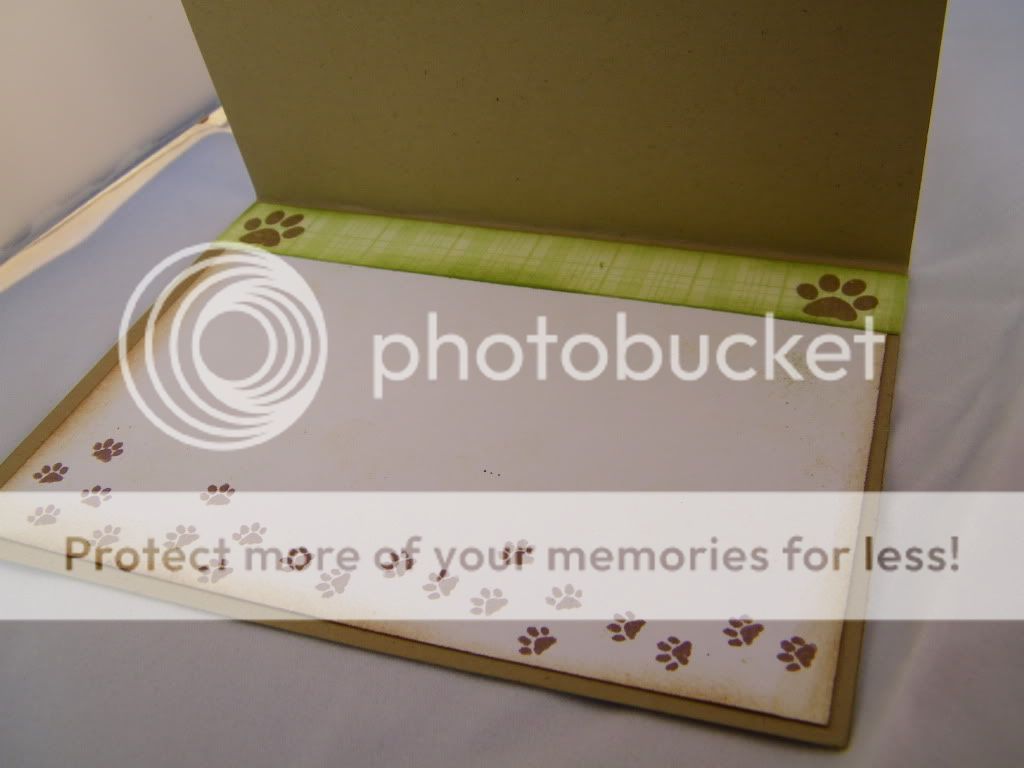
I really got into decorating the inside of this card as well. I added a little border strip along the top. All of the paw prints are from Furry Friends as well. I love the travelling paw prints!
I bought the Four-Legged Friends Cricut Lite cartridge on Black Friday and I've only used it once since I bought it. I really wanted to break it out and use it again, and the perfect opportunity came when I needed to make a birthday card for my boyfriends mother. She has a little Yorkie named Molly, and I thought the Yorkie from Four-Legged Friends would be PERFECT on her card!
This is an A2 size card made from craft cardstock. I matted the card with white glitter cardstock and a green plaid paper from the DCWV Dots, Stripes and Plaids stack. I used an EK Success border punch and inked around the edges of the plaid mat with Peeled Paint Distress Ink.
"Have a Doggone good birthday!" is from the Pink By Design Furry Friends stamp set. I punched it out with an EK Succes punch, matted it with the white glitter paper, and stitched around it and the base of the card. I finished the card with a really cute ribbon that continues the stitching in pink.
But I didn't stop there!
I really got into decorating the inside of this card as well. I added a little border strip along the top. All of the paw prints are from Furry Friends as well. I love the travelling paw prints!
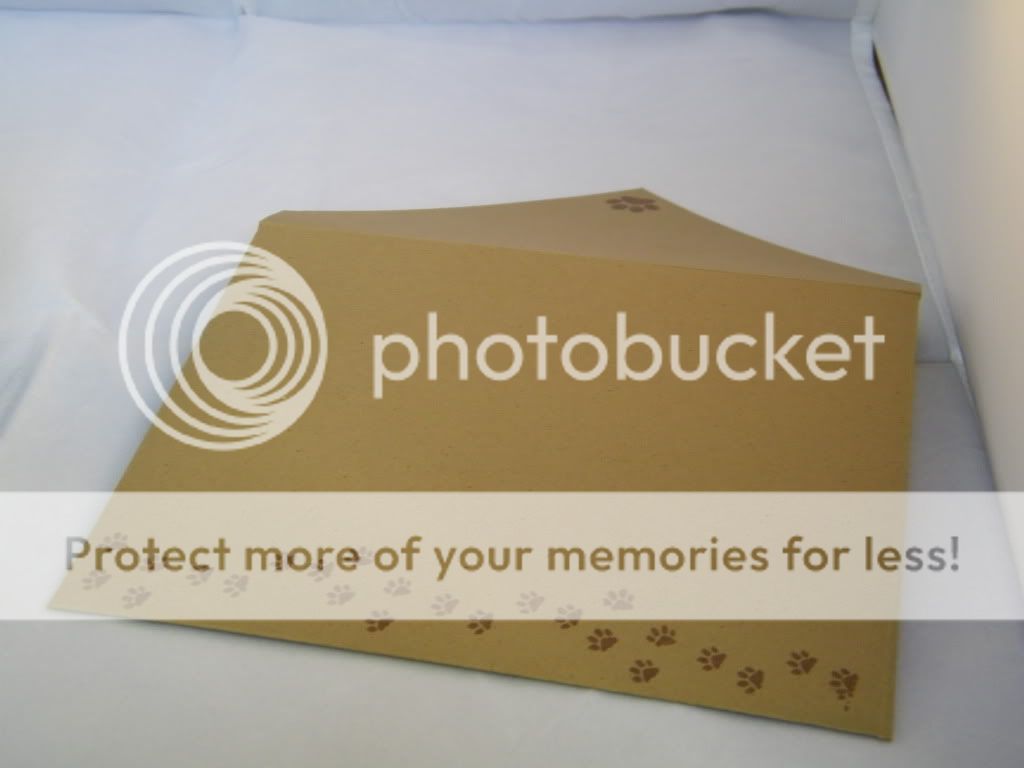
I continued the paw print theme on the matching envelope and the back of the card. I love my little personalized stamp from my Martha Stewart stamp kit!
That's it for today! Have a fabulous week friends! I have a few more things for you this week, including some things from my newest obsession: my YUDU!!
Friday, April 15, 2011
Party 'Til the Cows Come Home!
Hi everyone, and can I get a TGIF??? I can't WAIT for the weekend! I have a quick card to share with you today. My younger sisters birthday is next weekend, and I was asked by my mom to make her a cake (pics to come when I make it), so I decided to make a card to go with it.
I should preface this by saying my sister and I are POLAR opposites. I'm the girly, crafty, book smart, musically inclined one, and she's the sporty, tomboyish, nothing-fancy type. One of her life goals is to life on a farm and raise cattle, and I am a CITY GIRL through and through. So I knew I would need to make her a simple card without a lot of embellishments and "girly" stuff. My sister raises and sells cattle on my family's 40 acres (which I have never visited, like I said, farmwork is NOT for me), so I made a cow shaped card using my Gypsy for her.
I used the shadow feature on Create a Critter and welded two cow shadows together to form the base of the card. Then I just assembled the cow like normal on the front. I love using my Gypsy to make shape cards , she makes things so easy!:)
I used pink Core'dinations Gemstone cardstock for her nose and udders, and ran them through my Swiss Dots Cuttlebug folder to give her a little something extra (I know my sister likes simple, but I HAD to do something!)
For the inside, I cut the main part of the cows body again in white to give me somewhere to write. "Party Til the Cows Come Home" is from Pink By Designs "Take the Cake" stamp set. I punched it out with an EK Success punch and added a little stitching with my white gel pen. No inking or anything. Trust me, I was DYING to break out my distress inks but I had to keep reminding myself that this was for my sister, NOT me ;)
I added a little stitching on the front, and that was it! I hope she likes this card, and the cake I'm making next week. I've been told I need to make a simple white cake with very simple decorations and no fondant. Soooo not what I usually do. The things you do for family ;)
Thursday, April 14, 2011
I'm BACK! (with a card too!)
Hi everyone!
I just want to apologize for being gone for so long without an explanation. To make an INCREDIBLY long story short, my life got pretty crazy back in February and is just now getting back to some sense of "normal". I'm fine, but there was a time where I just did NOT have the time (or energy) to craft or blog. My poor Cricut was terribly neglected. I also felt like I was losing a lot of my "crafty mojo", and didn't really have any good ideas. I was doing a lot of crafting for design teams, challenges, etc but none really for ME. Last week I finally booted up my Cricut again and everything came rushing back, so of course I had to bring my blog back to life! I PROMISE to keep blogging as much as I can, hopefully 2-3 projects a week for awhile. Once I'm able to move and put my craft room back together (another long story) it will be much more then that! :)
Also, I FINALLY HAVE A NEW DIGITAL CAMERA! No more shots with my iPhone! That, and I discovered my boyfriend has a super AWESOME professional light box so now I can take MUCH better pictures.
The card I wanted to show you today was one I made MONTHS ago for a Design Team that I never got around to posting, but I absolutely love it so I wanted to make sure I posted it.
We had to create a card based on a movie. One of my favorite movies is Moulin Rouge, and I love the quote "The greatest thing you'll ever learn is just to love, and be loved in return". I wanted to create a very vintage looking card with red as the main color that focused on this quote. This is what I came up with:
The patterned paper is from the DCWV Black Currant stack. Iinked everything with Vintage Photo Distress Ink to give it that aged look.
The quote is computer generated, and I punched it out of cream colored cardstock using an EK Success punch. I inked the edges, popped it up on Pop Dots, and added two gems using my i-Rock.
In the movie, they call Satine the "Sparkling Diamond", so I knew I wanted a diamond somewhere on my card. I found this heart shaped "diamond" on the Hannah Montana cartridge and thought it would work perfectly. I both layers from red Core'Dinations cardstock, then ran the first layer through my Xyron and added red Martha Stewart glitter. The red flowers are also from my stash with gemstone brads in the center.
I LOVE how this card turned out. It looks vintage and lush, which reminds me of the Moulin Rouge.
I'm so happy to be back! I want to thank all of my subscribers that emailed me over the last few months making sure I was OK. I'm sorry if I didn't get back to all of you, but I really appreciated you thinking about me! I promise I will have more cards and projects to come very soon! :)
I just want to apologize for being gone for so long without an explanation. To make an INCREDIBLY long story short, my life got pretty crazy back in February and is just now getting back to some sense of "normal". I'm fine, but there was a time where I just did NOT have the time (or energy) to craft or blog. My poor Cricut was terribly neglected. I also felt like I was losing a lot of my "crafty mojo", and didn't really have any good ideas. I was doing a lot of crafting for design teams, challenges, etc but none really for ME. Last week I finally booted up my Cricut again and everything came rushing back, so of course I had to bring my blog back to life! I PROMISE to keep blogging as much as I can, hopefully 2-3 projects a week for awhile. Once I'm able to move and put my craft room back together (another long story) it will be much more then that! :)
Also, I FINALLY HAVE A NEW DIGITAL CAMERA! No more shots with my iPhone! That, and I discovered my boyfriend has a super AWESOME professional light box so now I can take MUCH better pictures.
The card I wanted to show you today was one I made MONTHS ago for a Design Team that I never got around to posting, but I absolutely love it so I wanted to make sure I posted it.
We had to create a card based on a movie. One of my favorite movies is Moulin Rouge, and I love the quote "The greatest thing you'll ever learn is just to love, and be loved in return". I wanted to create a very vintage looking card with red as the main color that focused on this quote. This is what I came up with:
The patterned paper is from the DCWV Black Currant stack. Iinked everything with Vintage Photo Distress Ink to give it that aged look.
The quote is computer generated, and I punched it out of cream colored cardstock using an EK Success punch. I inked the edges, popped it up on Pop Dots, and added two gems using my i-Rock.
In the movie, they call Satine the "Sparkling Diamond", so I knew I wanted a diamond somewhere on my card. I found this heart shaped "diamond" on the Hannah Montana cartridge and thought it would work perfectly. I both layers from red Core'Dinations cardstock, then ran the first layer through my Xyron and added red Martha Stewart glitter. The red flowers are also from my stash with gemstone brads in the center.
The word "Love" is from the Martha Stewart Elegant Cake Art cartridge. I used my i-Rock to add the "..." in bling after the word love.
Here is the rest of the quote on the inside of the card. I punched this out using the same EK Success punch, then glued it to a piece of red cardstock and cut around to create a shadow.
I'm so happy to be back! I want to thank all of my subscribers that emailed me over the last few months making sure I was OK. I'm sorry if I didn't get back to all of you, but I really appreciated you thinking about me! I promise I will have more cards and projects to come very soon! :)

Friday, January 28, 2011
The "Thank You" Blog Hop!
Good morning everyone! Today is the first day of the "Thank You" blog hop. You should have just come from Erikas blog! This blog hop was put together by the lovely Raven to give a big THANK YOU to Madeline of The Shabby Vanity for our blog makeovers!
I don't know if any of my early followers remember my original blog design, but it was BAD. I have no graphic design or HTML experience and it basically looked like it was thrown together by a fifth grader :) I decided I wanted a more professional look so I used Madeline and her "5-Minute Makeover" plus some other a la cart items that she offers. I could not be happier with the final result. Everything looks professional and organized, and I LOVE my banner! When I received word about this blog hop I couldn't wait to participate!
One of my favorite things about my new blog look is the cute cherry theme she has running throughout my blog. From my background to the screen on my Gypsy I'm juggling, it's everywhere, and I love it! I wanted to make a thank you card that incorporated those cute cherries, and this is what I came up with!
Your next stop is Angela at Creative Craftin. Make sure to check out everyone's projects!
Here's the list of everyone hopping today, and don't forget to stop by Madeline's blog and show her some love!
Raven- http://love4stamps.blogspot.
Ruthie- http://septemberninth.
Theresa- http://www.
Jennifer- http://crazyaboutcricut.
Erika- http://cricutlove1.blogspot.
Kristin- http://kristinscraftykitchen.
Angela- http://creativecraftin.
Melissa- http://www.
Michele- http://www.nowstampthis.
Zeni- http://www.scrappyzeni.
Madeline- http://theshabbyvanity.
I don't know if any of my early followers remember my original blog design, but it was BAD. I have no graphic design or HTML experience and it basically looked like it was thrown together by a fifth grader :) I decided I wanted a more professional look so I used Madeline and her "5-Minute Makeover" plus some other a la cart items that she offers. I could not be happier with the final result. Everything looks professional and organized, and I LOVE my banner! When I received word about this blog hop I couldn't wait to participate!
One of my favorite things about my new blog look is the cute cherry theme she has running throughout my blog. From my background to the screen on my Gypsy I'm juggling, it's everywhere, and I love it! I wanted to make a thank you card that incorporated those cute cherries, and this is what I came up with!
Recipe:
- Wild Card Cricut Cartridge
- George Cricut Cartridge
- Paisley Cricut Cartridge
- Peachy Keen "Everyday Character Faces" Assortment stamp set
- Scrappy Moms "A Pinch and a Dash" stamp set
- Ribbon from Michaels
- Stickles
I cut the card base from the Wild Card cartridge, and then made two layering circles using George and my Gypsy to line them up. The cherries are from Paisley cartridge and I used my favorite Peachy Keen face stamp set and pink chalk to give them an adorable touch. I used Action Wobbles underneath each of the cherries so they pop up and wobble back and forth (hence the sentiment). I used my white gel pen for some doodling and the whites of the eyes, Stickles on the leaf, and voila! An adorable thank you card.
...you didn't think that's all I had for you today, did you? How about a little blog candy?? I have TWO Martha Stewart Christmas punches to give away!
Wanna win a Poinsettia Vine Edge punch and a Present Punch and Stamp Punch? Here's what you need to do:
- Become a follower of my blog
- Leave me a comment on this post (make sure you leave a way for me to contact you)
I will draw a winner on Monday, January 1st and email the winner. You'll have one week to get back to me or I'll have to draw someone else.
Your next stop is Angela at Creative Craftin. Make sure to check out everyone's projects!
Here's the list of everyone hopping today, and don't forget to stop by Madeline's blog and show her some love!
Raven- http://love4stamps.blogspot.
Ruthie- http://septemberninth.
Theresa- http://www.
Jennifer- http://crazyaboutcricut.
Erika- http://cricutlove1.blogspot.
Kristin- http://kristinscraftykitchen.
Angela- http://creativecraftin.
Melissa- http://www.
Michele- http://www.nowstampthis.
Zeni- http://www.scrappyzeni.
Madeline- http://theshabbyvanity.
Labels:
Blog Hop,
Card,
Paisley,
Scrappy Moms,
Wild Card

Friday, January 14, 2011
SSD Design Team: "I Like Your Style" with Nifty Fifties
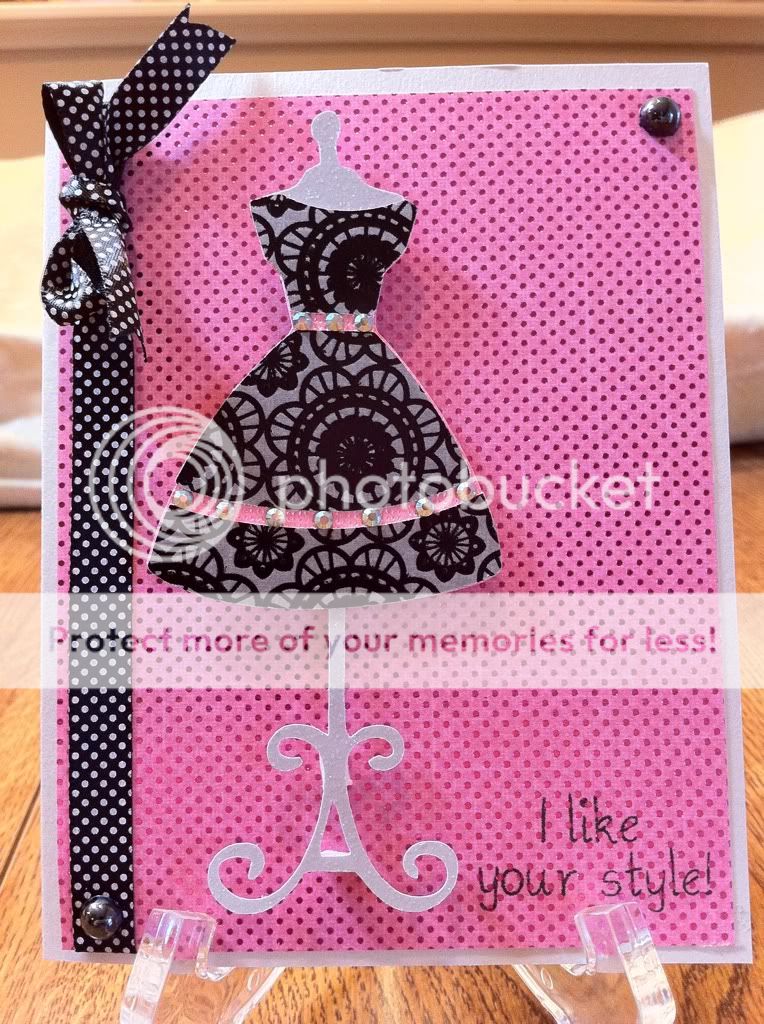
This week over at SweetSassyDiva our challenge was to create something using one of our new cartridges. I snagged Nifty Fifties during PaperCrafting Pros $13 cartridge sale, but I was a little apprehensive about using it. I was born in 1985, what in the heck was I going to do with all of these fifties images? Well, fear not my friends! Nifty Fifties is a truly versatile cartridge and you can make SO MANY wonderful things with it! Wanna see what I did?
Recipe:
- Nifty Fifties Cartridge
- DCWV Black Currant stack
- i-Rock and gems
- Martha Stewart black pearls
- My Pink Stamper "Pinkalicious Puns" stamp set
One of the first images I was drawn to on the cartridge was the dress form and the cute little sock hop dress. I cut the dress form from glitter paper and the actual dress from the Black Currant stack. The dress comes with a buckle but it was too small to really work with, so I blinged up the dress with gems instead.
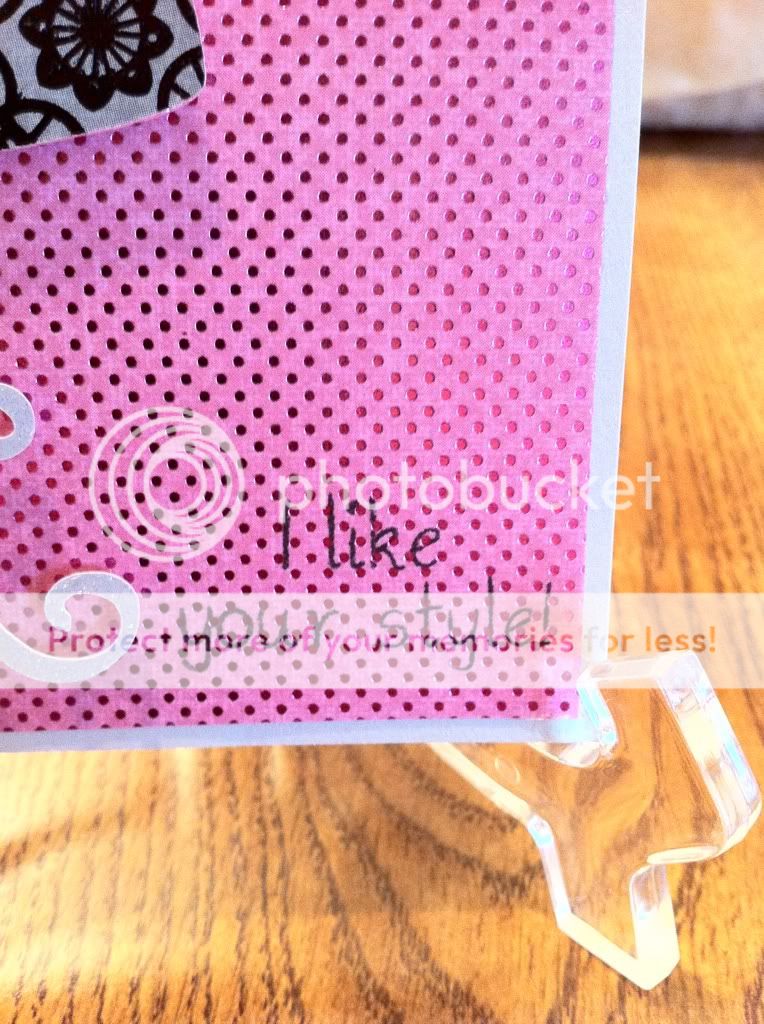
The sentiment is from the My Pink Stamper Pinkalicious Puns set. I KNOW, I KNOW. I didn't use a Pink By Design Stamp! Are you shocked? Trust me, I wanted to, but I don't own the Shopaholic stamp set...yet. Sarah, if you're listening, my birthday is next month ;)
All kidding aside, this is a great girly stamp set with lots of fashion sayings, and "I Like Your Style" went perfectly with the dress.
SO, there you have it! If you ever have the opportunity to get Nifty Fifties (and it's going for really cheap these days) you should! You'll be surprised what you can create with it :)
Labels:
Card,
Design Team,
My Pink Stamper,
Nifty Fifties

Saturday, January 8, 2011
SSD Design Team: I-Top Snowman Card
Hey everyone! This week at SSD out challenge was to recycle something into a project, or use something new we got for Christmas. I combined them both into this card.
Even though Christmas is over, it is still definitely winter in my neck of the woods, so I decided to make a winter card. I used my new Imaginisce I-Top that I got for Christmas to make a snowman out of brads. Isn't he cute?
The i-Top was SO EASY to use and makes perfect brads every time. Wait until you see my next project where I used ribbon and the i-Top, they're FLAWLESS :)
I used Recollections craft cardstock for the base and patterned paper from DCWVs Winter Combo stack. The twine is recycled from a package I got for Christmas. The sentiment is from Pink By Designs "Winter Fun" stamp set, which I punched out using an EK Success Punch. The snowflakes are a Martha Stewart punch.
Speaking of Pink By Design, did you see that Sarah released some new stamp sets this week? She also now carries super cute twine in her shop, and she started a Stamp Of The Month Club! I HAD to join that one, we all know how much I love my Pink By Design stamps :)
Have a great day everyone!
Labels:
Card,
Design Team,
i-top,
Imaginisce,
Martha Stewart,
Pink By Design

Saturday, December 18, 2010
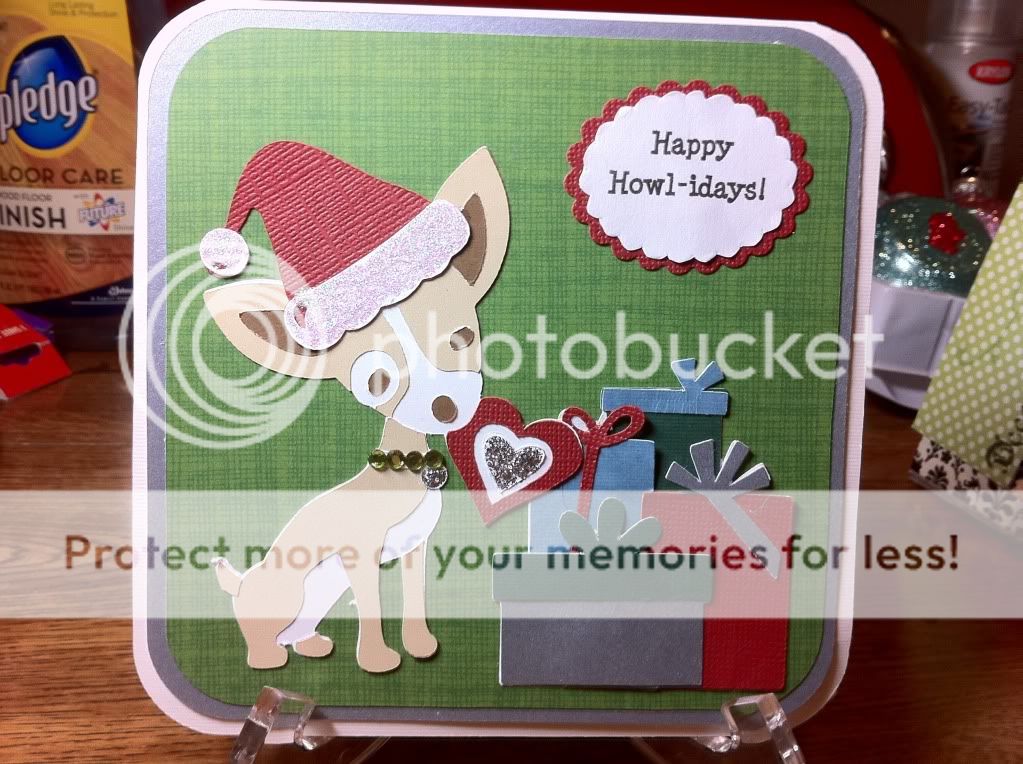
Happy Howlidays!
I needed to make a card to go along with a package I was sending to my friend Monica in Texas. She's the owner of the fabulous Monica Wants It and Damask Diva Designs on Etsy. Monica has a fabulous dog named Pee Wee and I wanted to make a holiday card with him on the front.
I got the dog from Four Legged Friends. Pee Wee is NOT a Chihuahua, but he was the closest I could find. Have I mentioned how much I LOVE this cart?? There are two dogs on there that look JUST like my two dogs and I can't wait to use them. Even though Pee Wee is a boy, he is still stylish so I blinged up his collar with my iRock and used silver Stickles on the heart he's holding.
The Santa Hat is from Jolly Holidays. It actually comes with two different stripe layers, but I hid those in my Gypsy so I could just get the basic Santa Hat shape. I used clear Stickles on the white parts of the hat to give it a little sparkle.
The stack of presents is from the Winter Frolic cartridge. Have a mentioned what a PAIN they were to piece together? I had to stare at that handbook for AGES to figure out which ones to cut which colors, and THEN how to layer them. They turned out super cute though!
I cut the card at 5.5" using George and Basic Shapes. I welded two together to form the base of the card and then cut two mats for the front. Both are from the DCWV Christmas Combo Stack.
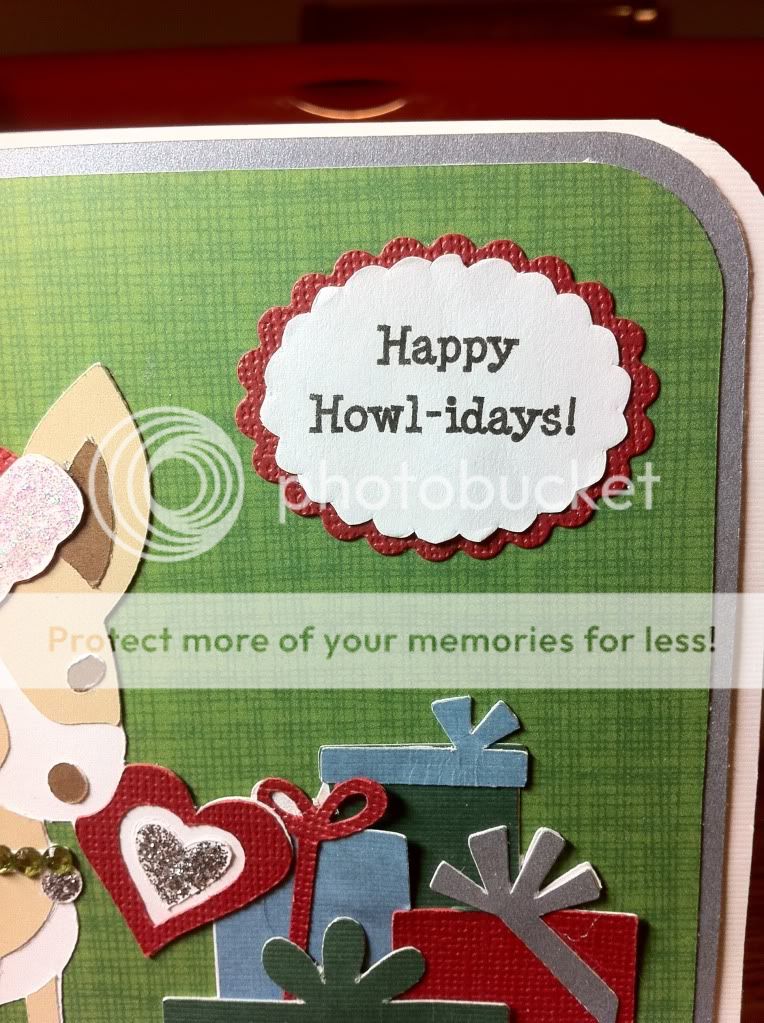
I could NOT find a sentiment to use for this card, so I made my own on my computer. I can't believe no one has a "Happy Howl-idays" sentiment stamp! I would definitely buy that one! I used my brand new Nestabilities in my Cuttlebug to make the scalloped mats for the sentiment.
Hope everyone is having a fabulous weekend! I'll be doing a LOT of crafting today and next week to get all of my Christmas presents done, so expect a lot of projects! :)
Labels:
Card,
Four Legged Friends,
Jolly Holiday,
Nestabilities,
Winter Frolic

Tuesday, December 7, 2010
Post-It Craft Paper Christmas Card
Hey everyone! This week for the SweetSassyDiva Design Team, we needed to use our AWESOME new Post-It Craft paper to make a Christmas card. I decided to make the mitten from Simply Charmed entirely out of the paper and put it through the ringer. Let me tell you how much I LOVE this paper. It cuts beautifully in the Cricut, embosses beautifully in the Cuttlebug, and is GREAT for flocking and glitter. For his cuff, I kepIt the paper on the backing sheet, ran it through my Xyron and added Martha Stewart white flocking. I used the Swiss Dots folder on the green and added MS pink glitter for his cheeks.
The adorable patterned paper is from DCWVs Christmas Combo stack. The green mat behind it is also Post it paper, which is AWESOME because I didn't have to break out my ATG and use my precious tape to adhere the big square!!
I used Pink By Design's "Christmas Wishes" stamp set for the cute sentiment, and then I topped it all off by popping the mitten up on an Action Wobble! He looks SO CUTE wobbling back and forth on the card. Here's a video on how to use the Action Wobbles:
A super adorable card and super QUICK thanks to the awesome Post It Craft Paper!
Labels:
Action Wobbles,
Card,
Christmas,
Design Team,
Pink By Design,
Post-It,
Simply Charmed

Saturday, November 13, 2010
SweetSassyDiva Design Team: Smiley Cards Project
Our challenge for this weeks SweetSassyDiva Design Team was to design something using Smiley Cards. I happen to LOVE this cartridge, so the hardest part for me was deciding what to cut.
I finally decided on the cute little birthday cake. I figured I could make a sweet birthday card to keep in my stash, and use my favorite new card in the process :)
I cut both the cake and the actual card base from the Smiley Cards cartridge (love the extra features!) I re-sized the base in my Gypsy to be approximately 5.5 x 5.5" and cut it from craft colored cardstock.
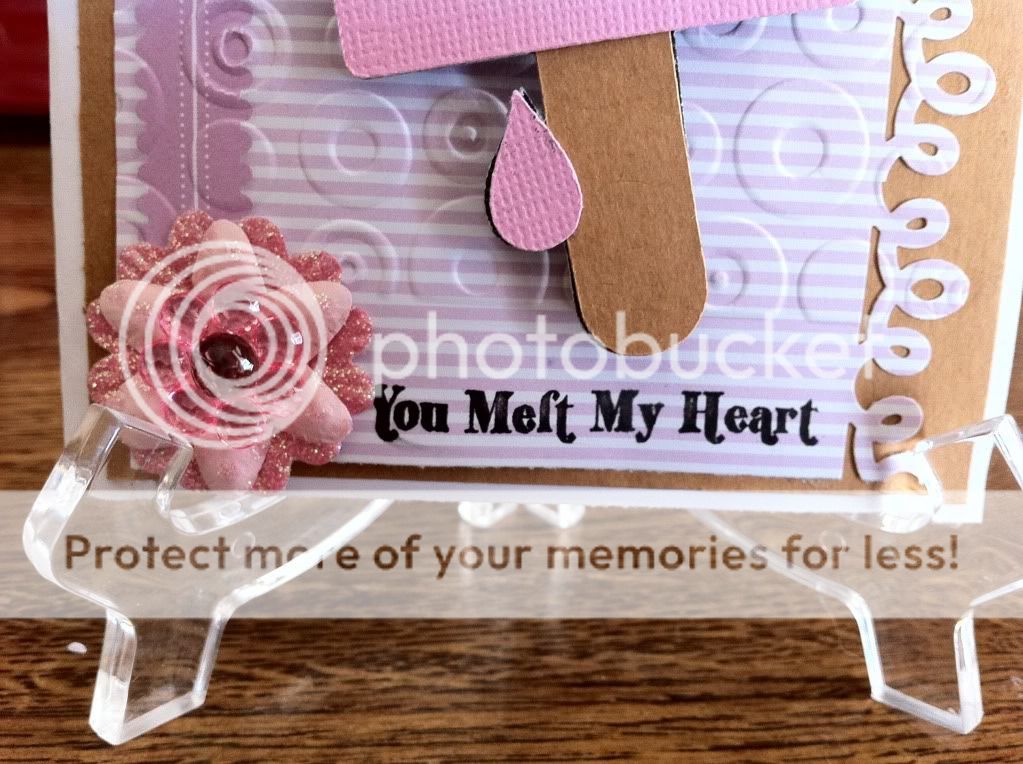
I couldn't find a patterned paper that I really liked for this card, and my Cuttlebug has been feeling horribly, horribly neglected lately so I took some pink Core'dinations paper and ran it through my Cuttlebug using the Paisley folder. I sanded the embossed image so the lighter pink color would show through. I think this is the first time I've used the Paisley folder, and it turned out so stinking cute!
I also cut the cake using the craft colored cardstock, and purple Core'dinations paper that I ran through my Cuttlebug with the D'Vine Swirls folder (a must have folder!) and sanded. I used my white gel pen to stitch around the card, slapped on some brown stitched ribbon, and voila!
The sentiment is from Pink by Designs "Take the Cake" stamp set. There are so many wonderful birthday sentiments in this set I had a hard time choosing one!
I finally decided on the cute little birthday cake. I figured I could make a sweet birthday card to keep in my stash, and use my favorite new card in the process :)
 | ||||||
| Excuse the lighting, I couldn't get it quite right for this picture |
I cut both the cake and the actual card base from the Smiley Cards cartridge (love the extra features!) I re-sized the base in my Gypsy to be approximately 5.5 x 5.5" and cut it from craft colored cardstock.
I couldn't find a patterned paper that I really liked for this card, and my Cuttlebug has been feeling horribly, horribly neglected lately so I took some pink Core'dinations paper and ran it through my Cuttlebug using the Paisley folder. I sanded the embossed image so the lighter pink color would show through. I think this is the first time I've used the Paisley folder, and it turned out so stinking cute!
I also cut the cake using the craft colored cardstock, and purple Core'dinations paper that I ran through my Cuttlebug with the D'Vine Swirls folder (a must have folder!) and sanded. I used my white gel pen to stitch around the card, slapped on some brown stitched ribbon, and voila!
The sentiment is from Pink by Designs "Take the Cake" stamp set. There are so many wonderful birthday sentiments in this set I had a hard time choosing one!
I'm so sorry for the lack of posts lately, my crafty friends. I've been working hard on a project for next week's Craft Junkie Too Design Team and I haven't had much time for "just for fun" crafting. I'll try to have some more posts this week!
Labels:
Card,
Cuttlebug,
Design Team,
Gypsy,
Pink By Design,
Smiley Cards

Friday, November 5, 2010
SweetSassyDiva Design Team: A Thankful Fall Card
I told myself I wasn't going to buy any Cricut Lite cartridges.
I got Cupcake Wrappers when they first came out, because I thought they would be good for my baking business (which they are!).
But then I said I was done. I get all of my cartridges online and I NEVER pay more than $25, so I SWORE I would never pay $39 for a Lite cartridge.
...
Then I saw Celebrate with Flourish.
It's truly a cart you can use all year round, and I LOVE the flourish designs.
So I caved yesterday when I saw my local Wal Mart had one copy left.
It all worked out though, because I needed to make a fall project for this weeks SweetSassyDiva Design Team, and I found a perfect image for my card.
This is a 5 1/2 by 5 1/2 inch card. I cut the green and patterned mats in 1/4 inch increments and inked around the edges. I cut the Pilgrim hat (with shadow) at 4" and inked all the cuts with Vintage Photo Distress Ink. Before I applied the hat, I used braiding cord around the card, secured in the back with a glue dot. I heat embossed the "Thankful" sentiment using black ink and clear embossing powder.
Do you remember that stamp set? I got it for $3 at Tuesday Morning. Totally a worthwhile buy!
I adhered the hat to the card with Pop Dots, and voila! A simple and elegant Thanksgiving card.
Make sure to stop by SweetSassyDiva and check out all of the design teams projects this week!
Have a FABULOUS Friday everyone!
I got Cupcake Wrappers when they first came out, because I thought they would be good for my baking business (which they are!).
But then I said I was done. I get all of my cartridges online and I NEVER pay more than $25, so I SWORE I would never pay $39 for a Lite cartridge.
...
Then I saw Celebrate with Flourish.
It's truly a cart you can use all year round, and I LOVE the flourish designs.
So I caved yesterday when I saw my local Wal Mart had one copy left.
It all worked out though, because I needed to make a fall project for this weeks SweetSassyDiva Design Team, and I found a perfect image for my card.
Recipe:
- Cricut Lite "Celebrate with Flourish" cartridge
- DCWV Amber Autumn Stack
- Recollections Spice Market Pack
- KI Memories "Fall Icons" Stamp Set
- Peeled Paint Distress Ink
- Vintage Photo Distress Ink
- Brown Braiding Cord
This is a 5 1/2 by 5 1/2 inch card. I cut the green and patterned mats in 1/4 inch increments and inked around the edges. I cut the Pilgrim hat (with shadow) at 4" and inked all the cuts with Vintage Photo Distress Ink. Before I applied the hat, I used braiding cord around the card, secured in the back with a glue dot. I heat embossed the "Thankful" sentiment using black ink and clear embossing powder.
Do you remember that stamp set? I got it for $3 at Tuesday Morning. Totally a worthwhile buy!
I adhered the hat to the card with Pop Dots, and voila! A simple and elegant Thanksgiving card.
Make sure to stop by SweetSassyDiva and check out all of the design teams projects this week!
Have a FABULOUS Friday everyone!
Labels:
Card,
Celebrate with Flourish,
Cricut Lite,
Fall,
Thanksgiving

Tuesday, November 2, 2010
Playing with Smiley Cards!
I just HAD to make a card using my new Smiley Cards cartridge today. I had this card rolling around in my head ever since I was able to access the Smiley Cards overlay on my Gypsy.
Today is ALSO Momo's Tuesday Challenge, and today's challenge was to use embossing, either heat or dry. My poor Cuttlebug has been horribly neglected these past few weeks, so I pulled her out and used the Spots and Dots folder on the background of the card. The cute little flower in the corner is from a tin of prima flowers I got at Tuesday Morning, held in place by a bead flower brad. The sentiment is from Pink by Design. I seriously love Sarah's stamps!
Today is ALSO Momo's Tuesday Challenge, and today's challenge was to use embossing, either heat or dry. My poor Cuttlebug has been horribly neglected these past few weeks, so I pulled her out and used the Spots and Dots folder on the background of the card. The cute little flower in the corner is from a tin of prima flowers I got at Tuesday Morning, held in place by a bead flower brad. The sentiment is from Pink by Design. I seriously love Sarah's stamps!
Recipe:
- Smiley Cards Cartridge
- DCWV Sweet Stack
- Cuttlebug Spots and Dots Folder
- Martha Stewart Border Punch
- Peachy Keen Everyday Face Assortment
- Stickles
Labels:
Card,
Gypsy,
Peachy Keen,
Pink By Design,
Smiley Cards

Saturday, October 30, 2010
Exciting Announcement!
I've been selected to be on the SweetSassyDiva Design Team! I am SO excited to share my projects with Bobbi Jo and her followers. She is such a sweetheart! Click HERE to go to her blog and meet the rest of the team!
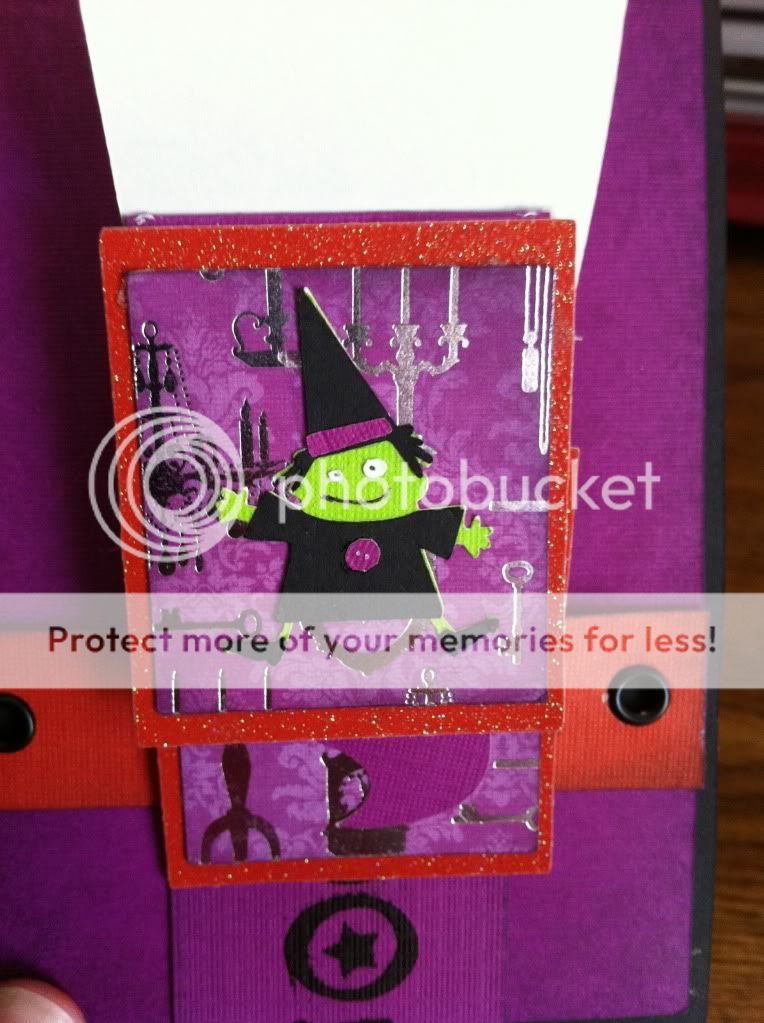
We needed a project to go along with our first week bios, so I designed a Halloween waterfall card using my BRAND NEW Gypsy and my new Mini Monsters cartridge!
I got the original gypsy file from Elizabeth at 217 Creations. She used Plantin Schoolbook for her file, and I don't have that cartridge, so I re-designed the file using George and Basic Shapes. I will be posting both her original file as well as my George file at the end of this post.
I made a video showing exactly how I made the card!
Recipe:
*DCWV Midnight Spell cardstock, glitter and patterned stacks
*Mini Monsters Cartridge
*Happy Hauntings Cartridge
*Crop-A-Dile and black eyelets
*Tim Holtz Dusty Concord Distress Ink
*Recollections Halloween Brads
*Zig 2-Way Glue Pen (for those tiny monsters!)
*Purple Stickles
For the 217 Creations original Gypsy File (Plantin Schoolbook): Click HERE
For my re-designed Gypsy File (George & Basic Shapes): (Click HERE)
Hope you enjoyed! If you have any questions, feel free to leave me a comment or shoot me an email! I love hearing from you :)
Labels:
Card,
Design Team,
Gypsy,
Gypsy File,
Halloween,
Happy Hauntings,
Mini Monsters,
Video

Subscribe to:
Posts (Atom)

