Friday, December 31, 2010

Michaels Ad Sneak Peek!

Hey everyone! I got my hands on the Michaels ad for the week of January 9th, and I just HAD TO SHARE!

All cartridges that are normally $69.99 will be 9.99!!!!!!! So awesome!

Here's a picture. It also adds it excludes Imagine carts and you can't do rain checks :)

Have a fabulous New Years everyone! Here's hoping for a great 2011!

Thursday, December 30, 2010

The Last of My Christmas Projects!

Here is my LAST "Christmas Project" post of 2010.  I promise!

Do you remember the altered recipe box I made a few weeks ago for the Post It Blog Hop?  Well, I showed my Mom and she thought they would be wonderful gifts for her co-workers.  She wanted me to make some things to fill the boxes as well, so I decided to put a set of 3x3" cards and envelopes in each box, along with a monogrammed Post-It Note Holder.  I made SEVEN of these bad boys, and each one was different!


The only Cricut cut I used was for the monogram, and I used the Martha Stewart Elegant Cake Art cartridge.  Most of the patterend paper is from Recollections (I took my Mom to Michaels and let her pick out all the patterned paper), and most of the solid paper is Post-It Craft Paper!    

Each one had a different Martha Stewart border punch around the top, and I used Stickles on each of the monograms (hard to see in the photos).  I bound all the Post-It Note holders with my Cinch!

These are extremely cute and SUPER AFFORDABLE gifts.  The recipe boxes were $1.00 at Michaels, and we bought the paper and ribbon during a sale.  The Post-It Note holders are made from 4x4 chipboard coasters I got at Michaels on clearance for 30 cents a pack!

Wednesday, December 29, 2010

Yummy Holiday Cookies!

I needed to make a huge batch of cookies for a few holiday events last week.  I decided I didn't want to use my Cricut Cake, not because I don't love her (BECAUSE I DO), but because I love making Royal Icing flood cookies.  They taste so yummy and the possibilities are endless with what you can do with them.

I think the mittens and the candy canes were my favorite.  I used a Christmas cookie cutter set that I have had for AGES for the shapes.  I colored a batch of the stiff royal icing to outline, and then once they had hardened, I added water to the remaining royal to make it flood consistency.  I colored them to match the outlines, filled squeeze bottles, and went to town.

The mittens were fairly simple.  After I flooded the red and white into the mitten and allowed them to dry, I piped white stiff royal on top.

To get the awesome swirl effect, I flood filled the candy canes with white, and then while they were still wet I made red and green stripes.  Because it is still wet the colored stripes sank into the white.  I then took a toothpick and just made lines down the candy cane.  Super simple and it really creates a gorgeous effect.

Here's the recipes I used for the cookies and for the icing.  If you're planning on making shape cookies, this is the all time go-to recipe.  It doesn't spread when baked, so your cookies retain their shape.


No Fail Sugar Cookies – NFSC

Ingredients

  • 6 cups flour
    3 tsp. baking powder
    2 cups unsalted butter
    2 cups sugar (white granulated)
    2 eggs
    2 tsp. vanilla extract or desired flavoring (I like almond myself)
    1 tsp. salt

Instructions

    Cream butter and sugar until light and fluffy. Add eggs and vanilla. Mix well. Mix dry ingredients and add a little at a time to butter mixture. Mix until flour is completely incorporated and the dough comes together.
  1. Chill for 1 to 2 hours (or see Hint below)
  2. Roll to desired thickness and cut into desired shapes. Bake on ungreased baking sheet at 350
  3. degrees for 8 to 10 minutes or until just beginning to turn brown around the edges. This recipe
  4. can make up to 5-dozen 3” cookies.
    HINT: Rolling Out Dough Without the Mess — Rather than wait for your cookie dough to
    chill, take the freshly made dough and place a glob between two sheets of parchment paper.
    Roll it out to the desired thickness then place the dough and paper on a cookie sheet and pop
    it into the refrigerator. Continue rolling out your dough between sheets of paper until you have
    used it all. By the time you are finished, the first batch will be completely chilled and ready to
    cut. Reroll leftover dough and repeat the process! An added bonus is that you are not adding
    any additional flour to your cookies.

    I got my royal icing from Bake at 350.  Actually, I get a TON of my recipes there.  She rocks :)  She even has picture directions, so you really have NO EXCUSE not to make these cookies!

Tuesday, December 28, 2010

Martha Stewart Valentines Day Goodness at Michaels!

I'm taking a break from my post-Christmas posts to share with you the new Martha Stewart Valentines Day display at my Michaels.  There are TOO many things I want, so I just had to share!
She has some really great die cuts and glitter this season.  My personal faves:
  • The glitter glue pens.  Don't get me wrong, I love my Stickles, but if there was anyone I would give them up for, it would be Martha!  I will have to try these out!
  • Valentines Day Stamp Set.  Cute sentiments and three great colors!
  • Die cut butterfiles.  An ENTIRE page of pink, glittery die cut butterflies?  I'm in love!  :)

Now to the good stuff:  THE PUNCHES.  She has a really cute Valentines Day paper pack and mat pack, but let's be serious, I mostly care about the punches.  She has some GREAT new ones this season (I'm not sure what the Fiskars punch is doing there, but oh well).  I purchased three punches, and there is still one more I want.  My faves:

  • Filagree Heart Large Punch
I'm OBSESSED with this punch.  I love the way it looks and can be used for more then just Valentines Day.  I don't think I could get something that intricate in that size to come out well with my Cricut.
  • Heart Lock and Key Double Punch


Don't quote me, but I'm fairly certain she has released this punch before.  I'm almost positive my friend has one, but I don't, so I had to get it!
  • Cherish Heart Border Punch
I love the scalloped border!  I think this will look so cute on so many different cards.


There is also a really cute stamp and punch set and two heart Punch All Over the Page punches (which I also plan on getting).


Make sure you check out your Michaels and see if they have rolled out their new Martha stuff yet!  Also, all of her Christmas stuff is on clearance right now, so if your M's has any left (mine only had two things left), make sure to grab them!

Handmade for the Holidays: More Word Books

Hey everyone!

I hope everyone had an amazing Christmas weekend.  Was Santa good to you this year?  He was extremely generous with me!  On top of some wonderful jewelry and clothes, I got the Stand and Salute cartridge, an i-Top plus accessories (Can't WAIT to play with that one) and....my Aqua Expression!  I already knew I was getting that (since I waited in line for it on Black Friday LOL), but it was great to finally be able to open that box!  I was also finally able to play with the two cartridges that came with it, Playtime and Classic Font.  Great carts!


I know Christmas is over, but I have a TON of projects I completed last week that I want to share with you!

I made two more word books for Christmas this year for family members.  I had full intentions of making FOUR, but I ran out of chipboard PLUS they are incredibly time consuming (and frustrating when your Gypsy won't do what you want it to do!), so two was all I could manage in one sitting.


I wish I had pictures to share, but I actually finished the books on THE DAY they had to be given to family so I didn't have time to snap anything!

Thursday, December 23, 2010

Jolly Snowman Ornaments

Hey everyone!  This week for the SweetSassyDiva Design Team our task was to make a last minute stocking stuffer.  I needed a last minute gift for some family members and thought these snowmen ornaments would be the perfect thing.  I originally saw this idea on Momos blog, and she has a video too!


Recipe:
*Large Glass Ornaments
*Pledge Floor Wax with Future Shine
*Martha Stewart Crystal Fine Glitter
*Martha Stewart Obsidian Pearls
*Red and White Pipe Cleaners
*Red Pom Poms
*Orange Glitter Paper
*Glue Gun

I have to say, I love the Pledge with Future Shine trick.  It coats the inside of the ornaments perfectly.  I did another set of ornaments using this technique, hopefully I can share them with you later this week.  I originally tried this with Martha's Coarse Glitter and it did NOT cover the inside of the ball well.  I switched to the Fine Glitter and it worked great :)


I also have to add that I did not own a glue gun before this project.

I KNOW.  Crazy, right?

I just never had need for one.  I bought the Martha Stewart 2 Temp Glue Gun, for two reasons.
1.) I really wanted to try the black hot glue next Halloween
2.) It's Martha Stewart, and everyone knows I own ALL of her stuff ;)

The gun worked great and now I have a glue gun for future projects :)


Have a great day everyone!  I hope you are all ready for Christmas :)

Wednesday, December 22, 2010

Craft Junkie Too Design Team: Glass Etching with Alcohol Inks

Hey everyone!  This week for the CJToo Design Team, our task was to create a Christmas project of our choice.  I've been Christmas decorating like crazy for the past few weeks, and I really wanted to make some pretty glass vases for the mantle.  I wanted to try glass etching for the first time, and I also wanted to play with my new Alcohol Inks for the first time, so I combined them both!

Recipe:
  • Glass Vases (I got mine from Dollar Tree)
  • Glass Etching Cream
  • Cricut Winter Lace Seasonal Cartridge
  • White Contact Paper (or vinyl)
  • Transfer Tap
  • Foam Brush
  • Ranger Alcohol Inks in the following colors:
    • Aqua
    • Sailboat Blue
    • Stonewashed
    • Silver Metallic Mixative
  • Ink Applicator


These were a little time consuming, but totally worth it.  I have a video walking you through each step, but basically you need to cut a stencil with your Cricut.  I used contact paper because vinyl is EXPENSIVE and I didn't feel like buying some just for a stencil.  I used the Winter Lace cartridge for my snowflake, but any ol' flake will do.  Just make sure that it isn't too detailed or fragile.

Lay the stencils on your glass and then apply your cream.  Has anyone else freaked out while looking at the price of glass etching cream?  HOLY COW!  Luckily I bought mine when I had a 50% coupon, but STILL.  That tiny bottle was EXPENSIVE!  The nice thing is that it doesn't take a lot to cover the stencil, and you can scrape it back in the bottle before washing, which is good, because at that price that bottle had better last me FOREVER!

After the etching it done, you put the INSIDE of the stencil (the part you usually throw away) on top of your etched image, making sure everything you want to see is covered, because the alcohol ink covers up EVERYTHING.  Including mistakes, which my first vase had a TON of.  I put on way too much etching cream on my first try and it ran EVERYWHERE, but luckily after inking you couldn't even see it.  Then, the fun part, the alcohol ink!

I want this stuff in every color.  It blends great and there really is no wrong way to apply it.  Don't like it?  Go back over it!  It's so great.
They turned out so pretty and unique looking.hard to believe they started as $1 vases!

Here's the video walking you through it:


Have a great day everyone!

Saturday, December 18, 2010

Happy Howlidays!

I needed to make a card to go along with a package I was sending to my friend Monica in Texas.  She's the owner of the fabulous Monica Wants It and Damask Diva Designs on Etsy.  Monica has a fabulous dog named Pee Wee and I wanted to make a holiday card with him on the front.

I got the dog from Four Legged Friends.  Pee Wee is NOT a Chihuahua, but he was the closest I could find.  Have I mentioned how much I LOVE this cart??  There are two dogs on there that look JUST like my two dogs and I can't wait to use them.  Even though Pee Wee is a boy, he is still stylish so I blinged up his collar with my iRock and used silver Stickles on the heart he's holding.

The Santa Hat is from Jolly Holidays.  It actually comes with two different stripe layers, but I hid those in my Gypsy so I could just get the basic Santa Hat shape.  I used clear Stickles on the white parts of the hat to give it a little sparkle.

The stack of presents is from the Winter Frolic cartridge.  Have a mentioned what a PAIN they were to piece together?  I had to stare at that handbook for AGES to figure out which ones to cut which colors, and THEN how to layer them.  They turned out super cute though!

I cut the card at 5.5" using George and Basic Shapes.  I welded two together to form the base of the card and then cut two mats for the front.  Both are from the DCWV Christmas Combo Stack.

I could NOT find a sentiment to use for this card, so I made my own on my computer.  I can't believe no one has a "Happy Howl-idays" sentiment stamp!  I would definitely buy that one!  I used my brand new Nestabilities in my Cuttlebug to make the scalloped mats for the sentiment.


Hope everyone is having a fabulous weekend!  I'll be doing a LOT of crafting today and next week to get all of my Christmas presents done, so expect a lot of projects! :)

Tuesday, December 14, 2010

Cute Gift Packaging with Wrap It Up

Wrap It Up is one of the few cartridges that I saw and thought "Nah, I'll pass".  I wasn't too crazy about the images and thought I could live without it.

That is, until I saw the boxes.


Oh, those boxes.

I own Tags, Bags, Boxes and More already, but the boxes and corresponding tags on Wrap It Up are so versatile and SO STINKING CUTE.  So, when the opportunity to snag it on eBay for $19 came up, I jumped.
Last month my mom and I went to a craft show and she saw a bracelet she really loved.  So, while she was looking at another booth I ran back and got it.  I wanted a cute package for it, and thought the Snowflake Box would work perfectly.  I just did Fit To Page ( I KNOW, no Gypsy!!) on some gold DCWV Christmas Combo paper and let my Cricut do her thing.  Then I folded at all the score lines and used my iRock to hotfix some blue bling onto the snowflakes.

I cut the tag at 3" using Core'dinations paper for both layers.  I tied the tag to the box with a little braiding cord and now I have an adorable little box under our tree :)


So, if you wrote off Wrap It Up when it was released last month, take another look.  You just might find something adorable on that cartridge!

Sunday, December 12, 2010

SweetSassyDiva Design Team: Perpetual Desktop Calendar

Hey everyone!  This week on the SweetSassyDiva Design Team our challenge was to make something using our Cinch, BIA or Your Story Photo.  I own a Cinch and LOVE it so I wanted to create something out of the ordinary.  A few months ago I saw a picture of a perpetual desktop calendar someone had made using a Bind-It-All, but with no instructions.  So, I decided to make up my own instructions and give it a go!
Recipe:
  • 4 pieces of lightweight chipboard
  • 5 pieces of coordinating cardstock
  • Cinch Binding Machine
  • Black 3/4" o-wires
  • Recollections "Flourish Month" Stamp Set
  • Inkadinkadoo "Months and Days" Stamp Set
  • Inkadinkadoo "Sketchy Flourishes" Stamp Set
  • Versamark Pad
  • Clear Embossing Powder

    To create the base, I cut a piece of chipboard at 8x12".  I scored it at 4 1/2" and 7 1/2" and covered the inside AND outside with black and white paper from the Black Currant Stack from DCWV.  I then took my Cinch and punched holes on both of the 8" side using the machine instructions.

    To create the small pieces, I cut 9 strips of 4 x8" chipboard and punched them on one of their 8" sides, pulling pegs 4, 8 and 12.  I then cut them into 2 x 4" strips.  I did the same with the paper and adhered the cut strips to the cardstock strips.
    I organized the strips in to corresponding piles and stamped them.  I bound the whole thing with my Cinch and VOILA!  A calendar I can use year after year.

    These would make great gifts for someone in your office or family, and they are so easy to make!  Here's a video walking you through it:


    Have a great week everyone!

    Thursday, December 9, 2010

    How do you like the new look?

    My blog got a super cute makeover! Madeline over at The Shabby Vanity did such a great job with my new look, it turned out exactly like I wanted! What do you think?

    If your blog is in need of a makeover, hope on over to the Shabby Vanity and we what she can do for you. I have her button on the left hand side of my blog.

    Wednesday, December 8, 2010

    Craft Junkie Too Design Team Day: Holiday Organization

    This week for Craft Junkie Too, our task was to show something that we use to get organized for the holidays.

    I'm not going to lie.  This was a challenge for me, mostly because organization is something I'm still working on in my every day life, not to mention the holidays.

    I saw this cute little shopping organizer from Laura at Following the Paper Trail and knew this was something I could use to my advantage to stay organized this holiday season.  I wanted to make mine a notebook as well, so I took her idea and ran with it.

    The cover is two pieces of 5x7 chipboard with a 3/4 x 7 strip in between.  I glued them down to a 12 x 8 inch piece of cardstock from the DCWV Christmas Combo Stack.  After I snipped the corners, I wrapped the cardstock around the chipboard and then added an inner piece that was slightly smaller.

    The coupon expanding file is also taking from Laura's original organizer.  She simply took 4 x 8 pieces of cardstock and scored them at 3/4" on each side.  I took Terrifically Tacky Tape and taped the folded edges of one to the back of another until they were all adhered together.  After gluing on a front cover, you make the "binding" by taking a 2 1/2 x 6 1/2 strip, punching a border, and gluing it to the bottom.  Voila!  Expanding file.

    The file tabs were made with the From My Kitchen cartridge.  I used my Gypsy to size them so they would be slightly bigger then the 4x6 paper I wanted to put in between.  I ran each file through my Snowflakes Cuttlebug folder.  I used my Cinch to bind the three sections of my "notebook" together, and then glued the back cover to the actual back cover of the book to keep it inside.

    The front cover is very simple, as I knew this would be in my purse and I didn't want things falling off.
    This is the Martha Stewart Vintage Dove Punch.  I have walked past that punch countless times in the last few months, and every time I had an internal argument with myself about whether I should buy it or not.  I finally bit the bullet and grabbed it and I'm SO glad I did.  I ran them both through my Xyron, added Martha Stewart Garnet glitter, and then covered them both with Glossy Accents after I realized that the glitter would go ALL OVER the inside of my purse if I didn't :)

    Here's a video walking you through it:


    Have a fabulous day everyone!  Don't forget to check and see if you won the Martha Stewart punch from the Post it Blog Hop this past weekend!

    Tuesday, December 7, 2010

    Winner of the Post-It Blog Hop Candy

    Hey everyone!  Sorry I didn't post this last night, but I have the winner for the Martha Stewart Poinsettia and Vine Edge Punch.

    I used Random.org to determine the winner and:
    Debbie said...
    December 4, 2010 9:52 PM
    Ooooh, that recipe box would be perfect to sit on my counter holding our favorite recipes. I love what you did and how you used the papers. Thanks for a chance to win that cool MS punch. I need to make that box, what a great gift for an upcoming cookie/card swap next week! Thanks!! Congratulations Debbie!  Please email me HERE or click the cupcake on the right hand side of my blog to claim your prize :) Thanks so much to everyone who participated in the hop!  I had a blast and I hope you did too! :)

    Post-It Craft Paper Christmas Card


    Hey everyone!  This week for the SweetSassyDiva Design Team, we needed to use our AWESOME new Post-It Craft paper to make a Christmas card.  I decided to make the mitten from Simply Charmed entirely out of the paper and put it through the ringer.  Let me tell you how much I LOVE this paper.  It cuts beautifully in the Cricut, embosses beautifully in the Cuttlebug, and is GREAT for flocking and glitter.  For his cuff, I kepIt the paper on the backing sheet, ran it through my Xyron and added Martha Stewart white flocking.  I used the Swiss Dots folder on the green and added MS pink glitter for his cheeks. 


    The adorable patterned paper is from DCWVs Christmas Combo stack.  The green mat behind it is also Post it paper, which is AWESOME because I didn't have to break out my ATG and use my precious tape to adhere the big square!!

    I used Pink By Design's "Christmas Wishes" stamp set for the cute sentiment, and then I topped it all off by popping the mitten up on an Action Wobble!  He looks SO CUTE wobbling back and forth on the card.  Here's a video on how to use the Action Wobbles:


    A super adorable card and super QUICK thanks to the awesome Post It Craft Paper!

    Sunday, December 5, 2010

    My Black Friday Buys!

    If you're looking for the Post-It Paper Blog hop and punch giveaway, click here!


    Hey everyone!  I've been SO BUSY for the past week that I totally forgot to post what I got on Black Friday!


    Did you get any Black Friday steals? I'd love to hear them!

    Saturday, December 4, 2010

    SweetSassyDiva Post-It Paper Blog Hop!

     Hello everyone!  Welcome to the SweetSassyDiva Post It Blog Hop.  We all can't wait to share our awesome Post-It Craft Paper projects with you.  If you've never heard of Post-it Craft paper, the explination is simple.  It's craft paper with Post-It adhesive on the back.  It sticks wonderfully, but it repositionable if you make a mistake.  It also works great in your Cuttlebug!


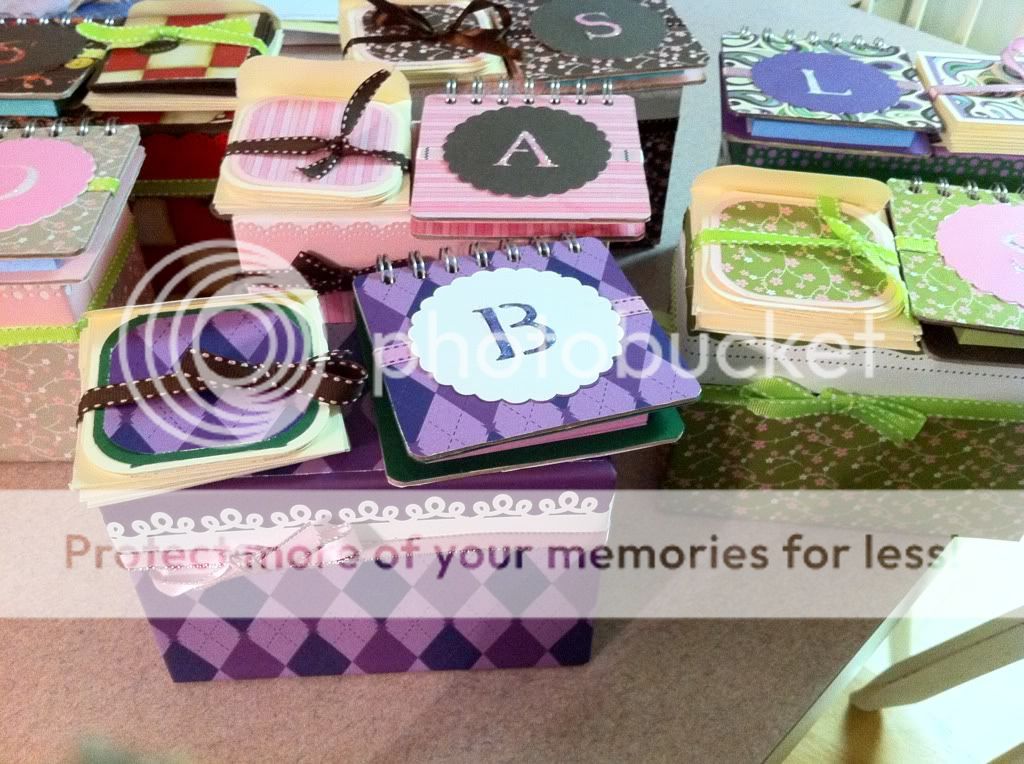
    I used the Post-It Craft paper to alter a recipe box to store my photos in for scrapbooking.  I got the instructions for this box from Momo, and let me tell you, the Post it paper not only coordinated beautifully, it made assembling the box a SNAP!


    I had made a box similar to this for another project, and it took a LOT of tape.  And to me, my ATG tape is precious.  It's not cheap and I hate to waste it.  This is where the Post It Craft paper was ESSENTIAL.  No tape, no mess, no mistakes.  All I had to do was peel off the backing and stick it where I wanted it to go on my box.  AMAZING, and such a time saver!

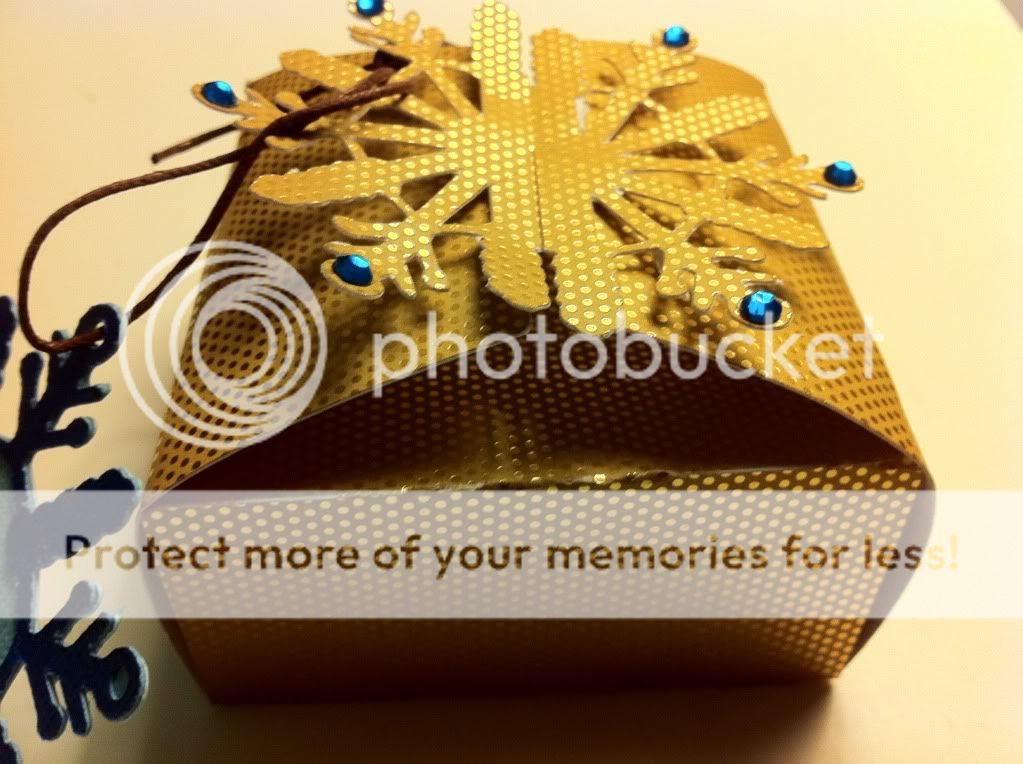
    See the punched white border?   Yep, thats Post it Craft paper too!  It punches just as well as it cuts in the Cricut, PLUS the whole border sticks, so no using my Zig pen to get those tiny parts!


    If you would like detailed instructions on how to make the boxes, check out Momos YouTube Channel for her video on how to make them.


    ...are you ready for some BLOG CANDY??

    How about a Martha Stewart Edge Punch (donated by me)?
    This Ponsettia and Vine punch is from her new Christmas Collection and makes a gorgeous die cut border!  LOVE it!

    In order to be eligible to win the punch, you:
    1.) Need to be a follower of my blog
    2.) Need to leave a comment telling me what you would use my Post it Craft box for!

    As an added bonus, all the comments from ALL the blogs on the hop will be entered to win a Post It Craft Prize Pack!

    I will choose a winner of the punch on Monday, 12/6.


    Thanks so much for hopping along with us!  Here's a list of the awesome blogs playing along today:

    SWEETSASSYDIVA DESIGNERS!

    If you arrived here first, be sure to head on over to SweetSassyDiva's blog http://sweetsassydiva-gspot.blogspot.com/ to see all the wonderful projects that everyone made! 
    Special thank you to Post-it for donating the wonderful blog candy!