Showing posts with label Design Team. Show all posts

Thursday, April 14, 2011

I'm BACK! (with a card too!)

Hi everyone!

I just want to apologize for being gone for so long without an explanation.  To make an INCREDIBLY long story short, my life got pretty crazy back in February and is just now getting back to some sense of "normal".  I'm fine, but there was a time where I just did NOT have the time (or energy) to craft or blog.  My poor Cricut was terribly neglected.  I also felt like I was losing a lot of my "crafty mojo", and didn't really have any good ideas.  I was doing a lot of crafting for design teams, challenges, etc but none really for ME.  Last week I finally booted up my Cricut again and everything came rushing back, so of course I had to bring my blog back to life!  I PROMISE to keep blogging as much as I can, hopefully 2-3 projects a week for awhile.  Once I'm able to move and put my craft room back together (another long story) it will be much more then that! :)

Also, I FINALLY HAVE A NEW DIGITAL CAMERA!  No more shots with my iPhone!  That, and I discovered my boyfriend has a super AWESOME professional light box so now I can take MUCH better pictures.

The card I wanted to show you today was one I made MONTHS ago for a Design Team that I never got around to posting, but I absolutely love it so I wanted to make sure I posted it.

We had to create a card based on a movie.  One of my favorite movies is Moulin Rouge, and I love the quote "The greatest thing you'll ever learn is just to love, and be loved in return".  I wanted to create a very vintage looking card with red as the main color that focused on this quote.  This is what I came up with:


The patterned paper is from the DCWV Black Currant stack.  Iinked everything with Vintage Photo Distress Ink to give it that aged look.

The quote is computer generated, and I punched it out of cream colored cardstock using an EK Success punch.  I inked the edges, popped it up on Pop Dots, and added two gems using my i-Rock.

In the movie, they call Satine the "Sparkling Diamond", so I knew I wanted a diamond somewhere on my card.  I found this heart shaped "diamond" on the Hannah Montana cartridge and thought it would work perfectly.  I both layers from red Core'Dinations cardstock, then ran the first layer through my Xyron and added red Martha Stewart glitter.  The red flowers are also from my stash with gemstone brads in the center.
The word "Love" is from the Martha Stewart Elegant Cake Art cartridge.  I used my i-Rock to add the "..." in bling after the word love.

Here is the rest of the quote on the inside of the card.  I punched this out using the same EK Success punch, then glued it to a piece of red cardstock and cut around to create a shadow.

I LOVE how this card turned out.  It looks vintage and lush, which reminds me of the Moulin Rouge.


I'm so happy to be back!  I want to thank all of my subscribers that emailed me over the last few months making sure I was OK.  I'm sorry if I didn't get back to all of you, but I really appreciated you thinking about me!  I promise I will have more cards and projects to come very soon!  :)

Thursday, January 27, 2011

SSD Design Team: "Love" Toilet Paper Roll Mini Album

Hey everyone!  This week our project was to make something for Valentines Day BESIDES a card or layout using our Cricut.  I made an adorable Valentines Day toilet paper roll mini album using both my Gypsy and my beautiful new blue Expression, plus my favorite new Martha Stewart punches.


Recipe:

*Toilet Paper Rolls (I used 4)
*Patterned Paper
*Cuttlebug or Big Shot (for flattening rolls)
*Martha Stewart Elegant Cake Art Cartridge
*Cricut Classic Font Cartridge
*Tags, Bags Boxes and More Cartridge
*Scalloped Flower Gypsy File 
*Cinch or Bind It All
*Martha Stewart String Lace and Cherish Hearts Border Punches
*Martha Stewart Heart Lock and Key Punch
*Martha Stewart Flourish Heart Punch
*Pink By Design "All Girl" and "Scripted Year" stamp sets

This would be a cute little album to tuck those Valentines Day mementos in.  I love making these little albums!  I want one for every season of the year :)


Here's a video walking you through each page:


I wish I could claim ownership of the gorgeous flower file, but I got it from Jen from her awesome blog.  It's just like the Sizzix 3D flower die, but you can cut it with your Cricut at whatever size you want!

Thursday, January 20, 2011

SSD Design Team: Valentines Day Box

Hey everyone!  This week at SSD our challenge was to create something for a Valentines Day Party.  I love to make a little something for my friends every year around Valentines, and this year I've decided to do chocolate covered Oreos (expect a blog post on that later!).  I wanted to make a cute box and tag to package the cookies in, and the boxes on Wrap It Up are just too cute not to use.  I used the blank box on the cartridge and cut it out of cardstock from DCWVs "Nana's Nursery: Baby Girl" stack.  Can you believe I don't have a stack just for Valentines Day?  I'll have to rectify that soon ;)


To spruce up the box, I used my new Martha Stewart Ruffled Heart Punch All Over the Page punch.  It punches a PERFECT window for these boxes and it was so easy to use!  I'm in love with these punches, I'm sure eventually I'll have them all :)

The tag is also from Wrap It Up, and I used clear Stickles on the flower.  The "To" and "From" stamps are from Pink By Designs Christmas Wishes Stamp Set.

Hope you enjoy!  I know my friends will love these.  Stay tuned tomorrow, I'm going to announce the winner from this past weekends blog hop!  Sorry it took so long, this week has gotten away from me for sure!

Friday, January 14, 2011

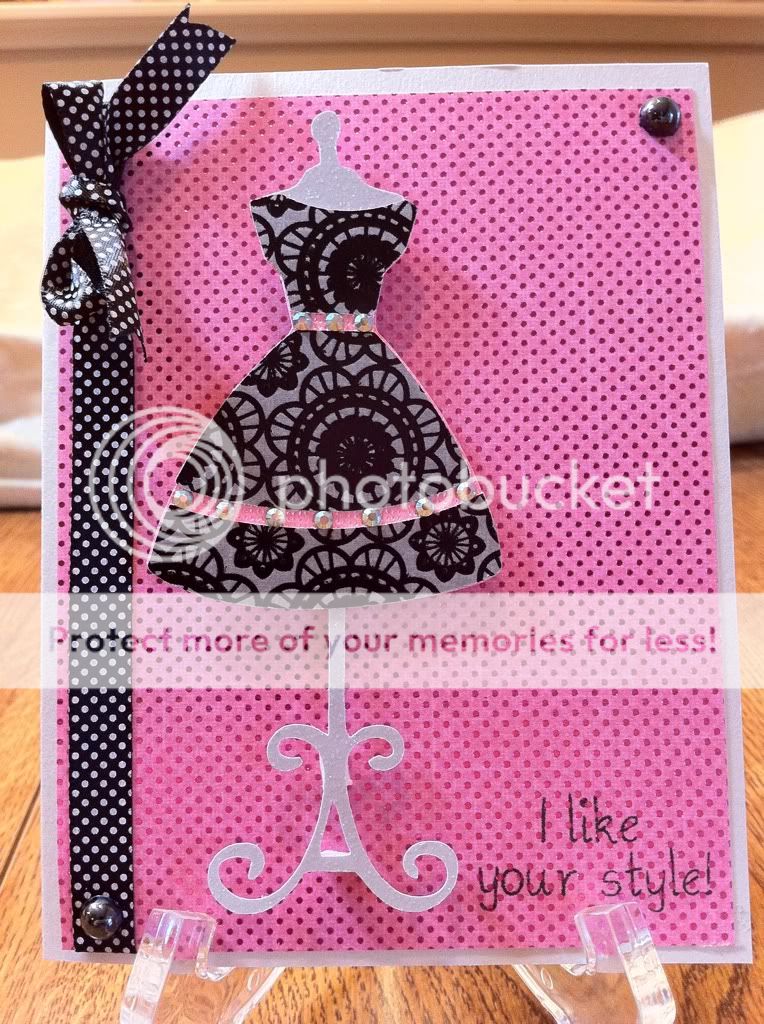
SSD Design Team: "I Like Your Style" with Nifty Fifties

This week over at SweetSassyDiva our challenge was to create something using one of our new cartridges. I snagged Nifty Fifties during PaperCrafting Pros $13 cartridge sale, but I was a little apprehensive about using it. I was born in 1985, what in the heck was I going to do with all of these fifties images? Well, fear not my friends! Nifty Fifties is a truly versatile cartridge and you can make SO MANY wonderful things with it! Wanna see what I did?


Recipe:
  • Nifty Fifties Cartridge
  • DCWV Black Currant stack
  • i-Rock and gems
  • Martha Stewart black pearls
  • My Pink Stamper "Pinkalicious Puns" stamp set


One of the first images I was drawn to on the cartridge was the dress form and the cute little sock hop dress.  I cut the dress form from glitter paper and the actual dress from the Black Currant stack.  The dress comes with a buckle but it was too small to really work with, so I blinged up the dress with gems instead.

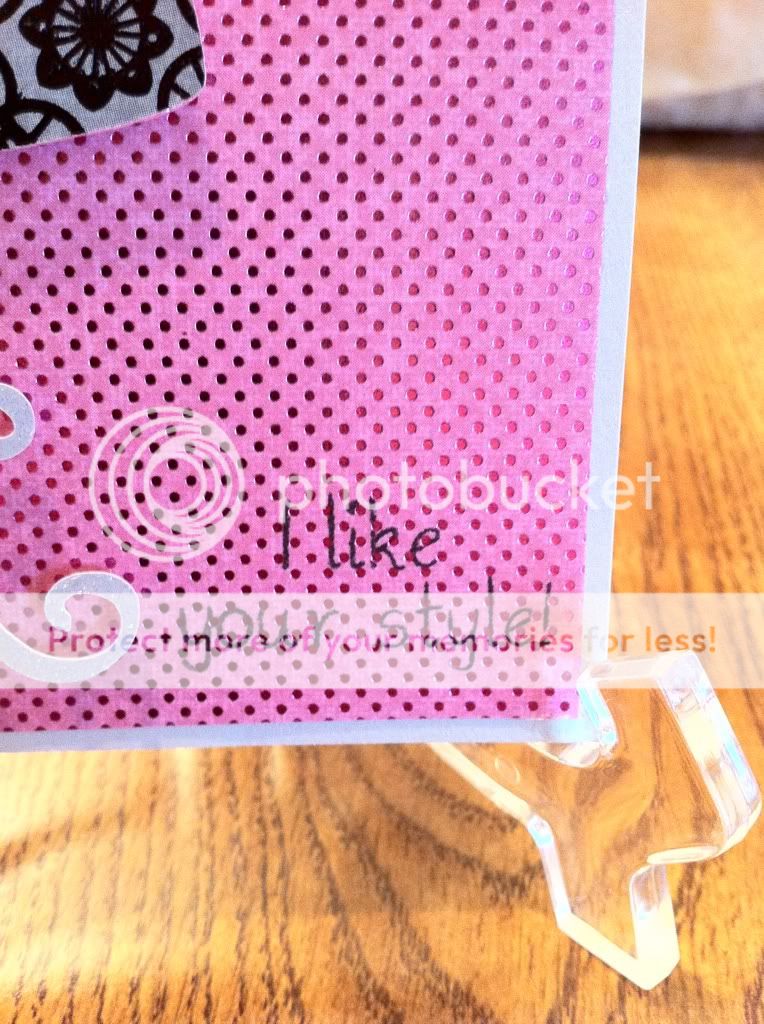
The sentiment is from the My Pink Stamper Pinkalicious Puns set.  I KNOW, I KNOW.  I didn't use a Pink By Design Stamp!  Are you shocked?  Trust me, I wanted to, but I don't own the Shopaholic stamp set...yet. Sarah, if you're listening, my birthday is next month ;)

All kidding aside, this is a great girly stamp set with lots of fashion sayings, and "I Like Your Style" went perfectly with the dress.

SO, there you have it!  If you ever have the opportunity to get Nifty Fifties (and it's going for really cheap these days) you should!  You'll be surprised what you can create with it :)

Saturday, January 8, 2011

SSD Design Team: I-Top Snowman Card

Hey everyone!  This week at SSD out challenge was to recycle something into a project, or use something new we got for Christmas.  I combined them both into this card.

Even though Christmas is over, it is still definitely winter in my neck of the woods, so I decided to make a winter card.  I used my new Imaginisce I-Top that I got for Christmas to make a snowman out of brads.  Isn't he cute?


The i-Top was SO EASY to use and makes perfect brads every time.  Wait until you see my next project where I used ribbon and the i-Top, they're FLAWLESS :)

I used Recollections craft cardstock for the base and patterned paper from DCWVs Winter Combo stack.  The twine is recycled from a package I got for Christmas.  The sentiment is from Pink By Designs "Winter Fun" stamp set, which I punched out using an EK Success Punch.  The snowflakes are a Martha Stewart punch.


Speaking of Pink By Design, did you see that Sarah released some new stamp sets this week?  She also now carries super cute twine in her shop, and she started a Stamp Of The Month Club!  I HAD to join that one, we all know how much I love my Pink By Design stamps :)

Have a great day everyone!

Thursday, December 23, 2010

Jolly Snowman Ornaments

Hey everyone!  This week for the SweetSassyDiva Design Team our task was to make a last minute stocking stuffer.  I needed a last minute gift for some family members and thought these snowmen ornaments would be the perfect thing.  I originally saw this idea on Momos blog, and she has a video too!


Recipe:
*Large Glass Ornaments
*Pledge Floor Wax with Future Shine
*Martha Stewart Crystal Fine Glitter
*Martha Stewart Obsidian Pearls
*Red and White Pipe Cleaners
*Red Pom Poms
*Orange Glitter Paper
*Glue Gun

I have to say, I love the Pledge with Future Shine trick.  It coats the inside of the ornaments perfectly.  I did another set of ornaments using this technique, hopefully I can share them with you later this week.  I originally tried this with Martha's Coarse Glitter and it did NOT cover the inside of the ball well.  I switched to the Fine Glitter and it worked great :)


I also have to add that I did not own a glue gun before this project.

I KNOW.  Crazy, right?

I just never had need for one.  I bought the Martha Stewart 2 Temp Glue Gun, for two reasons.
1.) I really wanted to try the black hot glue next Halloween
2.) It's Martha Stewart, and everyone knows I own ALL of her stuff ;)

The gun worked great and now I have a glue gun for future projects :)


Have a great day everyone!  I hope you are all ready for Christmas :)

Wednesday, December 22, 2010

Craft Junkie Too Design Team: Glass Etching with Alcohol Inks

Hey everyone!  This week for the CJToo Design Team, our task was to create a Christmas project of our choice.  I've been Christmas decorating like crazy for the past few weeks, and I really wanted to make some pretty glass vases for the mantle.  I wanted to try glass etching for the first time, and I also wanted to play with my new Alcohol Inks for the first time, so I combined them both!

Recipe:
  • Glass Vases (I got mine from Dollar Tree)
  • Glass Etching Cream
  • Cricut Winter Lace Seasonal Cartridge
  • White Contact Paper (or vinyl)
  • Transfer Tap
  • Foam Brush
  • Ranger Alcohol Inks in the following colors:
    • Aqua
    • Sailboat Blue
    • Stonewashed
    • Silver Metallic Mixative
  • Ink Applicator


These were a little time consuming, but totally worth it.  I have a video walking you through each step, but basically you need to cut a stencil with your Cricut.  I used contact paper because vinyl is EXPENSIVE and I didn't feel like buying some just for a stencil.  I used the Winter Lace cartridge for my snowflake, but any ol' flake will do.  Just make sure that it isn't too detailed or fragile.

Lay the stencils on your glass and then apply your cream.  Has anyone else freaked out while looking at the price of glass etching cream?  HOLY COW!  Luckily I bought mine when I had a 50% coupon, but STILL.  That tiny bottle was EXPENSIVE!  The nice thing is that it doesn't take a lot to cover the stencil, and you can scrape it back in the bottle before washing, which is good, because at that price that bottle had better last me FOREVER!

After the etching it done, you put the INSIDE of the stencil (the part you usually throw away) on top of your etched image, making sure everything you want to see is covered, because the alcohol ink covers up EVERYTHING.  Including mistakes, which my first vase had a TON of.  I put on way too much etching cream on my first try and it ran EVERYWHERE, but luckily after inking you couldn't even see it.  Then, the fun part, the alcohol ink!

I want this stuff in every color.  It blends great and there really is no wrong way to apply it.  Don't like it?  Go back over it!  It's so great.
They turned out so pretty and unique looking.hard to believe they started as $1 vases!

Here's the video walking you through it:


Have a great day everyone!

Sunday, December 12, 2010

SweetSassyDiva Design Team: Perpetual Desktop Calendar

Hey everyone!  This week on the SweetSassyDiva Design Team our challenge was to make something using our Cinch, BIA or Your Story Photo.  I own a Cinch and LOVE it so I wanted to create something out of the ordinary.  A few months ago I saw a picture of a perpetual desktop calendar someone had made using a Bind-It-All, but with no instructions.  So, I decided to make up my own instructions and give it a go!
Recipe:
  • 4 pieces of lightweight chipboard
  • 5 pieces of coordinating cardstock
  • Cinch Binding Machine
  • Black 3/4" o-wires
  • Recollections "Flourish Month" Stamp Set
  • Inkadinkadoo "Months and Days" Stamp Set
  • Inkadinkadoo "Sketchy Flourishes" Stamp Set
  • Versamark Pad
  • Clear Embossing Powder

    To create the base, I cut a piece of chipboard at 8x12".  I scored it at 4 1/2" and 7 1/2" and covered the inside AND outside with black and white paper from the Black Currant Stack from DCWV.  I then took my Cinch and punched holes on both of the 8" side using the machine instructions.

    To create the small pieces, I cut 9 strips of 4 x8" chipboard and punched them on one of their 8" sides, pulling pegs 4, 8 and 12.  I then cut them into 2 x 4" strips.  I did the same with the paper and adhered the cut strips to the cardstock strips.
    I organized the strips in to corresponding piles and stamped them.  I bound the whole thing with my Cinch and VOILA!  A calendar I can use year after year.

    These would make great gifts for someone in your office or family, and they are so easy to make!  Here's a video walking you through it:


    Have a great week everyone!

    Wednesday, December 8, 2010

    Craft Junkie Too Design Team Day: Holiday Organization

    This week for Craft Junkie Too, our task was to show something that we use to get organized for the holidays.

    I'm not going to lie.  This was a challenge for me, mostly because organization is something I'm still working on in my every day life, not to mention the holidays.

    I saw this cute little shopping organizer from Laura at Following the Paper Trail and knew this was something I could use to my advantage to stay organized this holiday season.  I wanted to make mine a notebook as well, so I took her idea and ran with it.

    The cover is two pieces of 5x7 chipboard with a 3/4 x 7 strip in between.  I glued them down to a 12 x 8 inch piece of cardstock from the DCWV Christmas Combo Stack.  After I snipped the corners, I wrapped the cardstock around the chipboard and then added an inner piece that was slightly smaller.

    The coupon expanding file is also taking from Laura's original organizer.  She simply took 4 x 8 pieces of cardstock and scored them at 3/4" on each side.  I took Terrifically Tacky Tape and taped the folded edges of one to the back of another until they were all adhered together.  After gluing on a front cover, you make the "binding" by taking a 2 1/2 x 6 1/2 strip, punching a border, and gluing it to the bottom.  Voila!  Expanding file.

    The file tabs were made with the From My Kitchen cartridge.  I used my Gypsy to size them so they would be slightly bigger then the 4x6 paper I wanted to put in between.  I ran each file through my Snowflakes Cuttlebug folder.  I used my Cinch to bind the three sections of my "notebook" together, and then glued the back cover to the actual back cover of the book to keep it inside.

    The front cover is very simple, as I knew this would be in my purse and I didn't want things falling off.
    This is the Martha Stewart Vintage Dove Punch.  I have walked past that punch countless times in the last few months, and every time I had an internal argument with myself about whether I should buy it or not.  I finally bit the bullet and grabbed it and I'm SO glad I did.  I ran them both through my Xyron, added Martha Stewart Garnet glitter, and then covered them both with Glossy Accents after I realized that the glitter would go ALL OVER the inside of my purse if I didn't :)

    Here's a video walking you through it:


    Have a fabulous day everyone!  Don't forget to check and see if you won the Martha Stewart punch from the Post it Blog Hop this past weekend!

    Tuesday, December 7, 2010

    Post-It Craft Paper Christmas Card


    Hey everyone!  This week for the SweetSassyDiva Design Team, we needed to use our AWESOME new Post-It Craft paper to make a Christmas card.  I decided to make the mitten from Simply Charmed entirely out of the paper and put it through the ringer.  Let me tell you how much I LOVE this paper.  It cuts beautifully in the Cricut, embosses beautifully in the Cuttlebug, and is GREAT for flocking and glitter.  For his cuff, I kepIt the paper on the backing sheet, ran it through my Xyron and added Martha Stewart white flocking.  I used the Swiss Dots folder on the green and added MS pink glitter for his cheeks. 


    The adorable patterned paper is from DCWVs Christmas Combo stack.  The green mat behind it is also Post it paper, which is AWESOME because I didn't have to break out my ATG and use my precious tape to adhere the big square!!

    I used Pink By Design's "Christmas Wishes" stamp set for the cute sentiment, and then I topped it all off by popping the mitten up on an Action Wobble!  He looks SO CUTE wobbling back and forth on the card.  Here's a video on how to use the Action Wobbles:


    A super adorable card and super QUICK thanks to the awesome Post It Craft Paper!

    Wednesday, November 17, 2010

    CJToo Design Team Wednesday: I Am Thankful For...

    Welcome to another Craft Junkie Too Design Team Wednesday!  This week, our theme was "I Am Thankful For".  Before I explain my project, I have to thank Tracy over at CJToo for coming up with this theme and letting us have free reign.

    Have you ever made a project, and the process of constructing it was totally therapeutic?  That's what this project was for me.  Before I started, I sat down and thought of everything and everyone I'm thankful for in my life, which lead me on the long journey to the completion of this project.

    As most of my close friends know, I've been having a really rough time lately.  The stress of unemployment and a constant job search that seems to lead nowhere, coupled with ongoing personal issues have made the past few months difficult for me.  I have amazing family and incredibly supportive friends (plus my awesome bloggy companions) that have made things a little better for me, but there are two very special little "people" who have kept me going, even when I didn't want to continue.

    My dogs.

    That statement might sound strange to anyone who is not a pet owner, but Bella and Dixie have been my anchor for the past few months.  They love me unconditionally, and the sight of me is always the highlight of their day, whether I've been gone 30 minutes or 3 hours.  There were times when I honestly didn't want to get out of bed, but I had to in order to give them the care they need.  I could be having the absolute worst day ever, and all they have to do is come curl up in my lap and stare up at me with those adorable eyes, and I can't help but smile.


    They are actually doing that as I type this :)

    So, I really wanted to make a project dedicated to my dogs.  I came up with the idea of doing a paper bag mini album, so I could have a book full of pictures to look at whenever I felt down.  I had never made a paper bag mini before, so I found instructions on YouTube and gave it a go.

    Here's the final result:


    I tried to list everything I used in the video, because I used a lot of different cartridges and inks.  Hopefully I remembered them all :)


     I hope you truly enjoyed this mini album, as I had a BLAST making it.  Make you you hop over to http://www.craftjunkietoo.com and see all of Design Team 2's projects today!

    Have a great Wednesday everyone!

    Monday, November 15, 2010

    SweetSassyDiva Design Team: "Joy" Banner

    Our challenge for SweetSassyDiva's Design Team project this week was to use the color green, use our Cuttlebug in some way, and to use felt.  I decided to make this "Joy" banner using chipboard coasters.  I used lovely green damask patterned paper from DCWV's "Christmas Combo" stack and inked around the edges of the coasters with Peeled Paint Distress Ink.  I really wanted to use my new digital carts on my Gypsy, so I used two in today's project, Blackletter and Christmas Solutions.  The word "Joy" is cut from the Blackletter Cartridge using the font and the shadow.  I ran the regular word through my Xyron and then used Martha Stewart Flocking in Ladybug to give the letters a "faux felt" effect.  After I flocked the letters, I ran it through my Cuttlebug using the D'Vine Swirls folder.  I love how you can emboss flocked letters!


    The snowflake is from the Christmas Solutions cartridge, and I cut the regular snowflake and the shadow as well.  I flocked the snowflake using MS Flocking in Swan. 

    I punched holes and set eyelets in all of the coasters using my Crop a Dile, and strung ribbon between the holes.  I think it turned out great and I love the traditional Christmas look :)


    This project came together in a SNAP thanks to my Gypsy girl.  I used a rounded 4 x4 square as a template to make sure I had everything sized correctly, then laid EVERYTHING out on one mat!  That's right, I got all my cuts done on one mat, in one turn on the Cricut.  Love it!

    Saturday, November 13, 2010

    SweetSassyDiva Design Team: Smiley Cards Project

    Our challenge for this weeks SweetSassyDiva Design Team was to design something using Smiley Cards.  I happen to LOVE this cartridge, so the hardest part for me was deciding what to cut.


    I finally decided on the cute little birthday cake.  I figured I could make a sweet birthday card to keep in my stash, and use my favorite new card in the process :)


    Excuse the lighting, I couldn't get it quite right for this picture     

    I cut both the cake and the actual card base from the Smiley Cards cartridge (love the extra features!)  I re-sized the base in my Gypsy to be approximately 5.5 x 5.5" and cut it from craft colored cardstock.

    I couldn't find a patterned paper that I really liked for this card, and my Cuttlebug has been feeling horribly, horribly neglected lately so I took some pink Core'dinations paper and ran it through my Cuttlebug using the Paisley folder.  I sanded the embossed image so the lighter pink color would show through.  I think this is the first time I've used the Paisley folder, and it turned out so stinking cute!

    I also cut the cake using the craft colored cardstock, and purple Core'dinations paper that I ran through my Cuttlebug with the D'Vine Swirls folder (a must have folder!) and sanded.  I used my white gel pen to stitch around the card, slapped on some brown stitched ribbon, and voila!


    The sentiment is from Pink by Designs "Take the Cake" stamp set.  There are so many wonderful birthday sentiments in this set I had a hard time choosing one!


    I'm so sorry for the lack of posts lately, my crafty friends.  I've been working hard on a project for next week's Craft Junkie Too Design Team and I haven't had much time for "just for fun" crafting.  I'll try to have some more posts this week!


    Wednesday, November 3, 2010

    CJToo Design Team Wednesday: Fall Is In The Air!

    Happy Wednesday everyone! Today is Design Team Wednesday, and here is my project. This weeks theme was "Fall is In The Air", and we were asked to create a fall project that can be hung somewhere (door, wall, window, etc). I was visiting Marys blog at Cardz TV and she had made a cute little Halloween door hanger out of a paper towel roll.  I actually had an empty paper towel roll sitting on my craft table, just waiting to be made into something, so I took Mary's awesome idea and made it my own.

    Recipe:
    *Paper Towel Roll
    *Chipboard
    *DCWV "Amber Autumn" stack
    *Recollections Spice Market Stack
    *Large Ribbon
    *Cricut "Holiday Cakes" Cartridge
    *Gypsy Wanderings Cartridge
    *"Thanksgiving" Seasonal Cartridge
    *Perfect Pearls
    *Tim Holtz Distress Ink


    I ran the paper towel roll through my Cuttlebug using the A, B, and C plates.  After several good passes, I sealed the edges with Zip Dry so it would lay completely flat.  I covered the flat roll with patterned cardstock and then punched two holes on top and one hole on bottom with my Crop-A-Dile, and then set bronze eyelets in each hole.

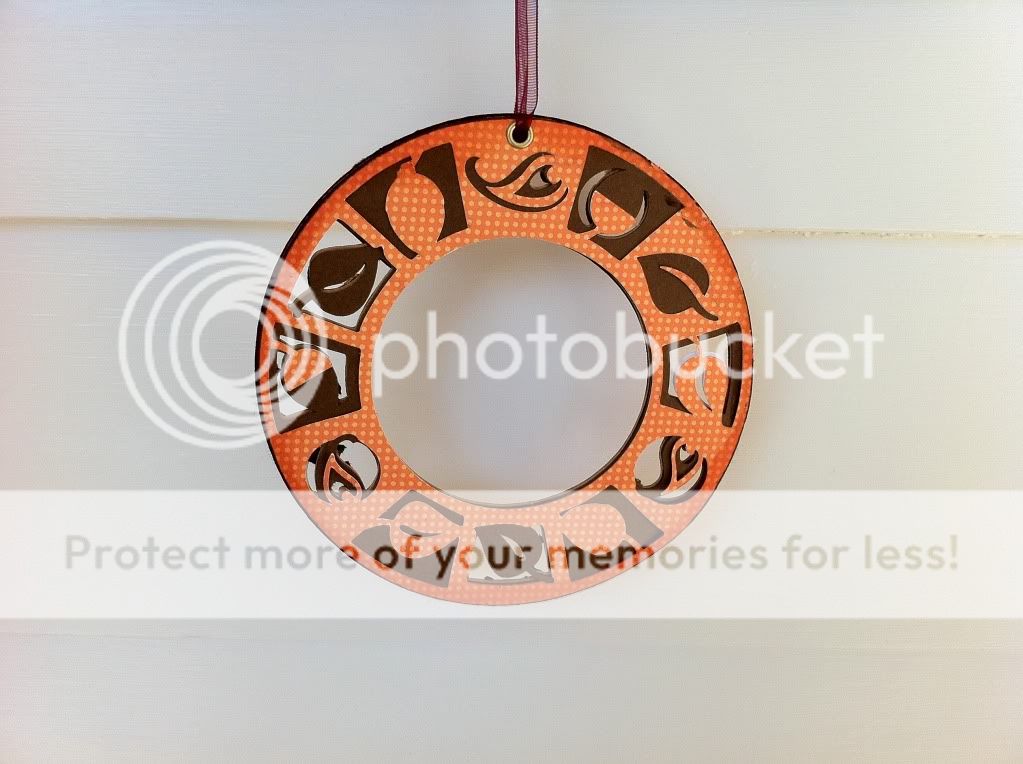
    For the spinning pendant, I found a perfect image on the Holiday Cakes cartridge.
      I cut it first out of recycled chipboard, and then covered BOTH sides with the brown and orange (I used "Flip" on my Cricut to make the back mirror the front).  That way, when it spins, both sides look the same :)  To finish off the pendant, I inked the inside and outside with Spice Marmalade Distress Ink

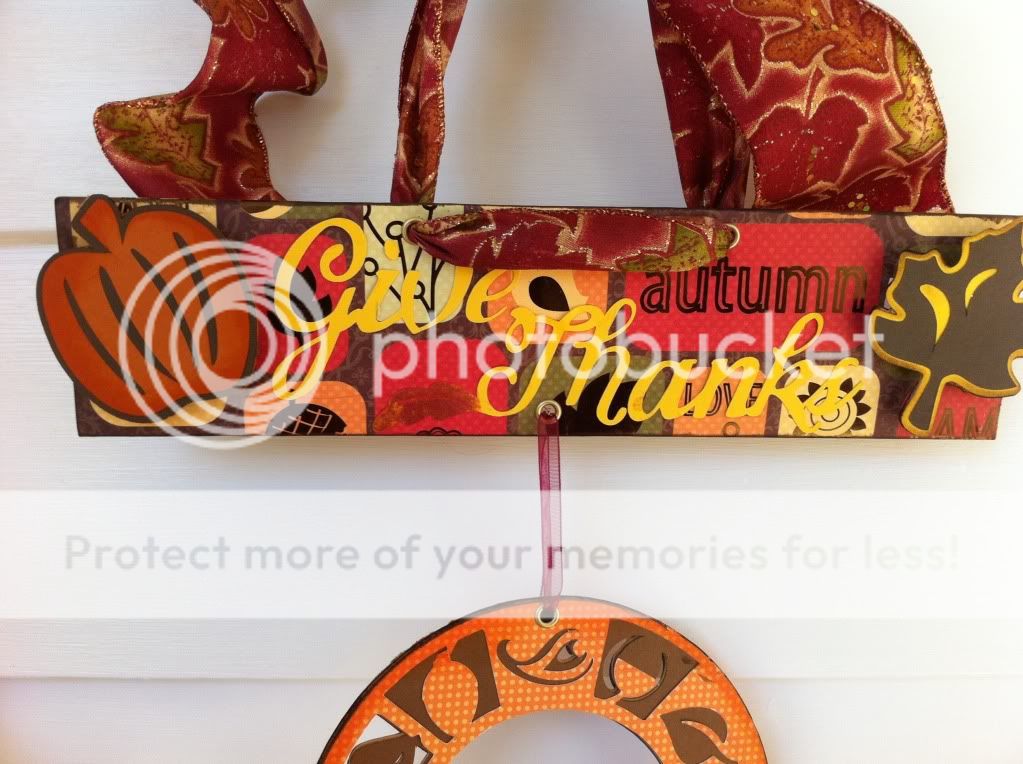
    Aren't the little pumpkin and leaf so adorable?  I cut them both from chipboard, and the Gypsy Wanderings cartridge.  I inked the edges in Spiced Marmalade and Walnut Stain Distress Ink, and then mounted them on large foam dimensionals so they really stand out from the paper.


    "Give Thanks" is cut from the Thanksgiving Seasonal Mini.  I'm so glad I got that cartridge!  There are some great elegant images and sentiments for Fall and Harvest projects.  I inked the leaf on the word "Thanks" with Perfect Medium and then brushed on some Forever Red Perfect Pearls.  It makes it super shimmery :)


    So, what do you think?  I LOVE how it turned out, and it was so easy!  It's hanging off of our mailbox on the front of our house right now and it looks very cute.

    Make sure you stop by Cardz TV to see Mary's original Halloween banner, and then hop on over to Craft Junkie Too to check out the rest of Design Team #2's projects!

    Have a fabulous Wednesday everyone!

    Saturday, October 30, 2010

    Exciting Announcement!

    I've been selected to be on the SweetSassyDiva Design Team!  I am SO excited to share my projects with Bobbi Jo and her followers.  She is such a sweetheart!  Click HERE to go to her blog and meet the rest of the team!

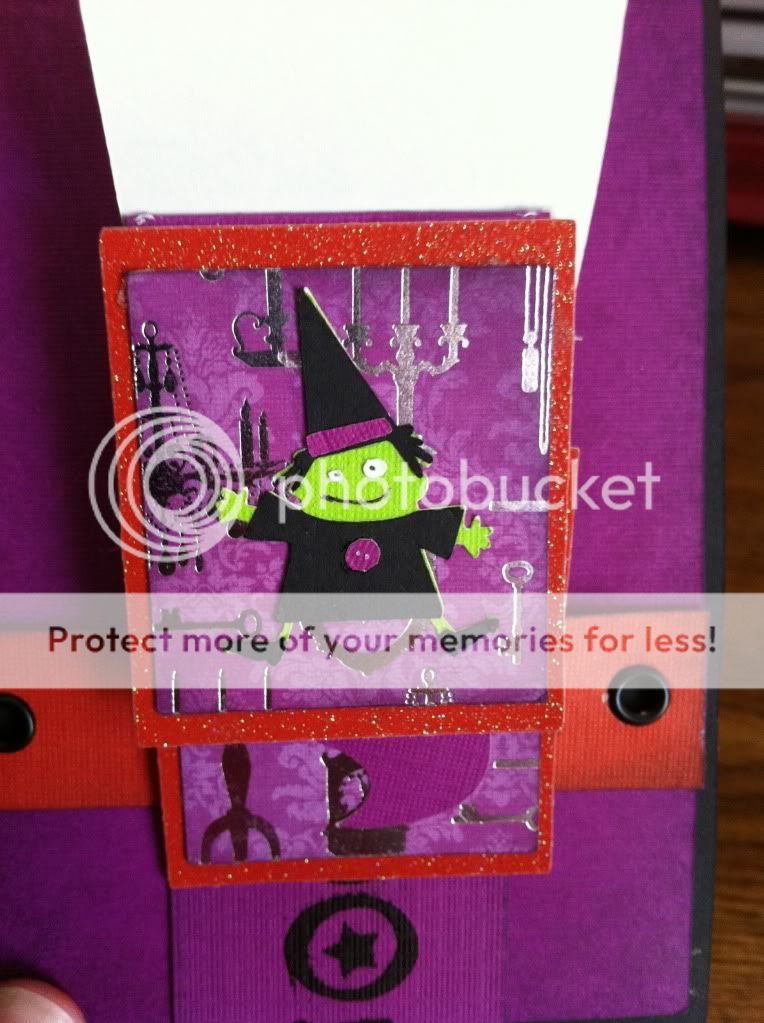
    We needed a project to go along with our first week bios, so I designed a Halloween waterfall card using my BRAND NEW Gypsy and my new Mini Monsters cartridge!

    I got the original gypsy file from Elizabeth at 217 Creations.  She used Plantin Schoolbook for her file, and I don't have that cartridge, so I re-designed the file using George and Basic Shapes.  I will be posting both her original file as well as my George file at the end of this post.

    I made a video showing exactly how I made the card!


    Recipe:

    *DCWV Midnight Spell cardstock, glitter and patterned stacks
    *Mini Monsters Cartridge
    *Happy Hauntings Cartridge
    *Crop-A-Dile and black eyelets
    *Tim Holtz Dusty Concord Distress Ink
    *Recollections Halloween Brads
    *Zig 2-Way Glue Pen (for those tiny monsters!)
    *Purple Stickles


     For the 217 Creations original Gypsy File (Plantin Schoolbook): Click HERE
     For my re-designed Gypsy File (George & Basic Shapes): (Click HERE)

    Hope you enjoyed!  If you have any questions, feel free to leave me a comment or shoot me an email!  I love hearing from you :)