Tuesday, January 1, 2013

My Sisters Baby Shower

Happy New Year my crafty friends!  I hope everyone had a great New Years Eve.  Our was pretty snowy and slushy.

I have a LOT of older projects and photos bumping around in my laptop that I really want to share with you guys.  I hope you don't mind a few posts of some not-so-recent creations!  I really wanted to make my first post of 2013 something that I did back in the spring of 2012.  My sister recently had her first child and I wanted to throw her a baby shower and flex my crafty muscles.  So I did!  I just wanted to share a few of the things I made for the shower.


These were originally going to be tags for the cake pop favors I was going to make, but between illness and a major baking fail they never came to fruition, so I added the tags as confetti on the tables.  The scallop, circle and tag are all My Creative Time dies, and the Precious Baby stamp is from her die and stamp set Teeny Tag Greetings.  I seriously can't get enough of miss Emmas stamps and dies!


The onesies for the banner came from my Every Day Pop Up Cards Cricut cartridge.  The actual pop up cards on that cartridge are kind of infuriating to put together to I rarely ever make them, but some of the images are actually useful for other projects.  The font is from A Childs Year.  I welded the letters into the onesie with my Gypsy, then punched holes in each arm and strung twine through each one.  The tiny clothespins were from Michaels.


I love making things with the glass craft blocks!  I cut different sized circles out of contact paper and placed them in a random pattern on both sides of the block.  I sprayed the entire block with frosted glass spray and then removed the contact paper for a cute polka-dot block!  The wooden cow cutouts were from Hobby Lobby, aren't they cute??


This might have been my FAVORITE part of the shower.  I wanted a fun activity for the guests to do, so I thought up a Onesie Making Station!  I thought it would be really useful for my sister to have a bunch of inexpensive onesies on hand, since I've heard newborns can be messy :).  My family was a little iffy on it when I told them abot the idea, but once we got to the shower and a few people started making them EVERYONE jumped in and had a great time.  I simply gave them puff paint and a bunch of different baby themed iron ons and they went to town!


My gift to my sister was a scrapbook (which I am MAJORLY BEHIND ON, ouch).  I provided her with 4 or 5 pages to get her started.  This is reminding me I REALLY need to make more pages for her!  Sorry sis!


I think everyone was really happy with the shower.  I only have one sibling, and my fiance is an only child so I figured this was my one chance to throw a family baby shower and I went all out!  My nephew is now 8 months old and getting cuter every day :)

Have a great rest of your week everyone!  Thanks for stopping by!


Monday, December 31, 2012

Hey Guys, Remember Me?

Oh.  My.  Gosh.


It's been awhile, eh?  I've fallen off the map for almost two years.

I have to admit, when I disappeared, I had a LOT of things going on.  Not so great things.  Life things.  Things I'd rather not discuss on my blog.  You get the picture.  I moved and my craft stuff was mostly in storage for almost TWO YEARS.  It was not fun, y'all.  Not fun.


However, after getting over a few major hurdles, I'm happy to report that a lot of AMAZING things happened to me in 2012:

*I lost over 40 pounds and two jean sizes (not to my goal yet, but still!)
*I got an amazing new job
*I got engaged to the most amazing man on the planet:


and

*We bought a beautiful house together this fall, complete with my own crafting space!


The aforementioned Most Amazing Man on the Planet has been begging me for AGES to get back into blogging, because he loves when I craft things.  He also does a little blogging himself (you can check out his photography here and his super cool NHL logo graphic renderings here) and was sad that my blog had been abandoned.  He always loves when I make things for him and other people.  And I do too.  I lost the crafting bug for awhile when my Cricut and other supplies were stored away but I'm slowly getting my mojo back.  I've made a promise to him, and to myself that I'm going to start blogging regularly.  I have no idea who even reads my blog anymore (hello, out there!) but I want to start doing this again for me.

So, now the hard part: Where in the heck do I begin?  Waaay back in the spring I hosted a baby shower for my sister (and my now 8 month old awesome nephew), where I DIYed pretty much everything.  I also crafted a TON of Christmas presents this year for friends and family.  PLUS, our wedding this spring is going to be 80% me and my craftiness.  I still love my Cricuts, but I'm drooling over the Silhouette Cameos.  I hope to post more home decor projects as well, as I now have a whole house to decorate :)

So, here we go.  One post at a time, trying to get back into the swing of things.  I'm going to try to do one post a week to start out, and ramp it up from there as inspiration strikes.

To all of my followers reading this, thanks for coming back and reading this post.  Hopefully I'll be blogging things that you will love, and will hopefully inspire you.

2013 is shaping up to be a great year :)


Friday, July 22, 2011

$19 Cartridges at Michaels!

Hi everyone!  Just an FYI that Michaels marked a handful of carts down to $19 today.  At my store I saw;

*Destinations
*Songbird
*Forever Young
*Freshly Picked
*Wall Decor and More
*Everyday Pop Up Cards


Go snag 'em while you can!!

Friday, July 15, 2011

Home Decor with my Yudu

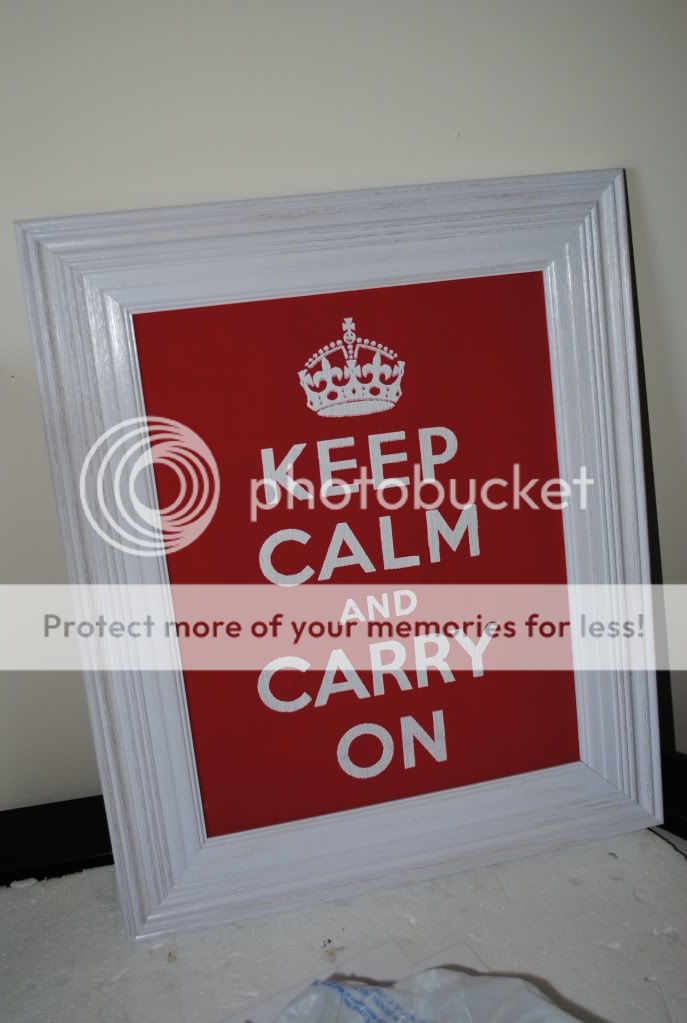
In between making a ton of t shirts, I decided to try my hand at home decor with my Yudu.  I was loving these posters I had seen on Etsy, but couldn't justify paying $20 for it (picture from CafePress):

Luckily the actual image is public domain so I had my boyfried, who is a whiz at all things image editing  take the image and make it into an 8 x 11" transfer for my Yudu.

I bought canvas from Michaels with a coupon that applied to sale items when they were already 40% off.  The acrylic paint was less then 25 cents.  I used the entire bottle to cover the canvas, since I knew I wouldn't be using it again.


I screened the canvas using white Yudu ink.  I also made a matching t-shirt (pictured below).  Just a few passes and it was ready to go!


I knew I wanted to frame my canvas print, but open back frames are SO expensive, even with a coupon!  So, I found a super cute white frame on clearance at Michaels for $9.00, and simply took the glass and backing out.  I think it fits the canvas perfectly and looks great.  And all for waaaaay less then if I had bought a poster myself.


I am so happy with how this project turned out.  I can't wait to use my Yudu for more home decor projects!  Oh, by the way, Yudus are on sale until Sunday for $99.  This is the lowest I ever see them go (I bought mine for this price a few months ago) so if you haven't gotten one yet, this is a great deal!

Speaking of Michaels, have you seen their new iPhone App?  It is so awesome.  It stores all of the store coupons right on your phone, plus has an event schedule for stores in your area.  It's free in the app store!

Wednesday, July 13, 2011

An (almost) totally non-Cricut card!

Hello everyone!  So, obviously, I've been absent.  Again.  This summer has been incredibly busy and fun, which has not left me much time to blog.  Also, I was hired by a co worker of my mothers to create a scrapbook for her sister, so that pretty much took up all of my crafting time for the past few months.  But it's done, and super cute, so expect a post on that later.  I'm going to try to ease my way back into blogging, maybe just a few posts per week, but I appreciate all of my subscribers sticking with me!


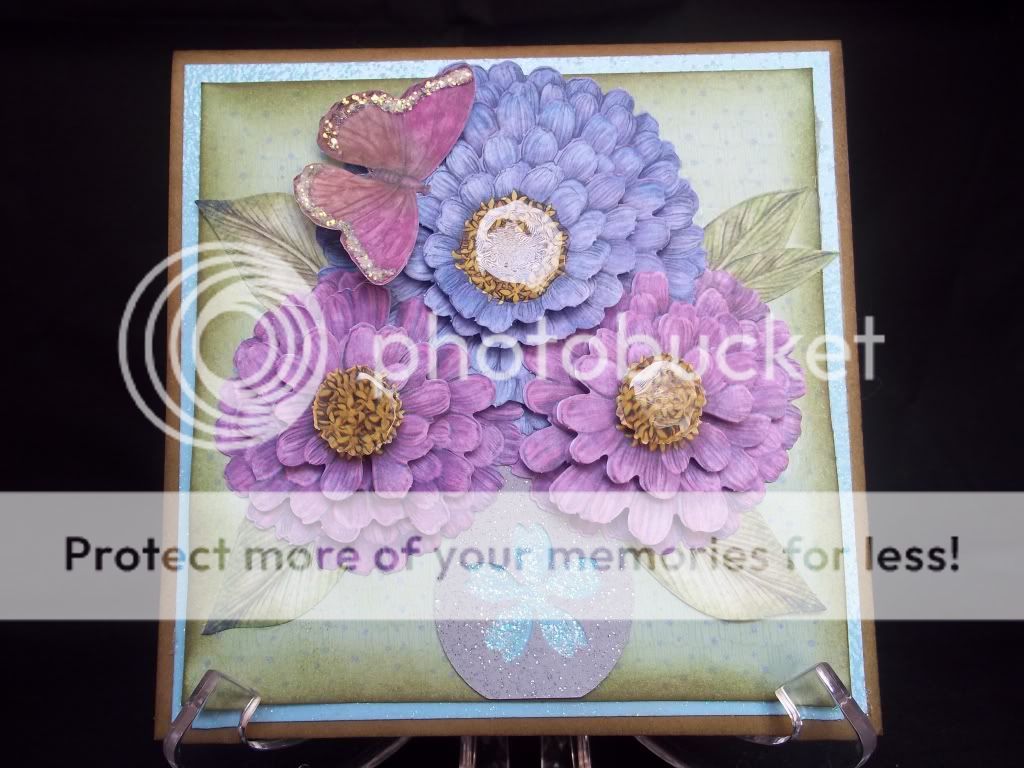
I made this card before I started the scrapbook project using a die-cut flower pad from K & Company.  I don't usually buy this type of thing, since I have my Cricut, but the flowers looked too cute to pass up.


I simply punched out each of the die cut flowers, and all of it's layers, and popped them up on pop dots to add dimension.


I added Glossy Accents to each of the flower centers.  I love the shine :)


The only Cricut cut I used was the vase from Pagoda.  I didn't have my Gypsy with me at the time, so I couldn't hide the flower in the center.  I wish I would have, but I think it still looks cute.

The butterfly is also from the K & Company pad.  I added Stickles to the outside of the wings.


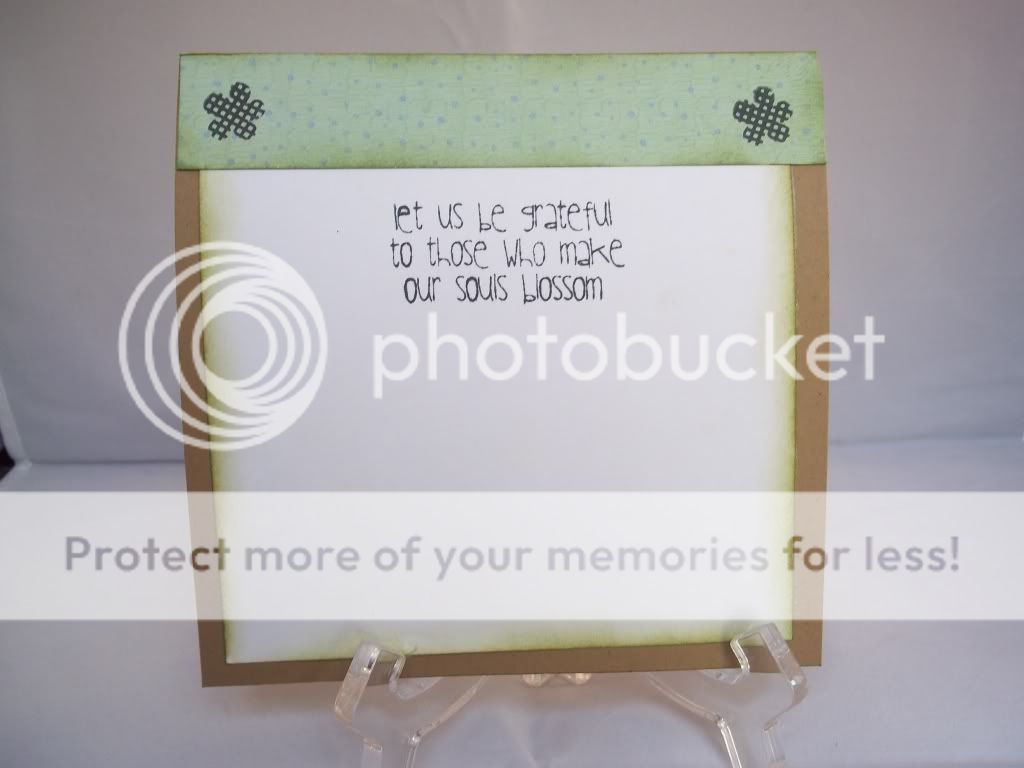
I've really gotten into decorating the inside of my cards.  I would usually just leave them blank, but I've started using coordinating paper to give it a little extra touch.  The sentiment and flower stamps are both from a Pink By Design Stamp of The Month Set.  Seriously, if you haven't checked out PBD, please do.  She has the cutest stamps!


I hope you enjoyed this card, and it's good to be back :)

Wednesday, April 27, 2011

Do you YUDU?

Now I DO!

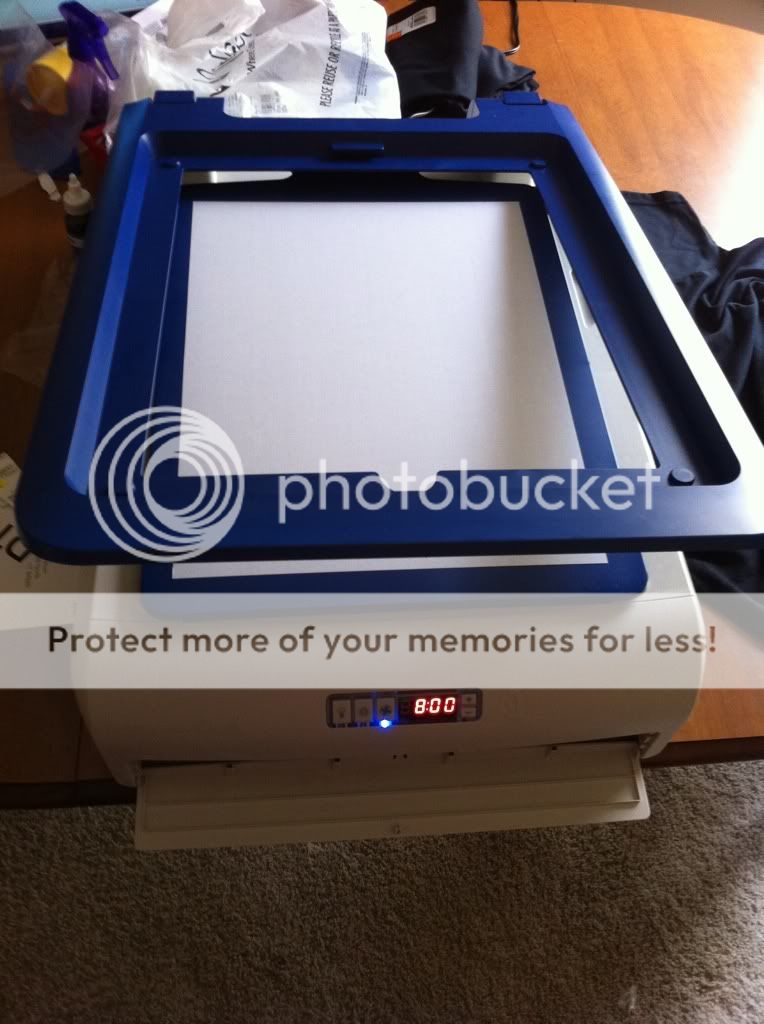
Yes, I jumped at the chance to buy a Yudu for $99 at Michaels a few weeks ago.  I had heard mixed reviews about it, but when I told my boyfriend I could make him customized t-shirts for his photography business, he went out and got it for the both of us!  Isn't he the best??  Sorry, I'm not sharing him ;)

There she is!  My beautiful baby :)  I did A LOT of research before I tried to burn my first screen.  I read some HORRIBLE reviews of the machine, and the emulsion sheets, but luckily I had very few problems when I used my Yudu for the first time.  My emulsion sheet burned pretty perfectly on the screen.  The only mess up I had is that when it came to rinsing out the burned emulsion sheets, I scrubbed a little too hard and one corner of the design washed off.  Luckily, I fixed it with tape and we were good to go.


Here's the front of my first Yudu shirt!  I used Speedball Opaque white Fabric ink, as I was worried about the Yudu ink on black.  My own regret is that I didn't pull white through the icon first, and then pull yellow over the white.  The color would have been much brighter had I done that.  But besides that, I think it turned out great!


Here's his URL screened on the back of the shirt (shameless plug, LOL).  I didn't get it entirely straight, but he loves it so I'm OK with it.  I also made him another shirt that is white with black ink.  He's also asked me to make him a sweatshirt, and I can't wait to try it!

In a few days I'll have another Yudu post for you.  I wanted to try screening on canvas, and I can't WAIT to show you the results!  I also hope to have a Yudu video tutorial for you guys soon!

Monday, April 25, 2011

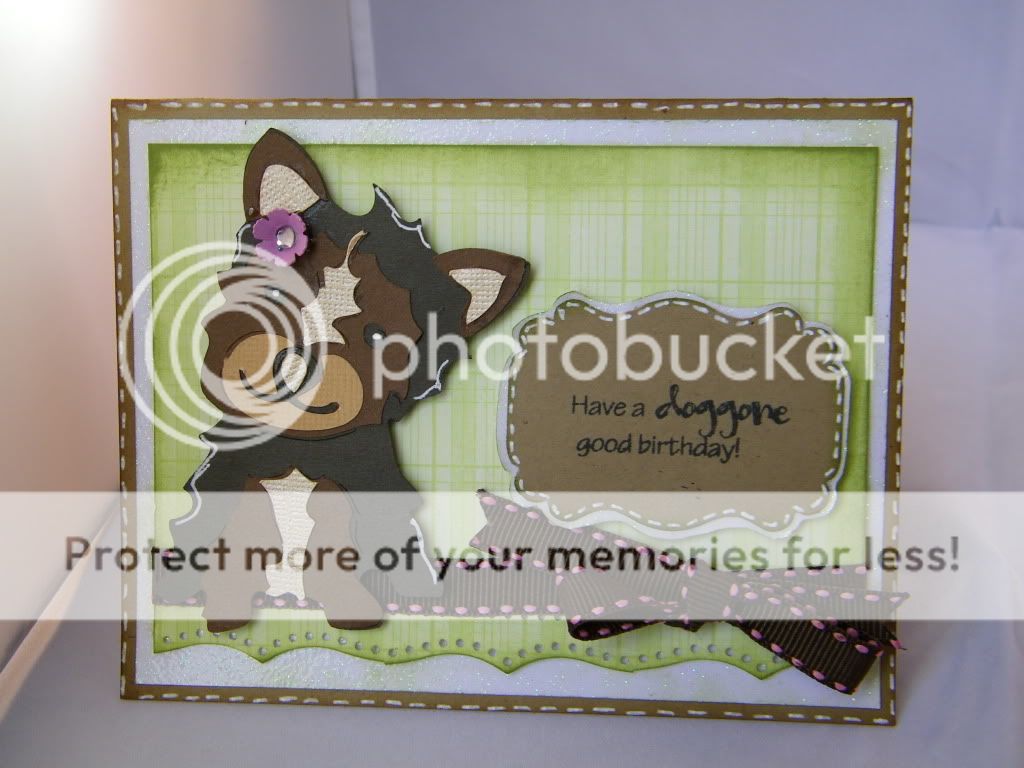
Have a Doggone Good Birthday!

Hello everyone!  I hope you had a FABULOUS Easter weekend.  I had a very busy few days filled with family, friends, and fun, and now I'm EXHAUSTED!  I wanted to share a birthday card with you I made a few weeks ago.

I bought the Four-Legged Friends Cricut Lite cartridge on Black Friday and I've only used it once since I bought it.  I really wanted to break it out and use it again, and the perfect opportunity came when I needed to make a birthday card for my boyfriends mother.  She has a little Yorkie named Molly, and I thought the Yorkie from Four-Legged Friends would be PERFECT on her card!


This is an A2 size card made from craft cardstock.  I matted the card with white glitter cardstock and a green plaid paper from the DCWV Dots, Stripes and Plaids stack.  I used an EK Success border punch and inked around the edges of the plaid mat with Peeled Paint Distress Ink.


I cut the yorkie at 3 3/4" out of Recollections cardstock.  I gave her a little shading with my white gel pen and also gave her dots for her eyes.  The metal flower is from Making Memories and gives her the perfect feminine touch.  The dogs from this cartridge are pretty easy to layer.  The only con is that the cartridge booklet gives them really strange color combinations so it's hard to see what colors go where.  But I think she turned out really cute!

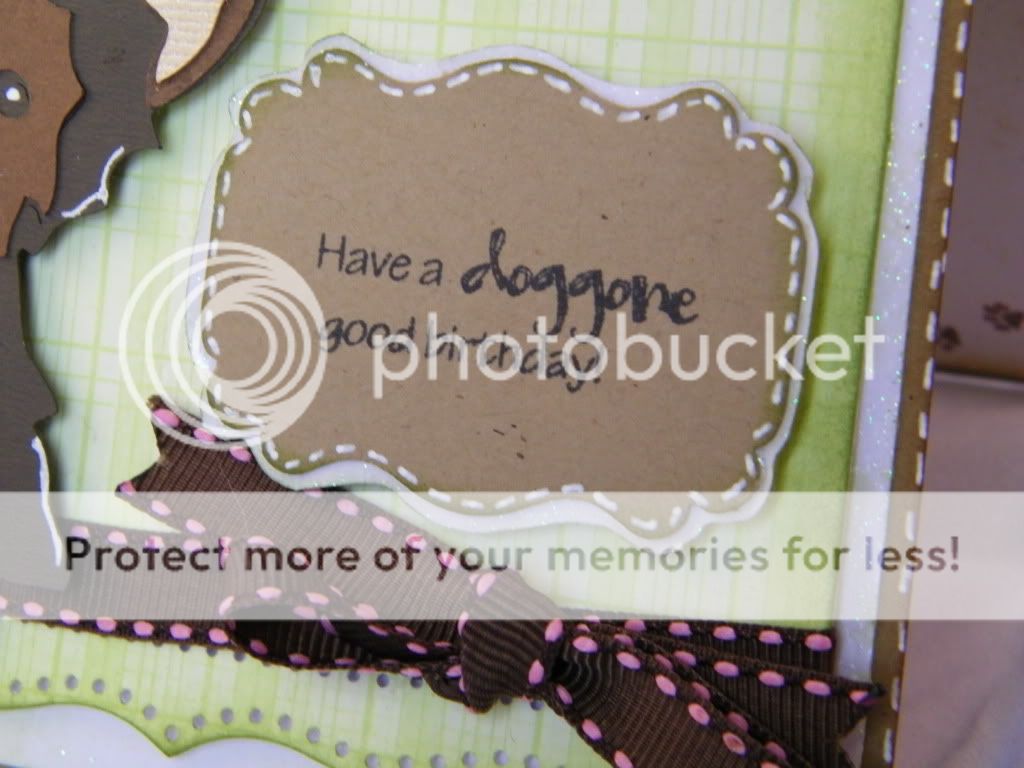
"Have a Doggone good birthday!" is from the Pink By Design Furry Friends stamp set.  I punched it out with an EK Succes punch, matted it with the white glitter paper, and stitched around it and the base of the card.  I finished the card with a really cute ribbon that continues the stitching in pink.

But I didn't stop there!

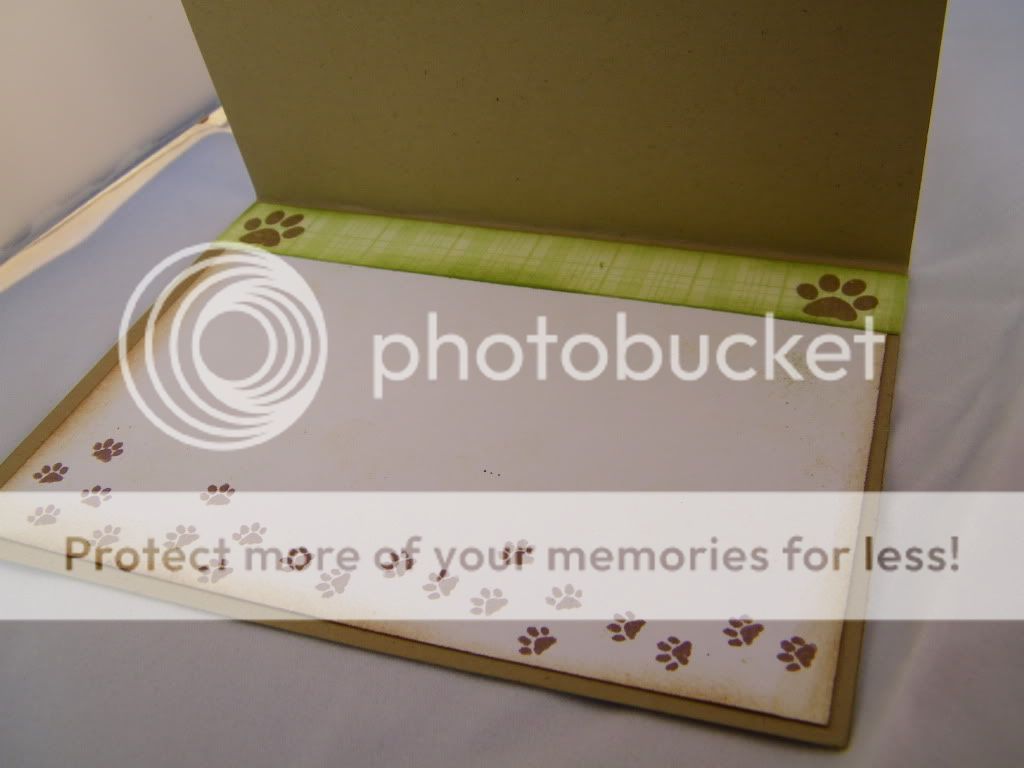
I really got into decorating the inside of this card as well.  I added a little border strip along the top.  All of the paw prints are from Furry Friends as well.  I love the travelling paw prints!


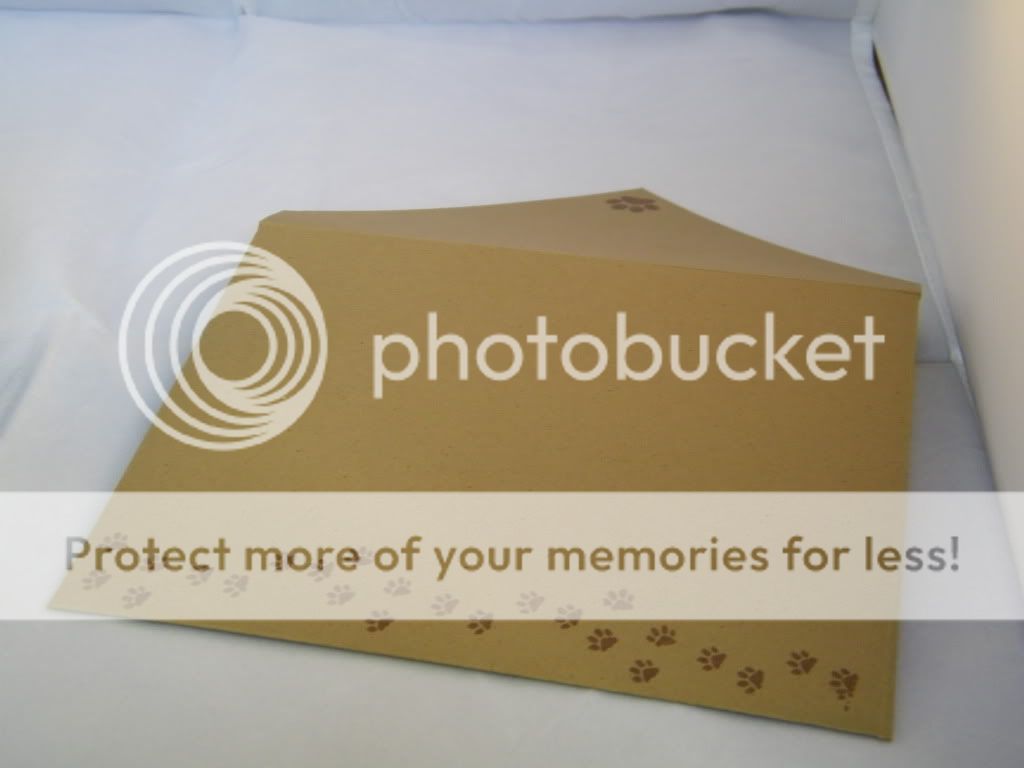
I continued the paw print theme on the matching envelope and the back of the card.  I love my little personalized stamp from my Martha Stewart stamp kit!

That's it for today!  Have a fabulous week friends!  I have a few more things for you this week, including some things from my newest obsession: my YUDU!!