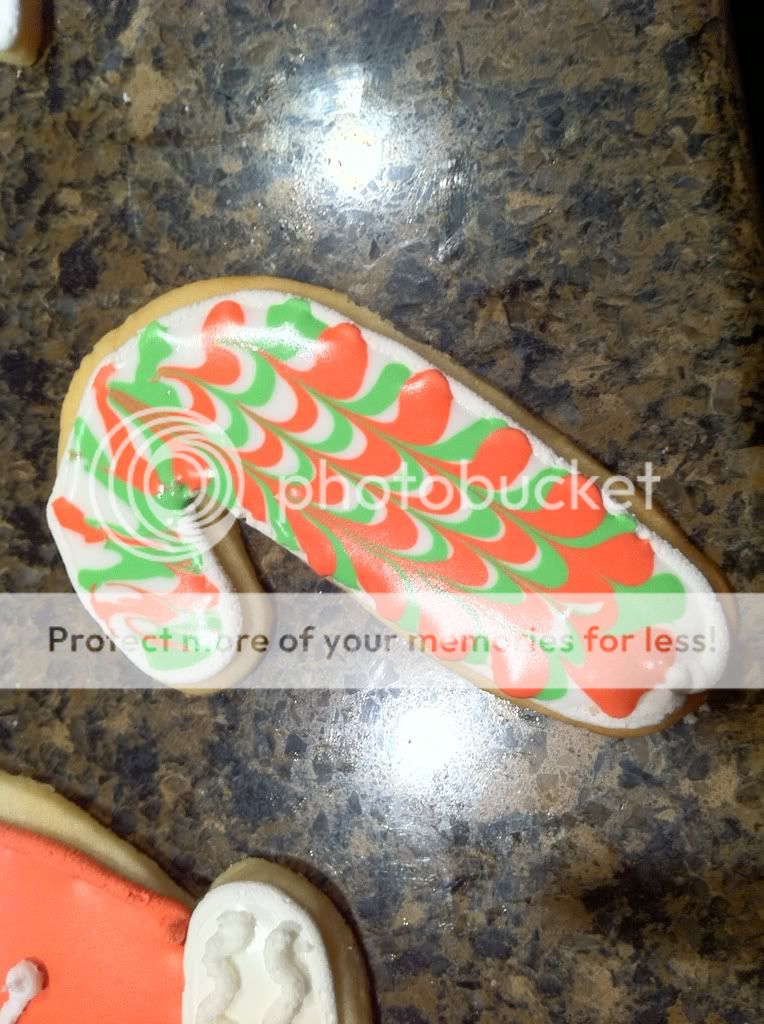
I think the mittens and the candy canes were my favorite. I used a Christmas cookie cutter set that I have had for AGES for the shapes. I colored a batch of the stiff royal icing to outline, and then once they had hardened, I added water to the remaining royal to make it flood consistency. I colored them to match the outlines, filled squeeze bottles, and went to town.
The mittens were fairly simple. After I flooded the red and white into the mitten and allowed them to dry, I piped white stiff royal on top.
To get the awesome swirl effect, I flood filled the candy canes with white, and then while they were still wet I made red and green stripes. Because it is still wet the colored stripes sank into the white. I then took a toothpick and just made lines down the candy cane. Super simple and it really creates a gorgeous effect.
Here's the recipes I used for the cookies and for the icing. If you're planning on making shape cookies, this is the all time go-to recipe. It doesn't spread when baked, so your cookies retain their shape.
No Fail Sugar Cookies – NFSC
Ingredients
- 6 cups flour
3 tsp. baking powder
2 cups unsalted butter
2 cups sugar (white granulated)
2 eggs
2 tsp. vanilla extract or desired flavoring (I like almond myself)
1 tsp. salt
Instructions
- Cream butter and sugar until light and fluffy. Add eggs and vanilla. Mix well. Mix dry ingredients and add a little at a time to butter mixture. Mix until flour is completely incorporated and the dough comes together.
- Chill for 1 to 2 hours (or see Hint below)
- Roll to desired thickness and cut into desired shapes. Bake on ungreased baking sheet at 350
- degrees for 8 to 10 minutes or until just beginning to turn brown around the edges. This recipe
- can make up to 5-dozen 3” cookies.HINT: Rolling Out Dough Without the Mess — Rather than wait for your cookie dough to
chill, take the freshly made dough and place a glob between two sheets of parchment paper.
Roll it out to the desired thickness then place the dough and paper on a cookie sheet and pop
it into the refrigerator. Continue rolling out your dough between sheets of paper until you have
used it all. By the time you are finished, the first batch will be completely chilled and ready to
cut. Reroll leftover dough and repeat the process! An added bonus is that you are not adding
any additional flour to your cookies.
I got my royal icing from Bake at 350. Actually, I get a TON of my recipes there. She rocks :) She even has picture directions, so you really have NO EXCUSE not to make these cookies!


3 comments:
They look good!
~Dawn
http://latenightscraper.blogspot.com/
Totally awesome looking cookies and they look soooooo tasty! I've always had problems when making sugar cookies. I don't know why...maybe I didn't chill the dough long enough...or the extra flour used to roll out the dough caused the problem. But, I am definately going to try your recipe and the parchment paper tip! Thanks so much for sharing with us all! And I'm going to pop over to "Bake at 350".
Kristin,
Your cookies are AMAZING!!! :) You did a great job!
Thank you so much for sharing your recipes,
Jennifer
Post a Comment