Here is my LAST "Christmas Project" post of 2010. I promise!
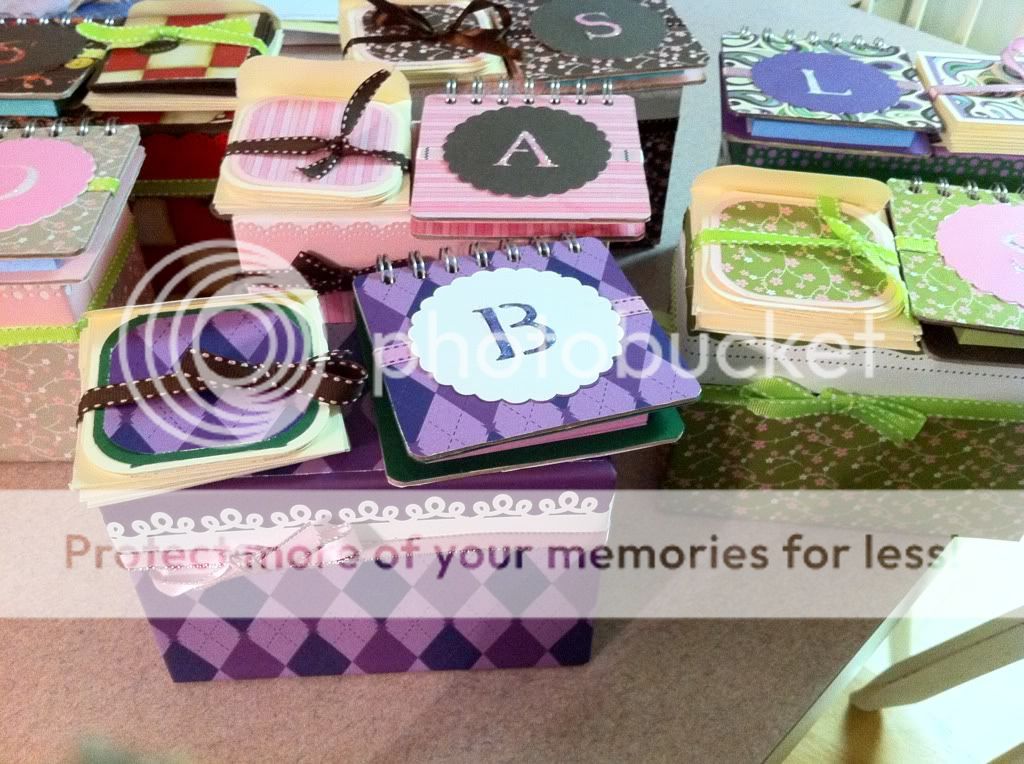
Do you remember the altered recipe box I made a few weeks ago for the Post It Blog Hop? Well, I showed my Mom and she thought they would be wonderful gifts for her co-workers. She wanted me to make some things to fill the boxes as well, so I decided to put a set of 3x3" cards and envelopes in each box, along with a monogrammed Post-It Note Holder. I made SEVEN of these bad boys, and each one was different!
The only Cricut cut I used was for the monogram, and I used the Martha Stewart Elegant Cake Art cartridge. Most of the patterend paper is from Recollections (I took my Mom to Michaels and let her pick out all the patterned paper), and most of the solid paper is Post-It Craft Paper!
Each one had a different Martha Stewart border punch around the top, and I used Stickles on each of the monograms (hard to see in the photos). I bound all the Post-It Note holders with my Cinch!
These are extremely cute and SUPER AFFORDABLE gifts. The recipe boxes were $1.00 at Michaels, and we bought the paper and ribbon during a sale. The Post-It Note holders are made from 4x4 chipboard coasters I got at Michaels on clearance for 30 cents a pack!
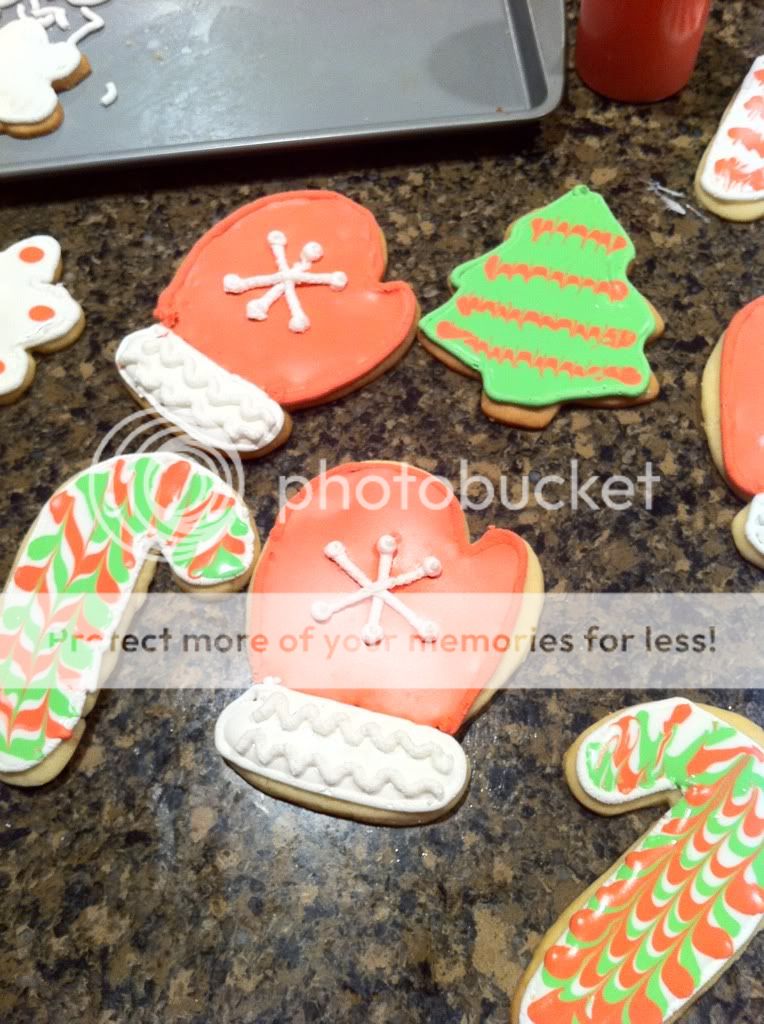
I needed to make a huge batch of cookies for a few holiday events last week. I decided I didn't want to use my Cricut Cake, not because I don't love her (BECAUSE I DO), but because I love making Royal Icing flood cookies. They taste so yummy and the possibilities are endless with what you can do with them.
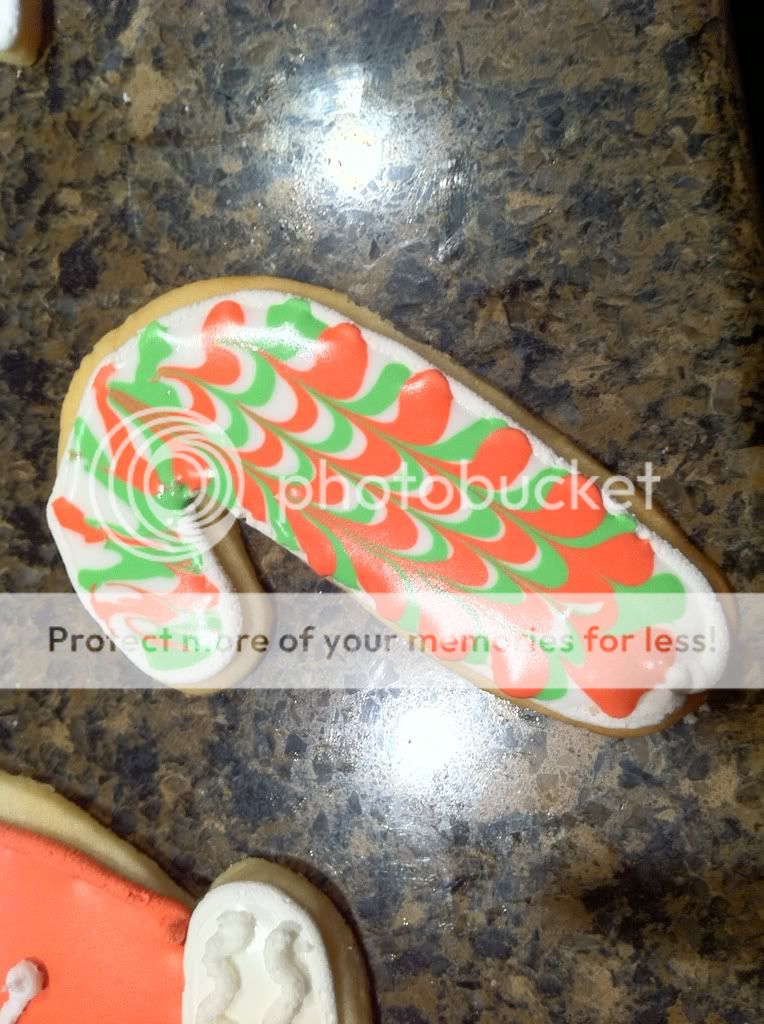
I think the mittens and the candy canes were my favorite. I used a Christmas cookie cutter set that I have had for AGES for the shapes. I colored a batch of the stiff royal icing to outline, and then once they had hardened, I added water to the remaining royal to make it flood consistency. I colored them to match the outlines, filled squeeze bottles, and went to town.
The mittens were fairly simple. After I flooded the red and white into the mitten and allowed them to dry, I piped white stiff royal on top.
To get the awesome swirl effect, I flood filled the candy canes with white, and then while they were still wet I made red and green stripes. Because it is still wet the colored stripes sank into the white. I then took a toothpick and just made lines down the candy cane. Super simple and it really creates a gorgeous effect.
Here's the recipes I used for the cookies and for the icing. If you're planning on making shape cookies, this is the all time go-to recipe. It doesn't spread when baked, so your cookies retain their shape.
No Fail Sugar Cookies – NFSC
Ingredients
6 cups flour 3 tsp. baking powder 2 cups unsalted butter 2 cups sugar (white granulated) 2 eggs 2 tsp. vanilla extract or desired flavoring (I like almond myself) 1 tsp. salt
Instructions
Cream butter and sugar until light and fluffy. Add eggs and vanilla. Mix well. Mix dry ingredients and add a little at a time to butter mixture. Mix until flour is completely incorporated and the dough comes together.
Chill for 1 to 2 hours (or see Hint below)
Roll to desired thickness and cut into desired shapes. Bake on ungreased baking sheet at 350
degrees for 8 to 10 minutes or until just beginning to turn brown around the edges. This recipe
can make up to 5-dozen 3” cookies.
HINT: Rolling Out Dough Without the Mess — Rather than wait for your cookie dough to chill, take the freshly made dough and place a glob between two sheets of parchment paper. Roll it out to the desired thickness then place the dough and paper on a cookie sheet and pop it into the refrigerator. Continue rolling out your dough between sheets of paper until you have used it all. By the time you are finished, the first batch will be completely chilled and ready to cut. Reroll leftover dough and repeat the process! An added bonus is that you are not adding any additional flour to your cookies.
I got my royal icing from Bake at 350. Actually, I get a TON of my recipes there. She rocks :) She even has picture directions, so you really have NO EXCUSE not to make these cookies!
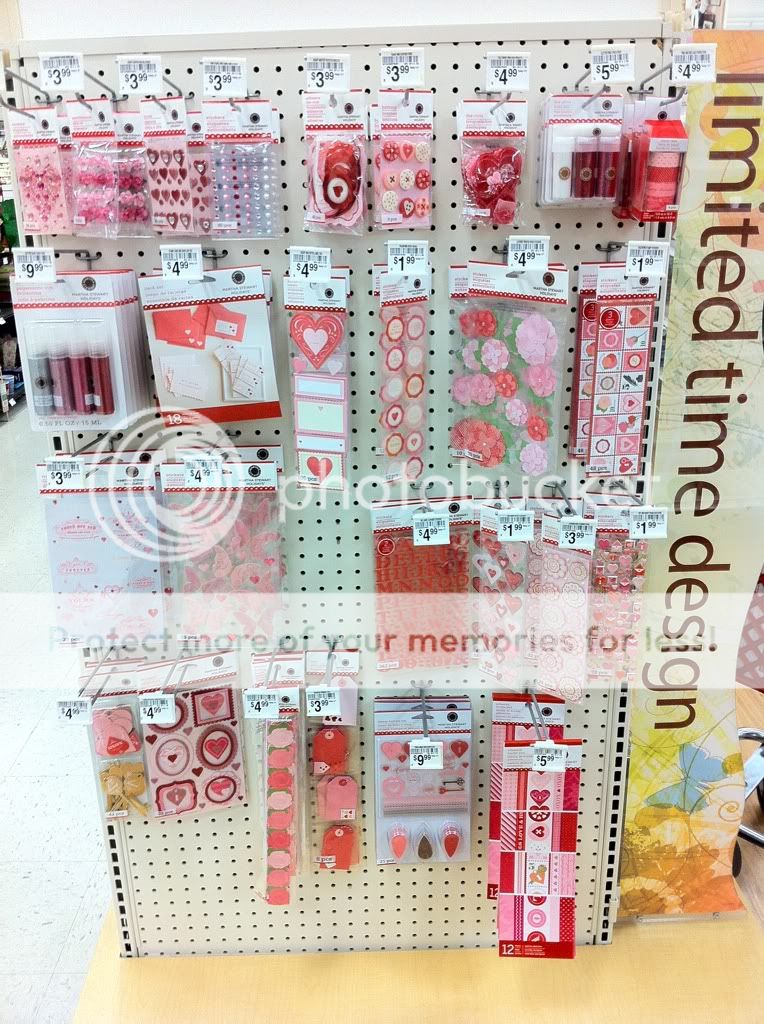
I'm taking a break from my post-Christmas posts to share with you the new Martha Stewart Valentines Day display at my Michaels. There are TOO many things I want, so I just had to share!
She has some really great die cuts and glitter this season. My personal faves:
The glitter glue pens. Don't get me wrong, I love my Stickles, but if there was anyone I would give them up for, it would be Martha! I will have to try these out!
Valentines Day Stamp Set. Cute sentiments and three great colors!
Die cut butterfiles. An ENTIRE page of pink, glittery die cut butterflies? I'm in love! :)
Now to the good stuff: THE PUNCHES. She has a really cute Valentines Day paper pack and mat pack, but let's be serious, I mostly care about the punches. She has some GREAT new ones this season (I'm not sure what the Fiskars punch is doing there, but oh well). I purchased three punches, and there is still one more I want. My faves:
Filagree Heart Large Punch
I'm OBSESSED with this punch. I love the way it looks and can be used for more then just Valentines Day. I don't think I could get something that intricate in that size to come out well with my Cricut.
Heart Lock and Key Double Punch
Don't quote me, but I'm fairly certain she has released this punch before. I'm almost positive my friend has one, but I don't, so I had to get it!
Cherish Heart Border Punch
I love the scalloped border! I think this will look so cute on so many different cards.
There is also a really cute stamp and punch set and two heart Punch All Over the Page punches (which I also plan on getting).
Make sure you check out your Michaels and see if they have rolled out their new Martha stuff yet! Also, all of her Christmas stuff is on clearance right now, so if your M's has any left (mine only had two things left), make sure to grab them!
I hope everyone had an amazing Christmas weekend. Was Santa good to you this year? He was extremely generous with me! On top of some wonderful jewelry and clothes, I got the Stand and Salute cartridge, an i-Top plus accessories (Can't WAIT to play with that one) and....my Aqua Expression! I already knew I was getting that (since I waited in line for it on Black Friday LOL), but it was great to finally be able to open that box! I was also finally able to play with the two cartridges that came with it, Playtime and Classic Font. Great carts!
I know Christmas is over, but I have a TON of projects I completed last week that I want to share with you!
I made two more word books for Christmas this year for family members. I had full intentions of making FOUR, but I ran out of chipboard PLUS they are incredibly time consuming (and frustrating when your Gypsy won't do what you want it to do!), so two was all I could manage in one sitting.
I wish I had pictures to share, but I actually finished the books on THE DAY they had to be given to family so I didn't have time to snap anything!
Hey everyone! This week for the SweetSassyDiva Design Team our task was to make a last minute stocking stuffer. I needed a last minute gift for some family members and thought these snowmen ornaments would be the perfect thing. I originally saw this idea on Momos blog, and she has a video too!
Recipe:
*Large Glass Ornaments
*Pledge Floor Wax with Future Shine
*Martha Stewart Crystal Fine Glitter
*Martha Stewart Obsidian Pearls
*Red and White Pipe Cleaners
*Red Pom Poms
*Orange Glitter Paper
*Glue Gun
I have to say, I love the Pledge with Future Shine trick. It coats the inside of the ornaments perfectly. I did another set of ornaments using this technique, hopefully I can share them with you later this week. I originally tried this with Martha's Coarse Glitter and it did NOT cover the inside of the ball well. I switched to the Fine Glitter and it worked great :)
I also have to add that I did not own a glue gun before this project.
I KNOW. Crazy, right?
I just never had need for one. I bought the Martha Stewart 2 Temp Glue Gun, for two reasons.
1.) I really wanted to try the black hot glue next Halloween
2.) It's Martha Stewart, and everyone knows I own ALL of her stuff ;)
The gun worked great and now I have a glue gun for future projects :)
Have a great day everyone! I hope you are all ready for Christmas :)
Hey everyone! This week for the CJToo Design Team, our task was to create a Christmas project of our choice. I've been Christmas decorating like crazy for the past few weeks, and I really wanted to make some pretty glass vases for the mantle. I wanted to try glass etching for the first time, and I also wanted to play with my new Alcohol Inks for the first time, so I combined them both!
Recipe:
Glass Vases (I got mine from Dollar Tree)
Glass Etching Cream
Cricut Winter Lace Seasonal Cartridge
White Contact Paper (or vinyl)
Transfer Tap
Foam Brush
Ranger Alcohol Inks in the following colors:
Aqua
Sailboat Blue
Stonewashed
Silver Metallic Mixative
Ink Applicator
These were a little time consuming, but totally worth it. I have a video walking you through each step, but basically you need to cut a stencil with your Cricut. I used contact paper because vinyl is EXPENSIVE and I didn't feel like buying some just for a stencil. I used the Winter Lace cartridge for my snowflake, but any ol' flake will do. Just make sure that it isn't too detailed or fragile.
Lay the stencils on your glass and then apply your cream. Has anyone else freaked out while looking at the price of glass etching cream? HOLY COW! Luckily I bought mine when I had a 50% coupon, but STILL. That tiny bottle was EXPENSIVE! The nice thing is that it doesn't take a lot to cover the stencil, and you can scrape it back in the bottle before washing, which is good, because at that price that bottle had better last me FOREVER!
After the etching it done, you put the INSIDE of the stencil (the part you usually throw away) on top of your etched image, making sure everything you want to see is covered, because the alcohol ink covers up EVERYTHING. Including mistakes, which my first vase had a TON of. I put on way too much etching cream on my first try and it ran EVERYWHERE, but luckily after inking you couldn't even see it. Then, the fun part, the alcohol ink!
I want this stuff in every color. It blends great and there really is no wrong way to apply it. Don't like it? Go back over it! It's so great.
They turned out so pretty and unique looking.hard to believe they started as $1 vases!