Showing posts with label Challenge. Show all posts

Tuesday, October 19, 2010

Cinch Out-Of-The-Box Tutorial, plus Momos Tuesday Challenge!

Happy Tuesday everyone!  I shot a quick video today showing how to use your Cinch right out of the box.  It really is RIDICULOUSLY easy to use!  I was able to bind my project in minutes!  Here's the video:


Today is also Momo's Tuesday Challenge, and this weeks challenge was to make anything you wanted-as long as it WASN'T a card.  I was excited when I saw this because it meant I could play with my new Cinch!  So, I made a super adorable Post-It-Note holder for my purse.  Now I have post-its on hand whenever I need them!  The video above shows exactly how I bound my project, but here's the recipe to make it yourself:

  • 2  3 3/4" squares of chipboard (round the corners)
  • DCWV Amber Autumn stack
  • Martha Stewart Elegant Cake Art Cartridge
  • Brown ink
  • Cinch or Bind-It-All
  • Post-It Notes
 I used cereal boxes for my chipboard, and they are actually two pieces glued together to make it sturdy enough to keep in my purse.  I then glued on the paper, inked the edges with Walnut Stain distress ink, and then punched the holes in my Cinch (see the video for how I did it).  I glued the Post-it-Pad onto the back cover with my ATG and then bound the whole project together.  I added ribbon, and used the MS Elegant Cake Art Cartridge for the mongram frame.  I used the Flourish Frame Creative Feature and cut the image at 2 1/2".   I stickled the "K" using Star Dust Stickles (I seriously need a bigger bottle of this stuff, I use it ALL the time!) I think it looks simple and elegant, perfect to pull out at work or in a meeting if you need to jot down a note.  I've already had three people today ask me to make one for them!  :)

Make sure you stop by my blog tomorrow, because I'll have my VERY FIRST Craft Junkie Too Design Team post!  I promise it's going to be delicious ;)

Saturday, October 9, 2010

Video: How to Make a Tri Shutter Card

Hi everyone!  I got quite a few emails asking me how I made my Thanksgiving Tri-Shutter card, so I thought I would make a quick tutorial on how I did it.  I'll also include the basic recipe, as well as all the measurements to make the card.

Robyn over at My Pink Stamper is having a Winter Challenge, so I thought this would be a great way to make a tutorial AND a challenge item at the same time!  I hope you enjoy it :)

Just remember, on the video I tell you the dimensions of each actual box on the card.  To make mats and add patterned paper, subtract a 1/4" from each dimension.  On the recipe I will give you the dimensions for my white cardstock mats.


Recipe:
  • 5.5" x 12" piece of green cardstock 
  • Martha Stewart Scoreboard (or any scoring tool)
  • Paper Trimmer
  • For front and back panels: 1 3/4" x 5 1/4" white cardstock 
  • For top and bottom panels: 1 1/4" x 1 3/4" (you need 2)
  • For the middle panels: 2 1/4" by 1 3/4" (you need 2),  2 1/4" by 3 3/4" (you need 1)
  • 3 by 5" piece of white cardstock
  • DCWV "Winter Combo" paper matstack (all cut 1/4 smaller than white cardstock)
  • Create a Critter for Reindeer (3 3/4") and "Joy" (1 1/2")
  • Crop a Dile and 3/16" eyelets
  • Martha Stewart Glitter Stamping Set (for snowflakes)
  • Martha Stewart Turquoise Glitter
  • Martha Stewart Stamp Setting Kit (for custom stamp on back)


    Have a fabulous day everyone!!

Tuesday, September 28, 2010

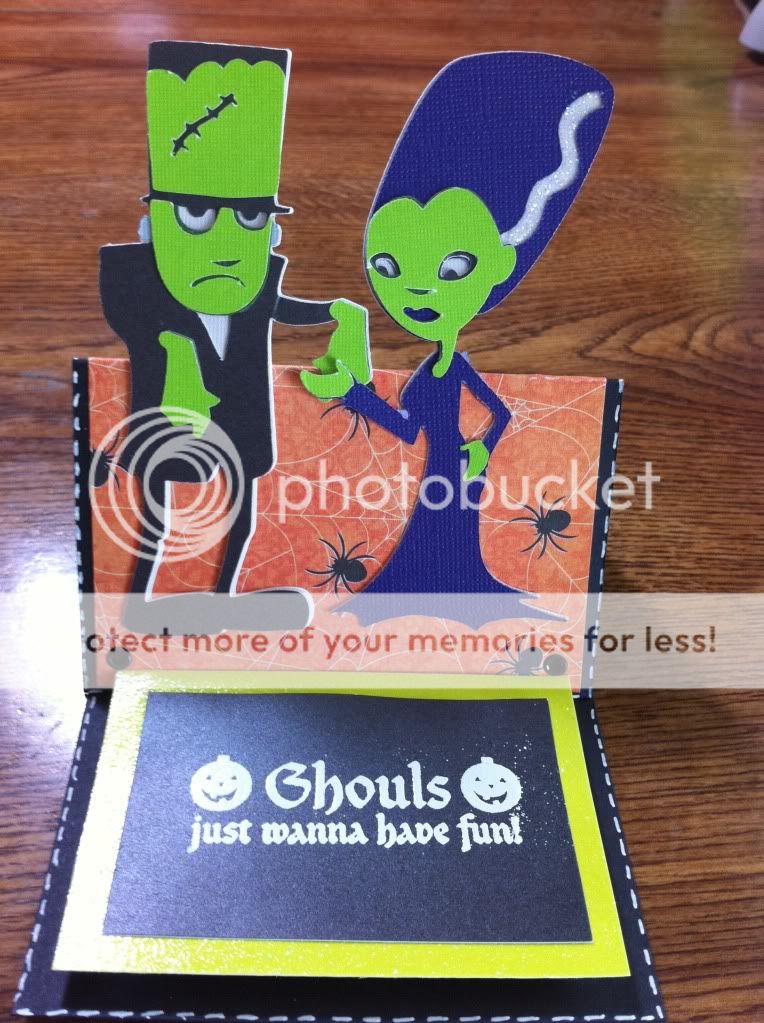
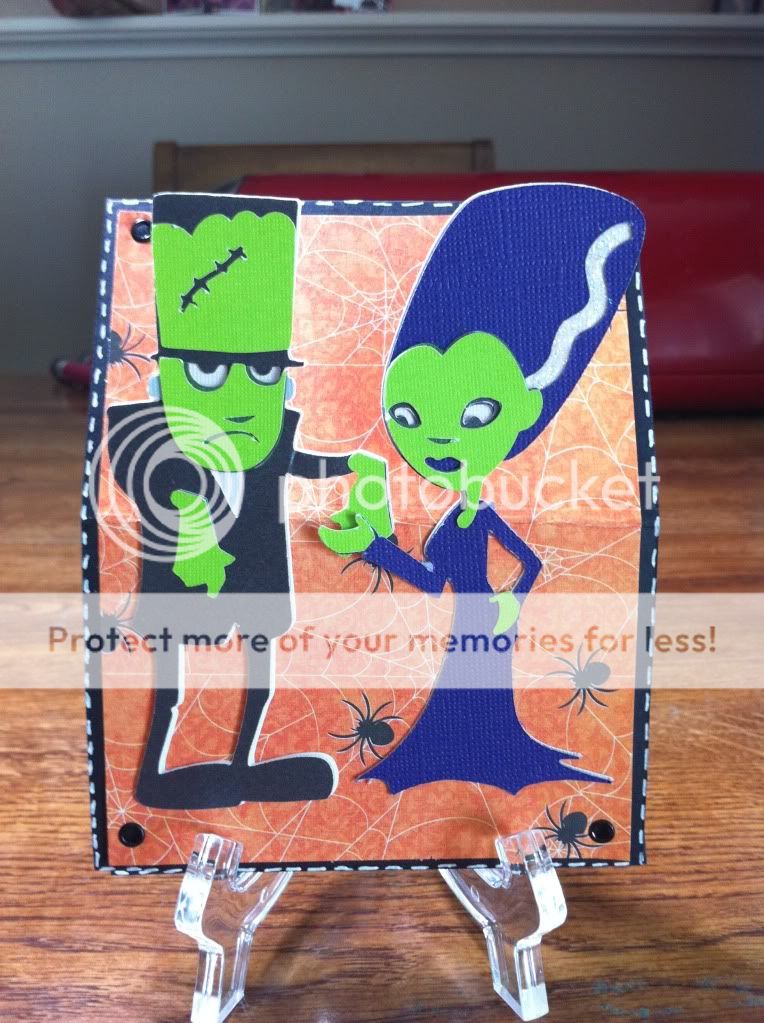
Ghouls Just Wanna Have Fun!

I've had this card rolling around in my head for a few days, and when I saw Momo's Tuesday Challenge today and realized I could make the color scheme fit, I decided to go for it.  Her challenge rules this week were using the colors orange, green, and yellow, and you also had to do faux stitching or doodling somewhere on the card.   Most of the examples I saw were fall cards, but, lets be honest, I'm obsessed with Halloween right now, so I made a Halloween card!


On Momo's blog earlier this week, she featured an ADORABLE penguin easel card, and that is where I got the idea for this card.  If you want a super easy to follow easel card tutorial, go to her YouTube channel.  She's so easy to follow :)

Recipe
DCWV Midnight Spell Paper and Cardstock
Cricut Happy Hauntings Cartridge
Crop a Dile and Eyelets
White Embossing Powder
Versamark Stamp Pad
Heat Gun
Dimensionals
White Gel Pen

I started with a 4 1/4 x 11" piece of black cardstock, and I scored it at 2 3/4 and 5 1/2.  This forms the base of the easel card.  I set eyelets in the corners of the spider paper using my Crop a Dile and then adhered it to the cardstock.  I cut Frankenstein and his bride at 4 1/2 inches (they were surprisingly easy to assemble) and then glued the bottom half of their bodies to the lower half of the card, below the score line.  That way they will pop up when you set up the easel. I also glued their hands together :) I used a little Startdust Stickles on Mrs. Frankys white hair streak, because let's face it, even monsters deserve a little bling, right?

The sentiment was from the Michaels $1 bin.  I can't stress enough the pure awesomeness of that bin.  I have found so many wonderful $1 cardmaking finds there!  I stamped with the Versamark pad, and then embossed it with white embossing powder.  This is another tip I picked up from Momo (are we sensing a pattern here?) from her Ustream class last night.  It is sooooo much easier to emboss in white then it is to stamp in white.  Stamping in white NEVER comes out right for me, no matter what ink I use.  Using the white embossing powder was the best idea, and the sentiment looks perfect!

I popped up the sentiment on Pop Dots, faux stitched around the card and VOILA!  There you have it.  When you fold the card back down, it is the perfect A2 size.

On an unrelated note, I was playing around with my new Distress Inks to get ready for a project I'm doing in a few days, and I made this tag.

Isn't that COOL???   The two colors on that tag are Spiced Marmalade and Walnut Stain (can you believe that tag used to be white?). I also used my Cuttlebug and a Sizzix embossing folder to emboss bats all over the tag.  I'm slowly becoming obsessed with Distress Inks...

Have a great day everyone!!


Tuesday, September 7, 2010

Cardz TV Halloween Challenge Card


I may or may not be slowly becoming obsessed with Halloween papers and cards.

How did I realize I had a problem?


When I discovered I had more Halloween themed stamps and paper packs then I did REGULAR stamps and paper packs.

Hello, my name is Kristin, and I'm addicted to Halloween crafting.

One of my favorite blogs, Cardz TV, is having a Halloween Challenge, and of course, I couldn't pass it up.  So here is my entry.

Please ignore my fingers...now I really want a manicure.  
Also, please excuse the crappy photo quality.  I swear I'm going to make a light box soon!

This is my first attempt at a gatefold card, and I'm pretty sure I'm in love.  The witch frame on the front is from my new favorite cartridge, Happy Hauntings.  I cut her at 4 inches, and then used my Jolee's hotfix tool to add a little bling  All of the paper and cardstock is from the yummy DCWV Midnight Spell Collection.  Yes, I own it ALL.  I love it that much.  The chandelier stamps are from a Martha Stewart Halloween stamp set, and the "Boo" sentiment is from a stamp I found in the Michaels dollar bin (LOVE those dollar bins!)  The two rose embellishments on the outside are from Recollections.

Want to submit your own card for the challenge?   Head over to Cardz TV and submit your own!  She's keeping the prize a secret (but who am I kidding, I would have made this card prize or no prize).

Wednesday, September 1, 2010

My Entry for MoMo's Tuesday Design Challenge

As I was reading Made By Momos blog entries this morning, I saw she was having her Tuesday Design Challenge, and this week the challenge was to design a black and white card using one other color.  I decided to test my creativity and make a card for the challenge.  This is my first challenge card EVER, and I think it's pretty cute.  I made a Halloween card using black, white and orange.  Ready for it?


All cardstock is DCWV, and the glitter paper is from their Midnight Spell pack, which is ADORABLE.  The images on the front are from a Sizzix Halloween embossing set on Core'dinations paper that I sanded to reveal the white core.  The cute little spider brads on the front I found at Michaels, and of course, it's hard to make a Halloween project without using Martha Stewarts Drippy Goo punch :).  On the inside, all of the stamps are from one of Marthas new Halloween stamp sets.


I have a question for whoever reads my posts, especially if you photograph your cards: what's the best way to get great card photos?  Is it the camera, or the setup?  Please share your opinions in my comments, I would love to hear them!