A Haul video that is! I also expect this to be one of the last haul videos I do this year, to keep with my "Use What I Have" 2011 goal! I think I'm set for the rest of the year at this point ;)

Showing posts with label Video. Show all posts
Showing posts with label Video. Show all posts
Friday, January 7, 2011


Sunday, December 12, 2010
SweetSassyDiva Design Team: Perpetual Desktop Calendar
Hey everyone! This week on the SweetSassyDiva Design Team our challenge was to make something using our Cinch, BIA or Your Story Photo. I own a Cinch and LOVE it so I wanted to create something out of the ordinary. A few months ago I saw a picture of a perpetual desktop calendar someone had made using a Bind-It-All, but with no instructions. So, I decided to make up my own instructions and give it a go!


Recipe:
- 4 pieces of lightweight chipboard
- 5 pieces of coordinating cardstock
- Cinch Binding Machine
- Black 3/4" o-wires
- Recollections "Flourish Month" Stamp Set
- Inkadinkadoo "Months and Days" Stamp Set
- Inkadinkadoo "Sketchy Flourishes" Stamp Set
- Versamark Pad
- Clear Embossing Powder
To create the base, I cut a piece of chipboard at 8x12". I scored it at 4 1/2" and 7 1/2" and covered the inside AND outside with black and white paper from the Black Currant Stack from DCWV. I then took my Cinch and punched holes on both of the 8" side using the machine instructions.
To create the small pieces, I cut 9 strips of 4 x8" chipboard and punched them on one of their 8" sides, pulling pegs 4, 8 and 12. I then cut them into 2 x 4" strips. I did the same with the paper and adhered the cut strips to the cardstock strips.

I organized the strips in to corresponding piles and stamped them. I bound the whole thing with my Cinch and VOILA! A calendar I can use year after year.
These would make great gifts for someone in your office or family, and they are so easy to make! Here's a video walking you through it:

Have a great week everyone!
Wednesday, December 8, 2010
Craft Junkie Too Design Team Day: Holiday Organization
This week for Craft Junkie Too, our task was to show something that we use to get organized for the holidays.
I'm not going to lie. This was a challenge for me, mostly because organization is something I'm still working on in my every day life, not to mention the holidays.
I saw this cute little shopping organizer from Laura at Following the Paper Trail and knew this was something I could use to my advantage to stay organized this holiday season. I wanted to make mine a notebook as well, so I took her idea and ran with it.

The cover is two pieces of 5x7 chipboard with a 3/4 x 7 strip in between. I glued them down to a 12 x 8 inch piece of cardstock from the DCWV Christmas Combo Stack. After I snipped the corners, I wrapped the cardstock around the chipboard and then added an inner piece that was slightly smaller.
 The coupon expanding file is also taking from Laura's original organizer. She simply took 4 x 8 pieces of cardstock and scored them at 3/4" on each side. I took Terrifically Tacky Tape and taped the folded edges of one to the back of another until they were all adhered together. After gluing on a front cover, you make the "binding" by taking a 2 1/2 x 6 1/2 strip, punching a border, and gluing it to the bottom. Voila! Expanding file.


I'm not going to lie. This was a challenge for me, mostly because organization is something I'm still working on in my every day life, not to mention the holidays.
I saw this cute little shopping organizer from Laura at Following the Paper Trail and knew this was something I could use to my advantage to stay organized this holiday season. I wanted to make mine a notebook as well, so I took her idea and ran with it.

The cover is two pieces of 5x7 chipboard with a 3/4 x 7 strip in between. I glued them down to a 12 x 8 inch piece of cardstock from the DCWV Christmas Combo Stack. After I snipped the corners, I wrapped the cardstock around the chipboard and then added an inner piece that was slightly smaller.


The file tabs were made with the From My Kitchen cartridge. I used my Gypsy to size them so they would be slightly bigger then the 4x6 paper I wanted to put in between. I ran each file through my Snowflakes Cuttlebug folder. I used my Cinch to bind the three sections of my "notebook" together, and then glued the back cover to the actual back cover of the book to keep it inside.
The front cover is very simple, as I knew this would be in my purse and I didn't want things falling off.

This is the Martha Stewart Vintage Dove Punch. I have walked past that punch countless times in the last few months, and every time I had an internal argument with myself about whether I should buy it or not. I finally bit the bullet and grabbed it and I'm SO glad I did. I ran them both through my Xyron, added Martha Stewart Garnet glitter, and then covered them both with Glossy Accents after I realized that the glitter would go ALL OVER the inside of my purse if I didn't :)
Here's a video walking you through it:
Have a fabulous day everyone! Don't forget to check and see if you won the Martha Stewart punch from the Post it Blog Hop this past weekend!
Sunday, December 5, 2010
My Black Friday Buys!
If you're looking for the Post-It Paper Blog hop and punch giveaway, click here!
Hey everyone! I've been SO BUSY for the past week that I totally forgot to post what I got on Black Friday!
Did you get any Black Friday steals? I'd love to hear them!
Tuesday, November 9, 2010
How I Make Card Templates Using My Gypsy
Hi everyone! I just wanted to share a quick video with you on how I make card front templates on my Gypsy. This is a huge time saver for me, because I don't have to second guess if my image is going to fit on the size card I want or not.
If you haven't tried out this technique already, give it a shot! It's helped me out tremendously :)
If you haven't tried out this technique already, give it a shot! It's helped me out tremendously :)
Thursday, November 4, 2010
"Homemade for the Holidays": Photo Album Word Book
Happy Thursday everyone! Welcome to the first post for my "Homemade for the Holidays" series. I am making a lot of my Christmas gifts by hand this year, and I wanted to share them all with you. Hopefully you will see something that you would like to make yourself :)
My first project is a photo album word book for my friend who has a two year old son. I thought this would be a perfect "brag book" she could take to work and keep in her office. I made it interactive and brightly colored so people would want to pick it up and look inside :)
I used the following things to make this word book:
Here's the video, I hope you enjoy it!
My first project is a photo album word book for my friend who has a two year old son. I thought this would be a perfect "brag book" she could take to work and keep in her office. I made it interactive and brightly colored so people would want to pick it up and look inside :)
I used the following things to make this word book:
- Make-The-Cut to weld the book together (I made it before I got my Gypsy girl!)
- DCWV "Nana's Kids" and "All About Boys" stacks for the patterned paper
- Cricut Cartridges
- Create a Critter
- Tags, Bags, Boxes and More
- George and Basic Shapes
- Birthday Cakes
- Mini Monsters
- Cinch Binding Machine
- Walnut Stain Distress Ink
- Martha Stewart Photo Corner Punch
- Martha Stewart "Cherish" PATP Set
- Martha Stewart "Bubble Bath" PATP Set
- Martha Stewart "Ribbon Loop" PATP Set
Here's the video, I hope you enjoy it!
Saturday, October 30, 2010
Exciting Announcement!
I've been selected to be on the SweetSassyDiva Design Team! I am SO excited to share my projects with Bobbi Jo and her followers. She is such a sweetheart! Click HERE to go to her blog and meet the rest of the team!
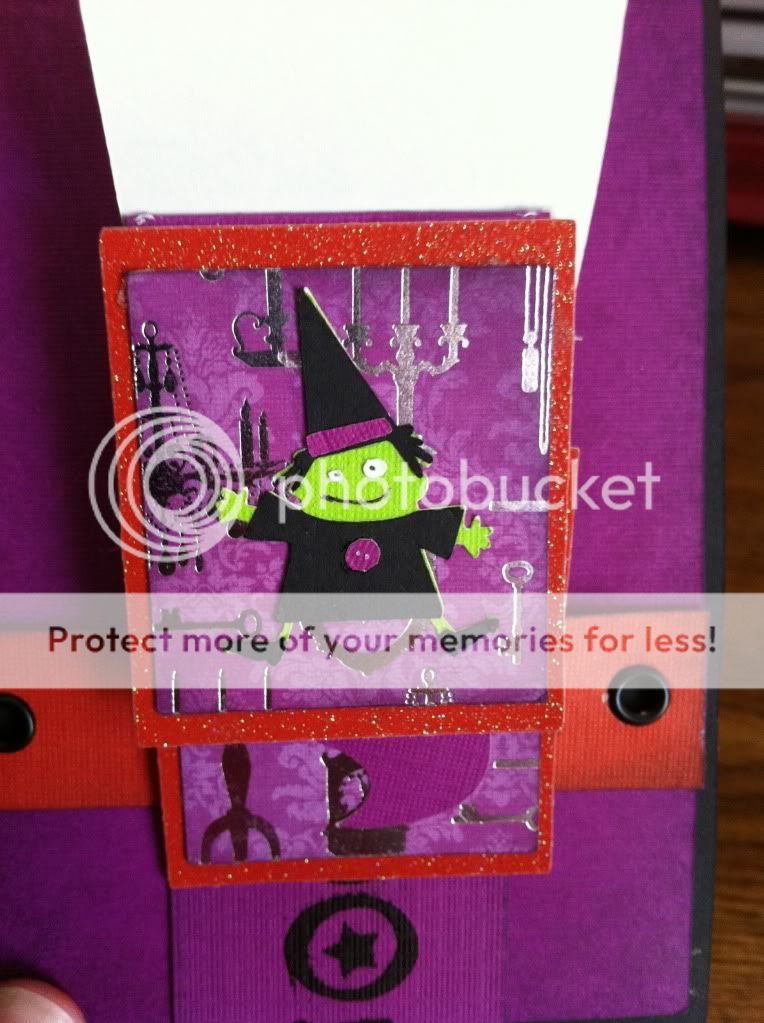
We needed a project to go along with our first week bios, so I designed a Halloween waterfall card using my BRAND NEW Gypsy and my new Mini Monsters cartridge!
I got the original gypsy file from Elizabeth at 217 Creations. She used Plantin Schoolbook for her file, and I don't have that cartridge, so I re-designed the file using George and Basic Shapes. I will be posting both her original file as well as my George file at the end of this post.
I made a video showing exactly how I made the card!
Recipe:
*DCWV Midnight Spell cardstock, glitter and patterned stacks
*Mini Monsters Cartridge
*Happy Hauntings Cartridge
*Crop-A-Dile and black eyelets
*Tim Holtz Dusty Concord Distress Ink
*Recollections Halloween Brads
*Zig 2-Way Glue Pen (for those tiny monsters!)
*Purple Stickles


For the 217 Creations original Gypsy File (Plantin Schoolbook): Click HERE
For my re-designed Gypsy File (George & Basic Shapes): (Click HERE)
Hope you enjoyed! If you have any questions, feel free to leave me a comment or shoot me an email! I love hearing from you :)
We needed a project to go along with our first week bios, so I designed a Halloween waterfall card using my BRAND NEW Gypsy and my new Mini Monsters cartridge!
I got the original gypsy file from Elizabeth at 217 Creations. She used Plantin Schoolbook for her file, and I don't have that cartridge, so I re-designed the file using George and Basic Shapes. I will be posting both her original file as well as my George file at the end of this post.
I made a video showing exactly how I made the card!
Recipe:
*DCWV Midnight Spell cardstock, glitter and patterned stacks
*Mini Monsters Cartridge
*Happy Hauntings Cartridge
*Crop-A-Dile and black eyelets
*Tim Holtz Dusty Concord Distress Ink
*Recollections Halloween Brads
*Zig 2-Way Glue Pen (for those tiny monsters!)
*Purple Stickles




For the 217 Creations original Gypsy File (Plantin Schoolbook): Click HERE
For my re-designed Gypsy File (George & Basic Shapes): (Click HERE)
Hope you enjoyed! If you have any questions, feel free to leave me a comment or shoot me an email! I love hearing from you :)
Friday, October 29, 2010
Long Overdue Haul Video!!
I realized I hadn't done a haul video in quite a long time, so I grabbed some of my newer purchases and shot a quick video. TONS of Martha this time! :)
Stay tuned tomorrow, I have an exciting announcement!
Stay tuned tomorrow, I have an exciting announcement!
Wednesday, October 20, 2010
Craft Junkie Too Design Team Day: Fall Create a Critter Cookies
Good morning everyone! I am so excited to debut my FIRST Design Team project for Craft Junkie Too. Our only rule was that we had to do a Fall themed project, so I decided to do some ADORABLE pumpkin cookies using my Cricut Cake!


Here is the recipe for my "No-Fail" Sugar Cookies. It has been a staple on Cake Central for AGES and is pretty much the go-to recipe for shaped cookies, because it holds its shape really well. This recipe can be easily halved to make a smaller amount.
 I have to tell you that I don't normally use store-bought fondant when I bake, but I've yet to be able to tweak my homemade fondant recipes to cut well in my Cake machine. This brand of fondant tastes really good AND cuts great in the machine, so it's a win win! It tends to be a little pricey at Michaels, so whenever I can get a 50% off coupon, I stock up for projects like this. I used the dark brown chocolate and orange buttercream varieties. I have to say, being able to buy fondant in a store already colored that doesn't taste like cardboard is always nice :)
I also made cute little tags for the cookies in Create a Critter. I cut the leaf (the accessory on the Turkey page) at 1 1/2", inked them with Spiced Marmalade Distress Ink, punched holes with my Crop a Dile, and threaded them onto ribbon I found in the Michaels dollar bin.
To create this cute and delicious cookies, I cut the cookie dough AND the fondant with my Cricut Cake. How in the heck did I cut the cookie dough in my Cake, you ask? You're in luck! Today is the debut of my Cricut Cake Video Series, and Episode 1 is cutting cookie dough in your Cake. Here's the video!
I hope this video helps you out. If you have any questions, PLEASE email me or leave a comment with a way to contact you. Next Cricut Cake Series video is cutting fondant with your Cricut!
Now, hop on over to Craft Junkie Too and check out all of Design Team 2's awesome projects! I design with some talented ladies :)
Have a fabulous Wednesday!


Recipe:
- 1 recipe "No-Fail" Sugar Cookie Dough
- Brown Chocolate Fondant
- Orange Fondant
Here is the recipe for my "No-Fail" Sugar Cookies. It has been a staple on Cake Central for AGES and is pretty much the go-to recipe for shaped cookies, because it holds its shape really well. This recipe can be easily halved to make a smaller amount.
- 6 cups flour
3 tsp. baking powder
2 cups unsalted butter
2 cups sugar (white granulated)
2 eggs
2 tsp. vanilla extract or desired flavoring (I like almond myself)
1 tsp. salt
Instructions
- Cream butter and sugar until light and fluffy. Add eggs and vanilla. Mix well. Mix dry ingredients and add a little at a time to butter mixture. Mix until flour is completely incorporated and the dough comes together.
- Chill for 1 to 2 hours (or see Hint below)
- Roll to desired thickness and cut into desired shapes. Bake on ungreased baking sheet at 350
- degrees for 8 to 10 minutes or until just beginning to turn brown around the edges. This recipe
- can make up to 5-dozen 3” cookies.

I also made cute little tags for the cookies in Create a Critter. I cut the leaf (the accessory on the Turkey page) at 1 1/2", inked them with Spiced Marmalade Distress Ink, punched holes with my Crop a Dile, and threaded them onto ribbon I found in the Michaels dollar bin.
To create this cute and delicious cookies, I cut the cookie dough AND the fondant with my Cricut Cake. How in the heck did I cut the cookie dough in my Cake, you ask? You're in luck! Today is the debut of my Cricut Cake Video Series, and Episode 1 is cutting cookie dough in your Cake. Here's the video!
I hope this video helps you out. If you have any questions, PLEASE email me or leave a comment with a way to contact you. Next Cricut Cake Series video is cutting fondant with your Cricut!
Now, hop on over to Craft Junkie Too and check out all of Design Team 2's awesome projects! I design with some talented ladies :)
Have a fabulous Wednesday!
Tuesday, October 19, 2010
Cinch Out-Of-The-Box Tutorial, plus Momos Tuesday Challenge!
Happy Tuesday everyone! I shot a quick video today showing how to use your Cinch right out of the box. It really is RIDICULOUSLY easy to use! I was able to bind my project in minutes! Here's the video:
Today is also Momo's Tuesday Challenge, and this weeks challenge was to make anything you wanted-as long as it WASN'T a card. I was excited when I saw this because it meant I could play with my new Cinch! So, I made a super adorable Post-It-Note holder for my purse. Now I have post-its on hand whenever I need them! The video above shows exactly how I bound my project, but here's the recipe to make it yourself:

Make sure you stop by my blog tomorrow, because I'll have my VERY FIRST Craft Junkie Too Design Team post! I promise it's going to be delicious ;)
Today is also Momo's Tuesday Challenge, and this weeks challenge was to make anything you wanted-as long as it WASN'T a card. I was excited when I saw this because it meant I could play with my new Cinch! So, I made a super adorable Post-It-Note holder for my purse. Now I have post-its on hand whenever I need them! The video above shows exactly how I bound my project, but here's the recipe to make it yourself:

- 2 3 3/4" squares of chipboard (round the corners)
- DCWV Amber Autumn stack
- Martha Stewart Elegant Cake Art Cartridge
- Brown ink
- Cinch or Bind-It-All
- Post-It Notes
Make sure you stop by my blog tomorrow, because I'll have my VERY FIRST Craft Junkie Too Design Team post! I promise it's going to be delicious ;)
Tuesday, October 12, 2010
Martha Stewart Custom Stamp Setting Kit
I was perusing the Cricut Message Board last night, and a few lovely ladies had questions about the new Martha Stewart Custom Stamp Setting Kit I found at Michaels last week. I made a quick video to show you exactly what's inside and how it works.
I hope everyone is having a fabulous Tuesday! Stay tuned to my blog for the next few weeks, I have something exciting planned! :)
I hope everyone is having a fabulous Tuesday! Stay tuned to my blog for the next few weeks, I have something exciting planned! :)
Saturday, October 9, 2010
Video: How to Make a Tri Shutter Card
Hi everyone! I got quite a few emails asking me how I made my Thanksgiving Tri-Shutter card, so I thought I would make a quick tutorial on how I did it. I'll also include the basic recipe, as well as all the measurements to make the card.
Robyn over at My Pink Stamper is having a Winter Challenge, so I thought this would be a great way to make a tutorial AND a challenge item at the same time! I hope you enjoy it :)
Just remember, on the video I tell you the dimensions of each actual box on the card. To make mats and add patterned paper, subtract a 1/4" from each dimension. On the recipe I will give you the dimensions for my white cardstock mats.


Robyn over at My Pink Stamper is having a Winter Challenge, so I thought this would be a great way to make a tutorial AND a challenge item at the same time! I hope you enjoy it :)
Just remember, on the video I tell you the dimensions of each actual box on the card. To make mats and add patterned paper, subtract a 1/4" from each dimension. On the recipe I will give you the dimensions for my white cardstock mats.
Recipe:
- 5.5" x 12" piece of green cardstock
- Martha Stewart Scoreboard (or any scoring tool)
- Paper Trimmer
- For front and back panels: 1 3/4" x 5 1/4" white cardstock
- For top and bottom panels: 1 1/4" x 1 3/4" (you need 2)
- For the middle panels: 2 1/4" by 1 3/4" (you need 2), 2 1/4" by 3 3/4" (you need 1)
- 3 by 5" piece of white cardstock
- DCWV "Winter Combo" paper matstack (all cut 1/4 smaller than white cardstock)
- Create a Critter for Reindeer (3 3/4") and "Joy" (1 1/2")
- Crop a Dile and 3/16" eyelets
- Martha Stewart Glitter Stamping Set (for snowflakes)
- Martha Stewart Turquoise Glitter
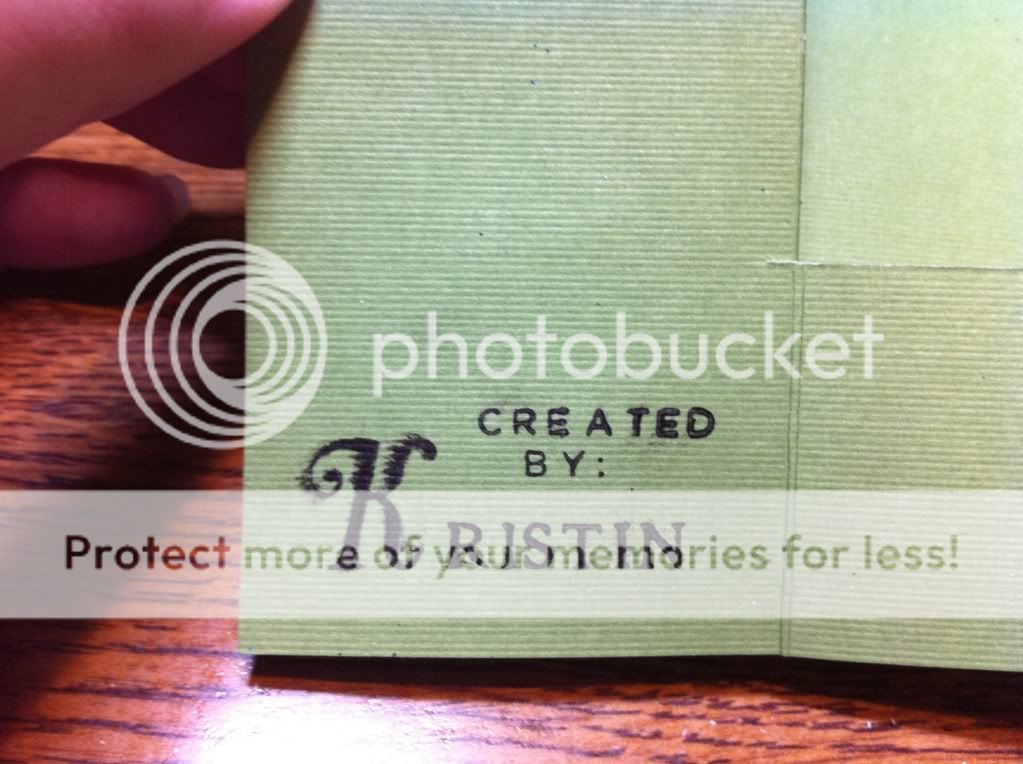
- Martha Stewart Stamp Setting Kit (for custom stamp on back)


- Have a fabulous day everyone!!
Saturday, October 2, 2010
"Boo" Recycled Mini Wordbook
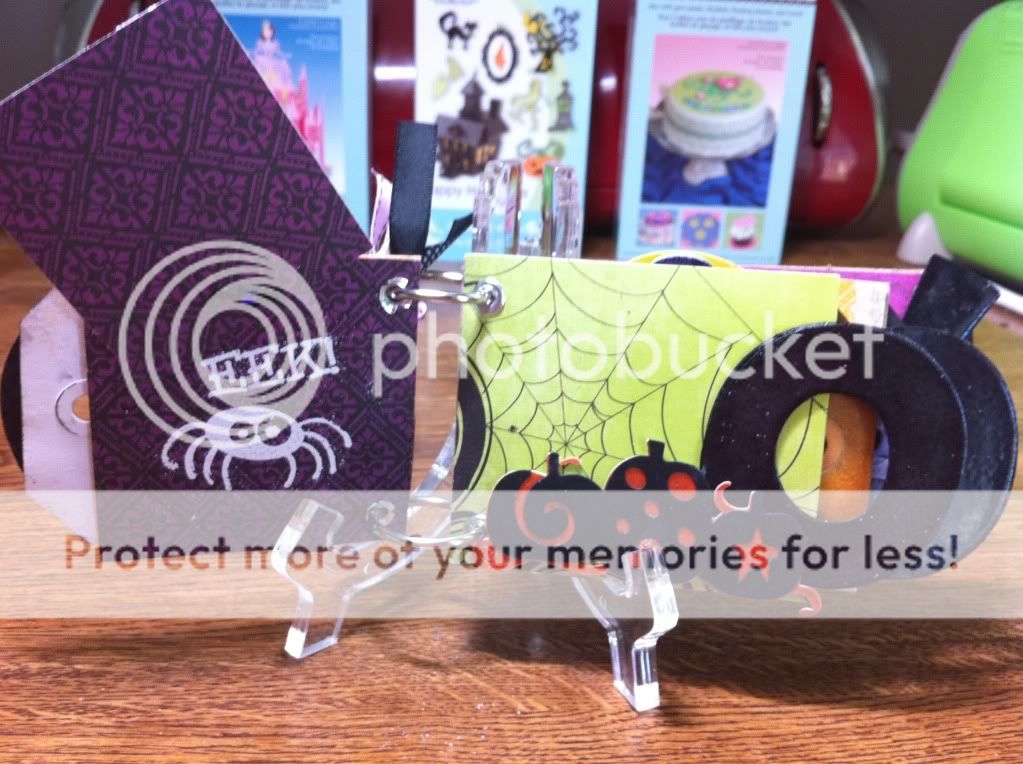
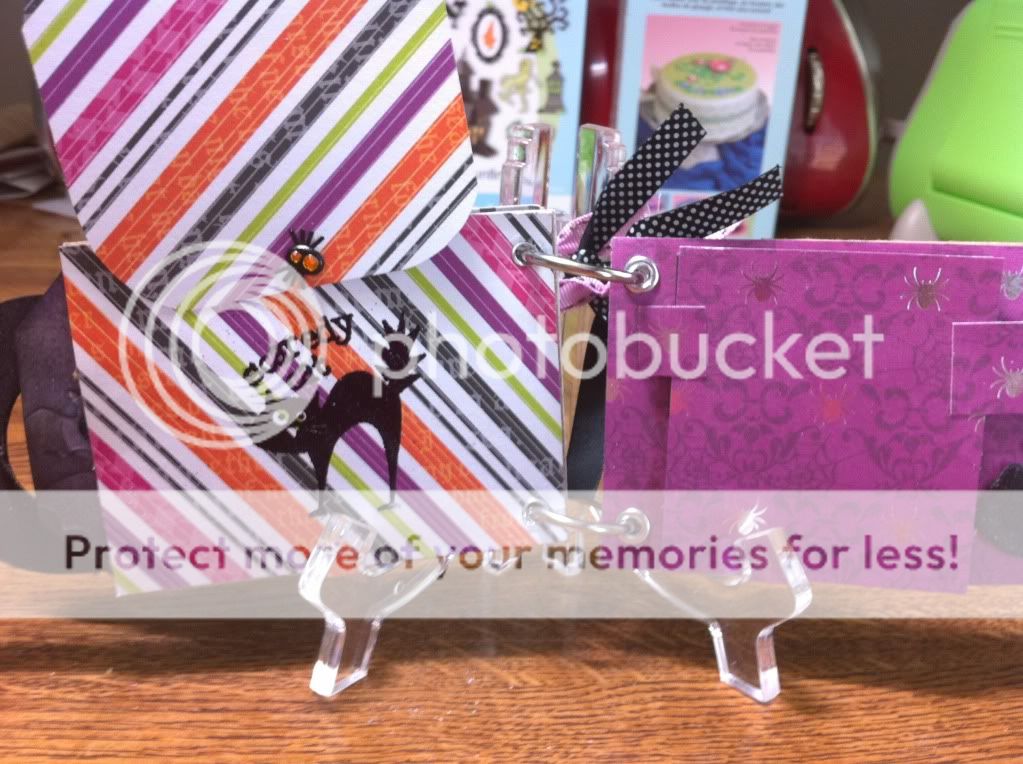
Hi everyone! I hope everyone is having a fabulous weekend. Today I've got a video showing you my newest project, a mini album/wordbook using recycled toilet paper rolls!
I was browsing Cardz TV the other day and I saw a cute little fall mini wordbook she made for a blog hop. I thought it was so neat that I had to try to make it myself. It was so easy to make!
I can't wait to explore the world of mini albums, but, I have to ask:
Bind-It-All or Cinch?
I want to get a binding machine but I just CAN'T make up my mind! If you own one of these machines, and have an opinion on why it's the one for me, leave me a comment! I'd love to read what you think :)


I was browsing Cardz TV the other day and I saw a cute little fall mini wordbook she made for a blog hop. I thought it was so neat that I had to try to make it myself. It was so easy to make!
I can't wait to explore the world of mini albums, but, I have to ask:
Bind-It-All or Cinch?
I want to get a binding machine but I just CAN'T make up my mind! If you own one of these machines, and have an opinion on why it's the one for me, leave me a comment! I'd love to read what you think :)
What you need:
- 4 toilet paper rolls, cut in 1/2 inch intervals
- Halloween Paper (I reccomend DCWVs "Midnight Spell" stack, it's fabulous!). You need two pieces of patterned paper for each roll.
- Cricut Happy Hauntings Cartridge (Fence, Tombstone Tags)
- Cricut Birthday Cakes Cartridge (BOO font)
- Cricut Holiday Cakes Cartridge (Pumpkins, Happy Halloween)
- Crop-A-Dile and 3/16" eyelets
- Binder Rings
- Large Tags (cut to fit each pocket)
- Tim Holtz Distress Inks in Spiced Marmalade, Dusty Concord, and Black Soot
- Martha Stewart Halloween Clear Stamp Set
- Versamark Pad, clear and black embossing powder
- Stickles, brads, and any other embellishments you want to use




Monday, September 27, 2010
"Thankful" Fall Card Video
We are FINALLY getting fall-like temperatures around here (yay open windows and no A/C!), so I was itching to use my new DCWV Amber Autumn Stack, so I whipped up a cute Joy Fold fall themed card. This is also the first time I've inked the edges of all of my pages. I was TERRIFIED of not doing it correctly and ruining my paper, but it all turned out find and I love the look it gives paper. I finally bit the bullet and bought some Tim Holtz Distress Ink (In Walnut Stain and Spiced Marmalade) along with the applicator to use in a future project, I've pretty much decided I'm going to have to collect all the colors because I couldn't decide which ones I wanted!
I hope everyone is having a happy Monday! I'm in the process of working on a HUGE cupcake wrapper order that is pretty much dominating all of my craft time, but I hope to be done in a few days so I can play again!
I hope everyone is having a happy Monday! I'm in the process of working on a HUGE cupcake wrapper order that is pretty much dominating all of my craft time, but I hope to be done in a few days so I can play again!
Thursday, September 16, 2010
HALFWAY TO 100! Plus a haul video!
I hit 50 followers today! 50 people follow my lil' old blog, and that makes me SO happy! I'm so grateful for each and every one of you! Thanks for the comments, and just checking out what I do. I've decided once I hit 100 followers, I'm going to do a giveaway of some sort. So, if you're not a follower yet, jump on board! I promise lots of paper crafts (and yummy treats) here on my blog. :)
Here is a quick video I made showing what I got this week. Michaels has some GREAT DEALS (and a 50% off coupon!), so I had to take advantage! Hope everyone is having a great week!
Here is a quick video I made showing what I got this week. Michaels has some GREAT DEALS (and a 50% off coupon!), so I had to take advantage! Hope everyone is having a great week!
Friday, September 10, 2010
Trick or Treat! (plus a video!)
The video I posted yesterday got me hooked, and I immediately wanted to make another one.
Except maybe actually making something this time ;)
I really loved my little witch frame gatefold card I made the other day, so I decided to make another one. I wanted to use Happy Hauntings, but use a cut that isn't very popular (like the shoes or the frames). This morning I literally woke up with an idea for a card in my brain, and I couldn't get it to go away until I sat down and made the thing :) I think it turned out really cute, let me know what you think!!


Also, I got the tutorial on how to make gatefold cards from Momo's Ustream class. She's been doing a weekly live class and they are SO fun and SO informative. I've learned so much and she's only had two! You can see recordings of previous classes at her website HERE. Mari (AKA Momo) is such a sweet girl, you'll love her blog :)
I'm really excited to have so many followers. I've decided when (or if) I get to 100 followers, I'm going to do a giveaway of some sort. Not sure of the prize, but I promise it will be fun. So, if you're not a follower yet, become one today! I can't wait to share all of my crafting and baking fun with you :)
Except maybe actually making something this time ;)
I really loved my little witch frame gatefold card I made the other day, so I decided to make another one. I wanted to use Happy Hauntings, but use a cut that isn't very popular (like the shoes or the frames). This morning I literally woke up with an idea for a card in my brain, and I couldn't get it to go away until I sat down and made the thing :) I think it turned out really cute, let me know what you think!!


I'm really excited to have so many followers. I've decided when (or if) I get to 100 followers, I'm going to do a giveaway of some sort. Not sure of the prize, but I promise it will be fun. So, if you're not a follower yet, become one today! I can't wait to share all of my crafting and baking fun with you :)
Wednesday, September 8, 2010
Check it out, I made a VIDEO!
Yes, ladies and gentlemen, I finally made a video.
I picked up some cute stuff at Tuesday Morning and had to share. Now that I know I can successfully make and upload videos, expect more :)
My dog Dixie makes a suprise appearance at the end of my video. She tried to get her furry sister Bella in on the fun but she was being camera shy. Maybe she was having a bad hair day ;)
P.S: Just in case you didn't hear, I'd appreciate if you could leave a comment. I got a message from a very nice viewer saying she wasn't able to leave me a comment, and I want to see if that applies to everyone. If you can't leave a comment, please drop me an email (click the image under my "Email Me!" sidebar) and let me know, so I can fix it (or, find someone smarter then me to fix it)!
P.P.S: Dixie is incredibly vain and would totally love the comments to be about her ;)
I picked up some cute stuff at Tuesday Morning and had to share. Now that I know I can successfully make and upload videos, expect more :)
My dog Dixie makes a suprise appearance at the end of my video. She tried to get her furry sister Bella in on the fun but she was being camera shy. Maybe she was having a bad hair day ;)
P.S: Just in case you didn't hear, I'd appreciate if you could leave a comment. I got a message from a very nice viewer saying she wasn't able to leave me a comment, and I want to see if that applies to everyone. If you can't leave a comment, please drop me an email (click the image under my "Email Me!" sidebar) and let me know, so I can fix it (or, find someone smarter then me to fix it)!
P.P.S: Dixie is incredibly vain and would totally love the comments to be about her ;)
Subscribe to:
Posts (Atom)