Saturday, December 4, 2010

SweetSassyDiva Post-It Paper Blog Hop!

 Hello everyone!  Welcome to the SweetSassyDiva Post It Blog Hop.  We all can't wait to share our awesome Post-It Craft Paper projects with you.  If you've never heard of Post-it Craft paper, the explination is simple.  It's craft paper with Post-It adhesive on the back.  It sticks wonderfully, but it repositionable if you make a mistake.  It also works great in your Cuttlebug!


I used the Post-It Craft paper to alter a recipe box to store my photos in for scrapbooking.  I got the instructions for this box from Momo, and let me tell you, the Post it paper not only coordinated beautifully, it made assembling the box a SNAP!


I had made a box similar to this for another project, and it took a LOT of tape.  And to me, my ATG tape is precious.  It's not cheap and I hate to waste it.  This is where the Post It Craft paper was ESSENTIAL.  No tape, no mess, no mistakes.  All I had to do was peel off the backing and stick it where I wanted it to go on my box.  AMAZING, and such a time saver!

See the punched white border?   Yep, thats Post it Craft paper too!  It punches just as well as it cuts in the Cricut, PLUS the whole border sticks, so no using my Zig pen to get those tiny parts!


If you would like detailed instructions on how to make the boxes, check out Momos YouTube Channel for her video on how to make them.


...are you ready for some BLOG CANDY??

How about a Martha Stewart Edge Punch (donated by me)?
This Ponsettia and Vine punch is from her new Christmas Collection and makes a gorgeous die cut border!  LOVE it!

In order to be eligible to win the punch, you:
1.) Need to be a follower of my blog
2.) Need to leave a comment telling me what you would use my Post it Craft box for!

As an added bonus, all the comments from ALL the blogs on the hop will be entered to win a Post It Craft Prize Pack!

I will choose a winner of the punch on Monday, 12/6.


Thanks so much for hopping along with us!  Here's a list of the awesome blogs playing along today:

SWEETSASSYDIVA DESIGNERS!

If you arrived here first, be sure to head on over to SweetSassyDiva's blog http://sweetsassydiva-gspot.blogspot.com/ to see all the wonderful projects that everyone made! 
Special thank you to Post-it for donating the wonderful blog candy!

Sunday, November 28, 2010

I think I need a support group.

Hi, my name is Kristin and I have a serious problem.

I'm pretty sure it's called Hey-I-Can-Make-That-gitis.  Want to know if you suffer from it too?  Read on.

I've been a little obsessed with Card Creations By Lorraine lately, and a few days ago she made a post about making a cute scarf using the Provo Craft Knifty Knitters.

Here's what I SHOULD have said upon seeing her cute scarf:

"Wow, how adorable!  She's really good.  Well...off to do something I already know how to do!"


What I ACTUALLY said:


"Wow, how adorable!  She's really good.


...


HEY!  I bet I could make that!"


I think it's important here to mention that I have never knitted a single thing in the entirety of my life.  In fact, just the word "knitting" made me think of someones 80 year old grandma sitting in her front parlor with a pair of needles knitting a sweater that you will never, ever wear.


(My apologies to anyone with an 80 year old grandma who like to knit sweaters.  I'm sure they're beautiful).


So, after chatting with the lovely Lorraine on the Provo Craft forums I set off to Wal Mart and Michaels to buy knitting supplies.


(Honestly, I can't believe I just said knitting supplies).


My Wal Mart only had two looms, and luckily, they were the exact two I needed:
Purple Rectangle Loom
Flower Loom


I bought some really nice, thick, soft cream colored yarn from Michaels.  I wish I could tell you the brand but I can't because my dog ate the band that goes around the yarn.

I wish I was joking about that.

I also bought some teal colored yarn that matches a winter coat I wear a  lot for the flowers, and a crochet hook because the guy on You Tube told me so (more about that later).

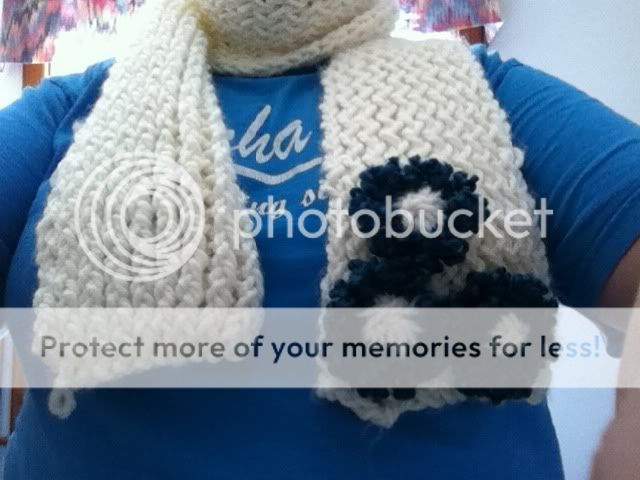
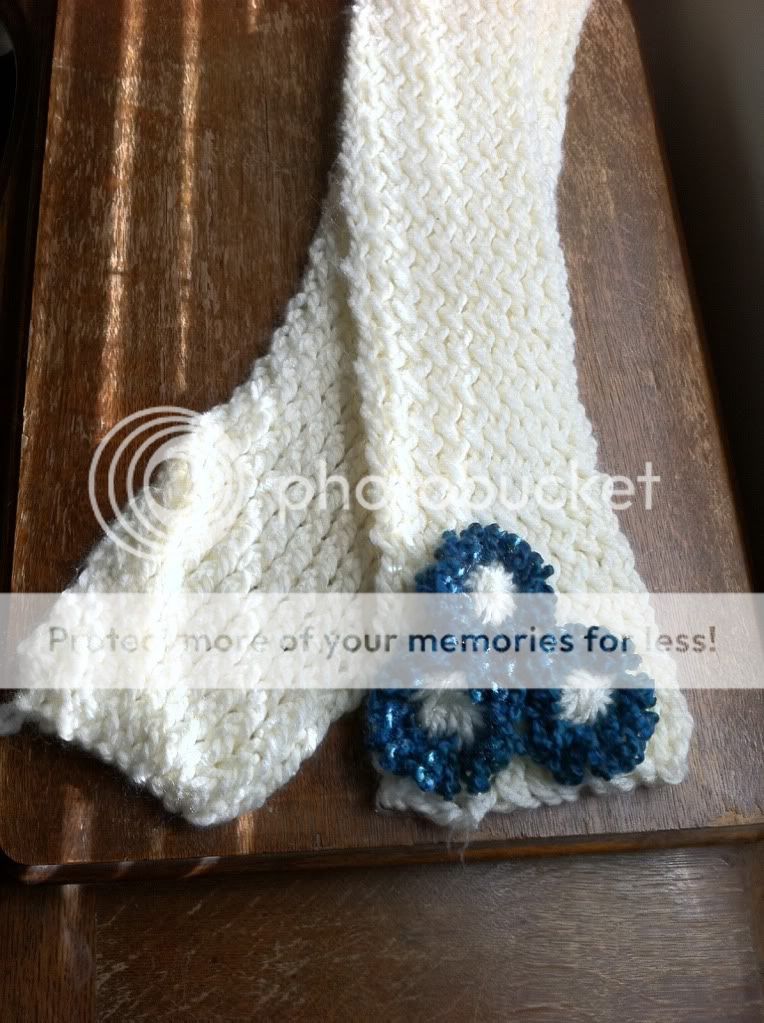
And then I knitted a scarf.


The End.


...

Come on, did you think I would let you get off THAT easy?  Let me tell you a little of how I did it.

I was actually surprised at how EASY it was to knit my scarf, once I got it going. I started this project last night about 6 PM, knitted for a few hours and went to bed.  This morning I finished the project after church.  So, 5 to 6 hours for a full scarf.  Not bad.

The hardest part was actually STARTING the scarf.  Provo Craft, I love you lots (and I'm sure you love my money), but your instructions for things kind of suck.  Luckily, I had my BFF YouTube waiting in the wings to help me out.  If you're thinking of picking up the Knifty Knitters, make sure to check out THIS You Tube channel.  He also has a website.  His videos on casting on/casting off looms were SO easy to follow.  Once I figured that part out, the scarf was smooth sailing.  I used 10 pegs, I kind of wish I had used a few more to make the scarf a little thicker, but I still love it.

The final touch I wanted to add were flowers using the Flower Loom.  Lemme tell you, these are a BREEZE to make.  So easy and it's really hard to screw up.  The instructions in the package were actually helpful for this one, but there are some great video tutorials out there for these as well.  One is of an 11 year old girl whipping out flowers like nobodys business.  If she can, you can too :)


There was a tiny bit of sewing involved to attach the flowers to the scarf (thanks, high school Home Economics!), but all in all it turned out pretty good for my first attempt at knitting!


Here's one important tip I picked up from Mikey on knitting with looms: use a Styler Pen.

What's a Styler Pen, you might ask?  Now, stay with me, this might get complicated:


Or not.  It's literally a pen with the insides taken out.  You thread your yarn through it and OHMYGOSH it makes wrapping the loom go SO FAST.  Plus, you don't have to cram your fingers in between the pegs.  Win win.

So there you have it.  My mom has already put in an order for one and she wants to wear my scarf to work in hopes that her co-workers will want one too.  I agreed to all this while silently screaming "I CAN'T AFFORD ANOTHER HOBBY!!!"

In conclusion, I have a little request for my bloggy friends out there.

Please don't enable my Hey-I-Can-Make-That-gitis. If you have some super cool craft project that requires going out and buying a bunch of new tools and is highly addictive...

DON'T SHOW IT TO ME!!

Love,
Kristin
:)

Monday, November 22, 2010

A Very Martha Stewart Christmas Card

Alright, I'm going to come right out and say it.

I'm obsessed with the card I made today, and can you believe I only used my Cricut for ONE cut???


But first, a story.

I saw Lorraine make a wreath out of the Martha Stewart Branch punch, and I fell in LOVE.  The only problem is you can't buy this punch in stores anymore.


 I immediatly scoured my craft room, hoping maybe I had purchased this punch without realizing it and and it was just hiding in a drawer somewhere.

No such luck.

It just so happened that my friend Matt, who is Martha Stewart obsessed like me, had this punch and wasn't using it.

I drove to his house and stole it I politely asked if I could borrow it and once I had it in my hands I couldn't wait to do my take on the wreath.


I punched two different shades of green, and glued them to a scalloped circle to create the wreath shape.  To make it shimmery, I took a Mini Mister and added Forever Green Perfect Pearls and spritzed it all over my wreath.  I know it's hard to see in my pictures (sorry for the crappy lighting) but the Perfect Pearls made the wreath shimmery and GORGEOUS.  I added a bow using the MS Ribbon Bow Punch, and I flocked the bow using my Xyron and Martha Stewart Ladybug flocking.

To create the door, I ran a piece of BROWN (yes, the door is brown, although it looks purple in my stupid pictures) cardstock through my Cuttlebug using the Distressed Stripes folder to give it a woodgrain look.  To make the panels, I used the Blackletter cartridge on my Gypsy.  Yes, I know that is totally random and I have no idea how I discovered that shape on there but it works PERFECTLY for door panels.  I made them faux chipboard by gluing three together (I ran the last piece through the same folder as the door before I glued it to the top).  THEN, I sprayed the panels with Tattered Leather Glimmer Mist to make them stand out a little more.  I used a brad as the door handle.

"Merry Christmas" is from the Pink By Design "Scripted Year" stamp set.  This set is BEAUTIFUL.  If you only buy one of her sets (which is scientifically impossible, by the way, I can't stop buying them), MAKE IT THIS ONE. 


So there you have it folks.  My new favorite Christmas card.  As soon as I finished it, I wanted to immediately mass produce them for all of my friends.   Make sure you stop by Card Creations By Lorraine and watch her tutorial on how to make that beautiful wreath.  She's also made one with the frond punch if you don't have the branch punch.

Don't tell Matt, but he's probably not getting this punch back ;)


Recipe:

  • DCWV "Christmas Combo" cardstock stack 
  • Martha Stewart Branch Punch
  • Martha Stewart Ribbon Bow Punch
  • Perfect Pearls in Forever Green
  • Mini Misters
  • Tattered Leather Glimmer Mist
  • Cricut Blackletter Cartridge
  • Pink By Design "Scripted Year" Stamp Set


Wednesday, November 17, 2010

CJToo Design Team Wednesday: I Am Thankful For...

Welcome to another Craft Junkie Too Design Team Wednesday!  This week, our theme was "I Am Thankful For".  Before I explain my project, I have to thank Tracy over at CJToo for coming up with this theme and letting us have free reign.

Have you ever made a project, and the process of constructing it was totally therapeutic?  That's what this project was for me.  Before I started, I sat down and thought of everything and everyone I'm thankful for in my life, which lead me on the long journey to the completion of this project.

As most of my close friends know, I've been having a really rough time lately.  The stress of unemployment and a constant job search that seems to lead nowhere, coupled with ongoing personal issues have made the past few months difficult for me.  I have amazing family and incredibly supportive friends (plus my awesome bloggy companions) that have made things a little better for me, but there are two very special little "people" who have kept me going, even when I didn't want to continue.

My dogs.

That statement might sound strange to anyone who is not a pet owner, but Bella and Dixie have been my anchor for the past few months.  They love me unconditionally, and the sight of me is always the highlight of their day, whether I've been gone 30 minutes or 3 hours.  There were times when I honestly didn't want to get out of bed, but I had to in order to give them the care they need.  I could be having the absolute worst day ever, and all they have to do is come curl up in my lap and stare up at me with those adorable eyes, and I can't help but smile.


They are actually doing that as I type this :)

So, I really wanted to make a project dedicated to my dogs.  I came up with the idea of doing a paper bag mini album, so I could have a book full of pictures to look at whenever I felt down.  I had never made a paper bag mini before, so I found instructions on YouTube and gave it a go.

Here's the final result:


I tried to list everything I used in the video, because I used a lot of different cartridges and inks.  Hopefully I remembered them all :)


 I hope you truly enjoyed this mini album, as I had a BLAST making it.  Make you you hop over to http://www.craftjunkietoo.com and see all of Design Team 2's projects today!

Have a great Wednesday everyone!

Monday, November 15, 2010

SweetSassyDiva Design Team: "Joy" Banner

Our challenge for SweetSassyDiva's Design Team project this week was to use the color green, use our Cuttlebug in some way, and to use felt.  I decided to make this "Joy" banner using chipboard coasters.  I used lovely green damask patterned paper from DCWV's "Christmas Combo" stack and inked around the edges of the coasters with Peeled Paint Distress Ink.  I really wanted to use my new digital carts on my Gypsy, so I used two in today's project, Blackletter and Christmas Solutions.  The word "Joy" is cut from the Blackletter Cartridge using the font and the shadow.  I ran the regular word through my Xyron and then used Martha Stewart Flocking in Ladybug to give the letters a "faux felt" effect.  After I flocked the letters, I ran it through my Cuttlebug using the D'Vine Swirls folder.  I love how you can emboss flocked letters!


The snowflake is from the Christmas Solutions cartridge, and I cut the regular snowflake and the shadow as well.  I flocked the snowflake using MS Flocking in Swan. 

I punched holes and set eyelets in all of the coasters using my Crop a Dile, and strung ribbon between the holes.  I think it turned out great and I love the traditional Christmas look :)


This project came together in a SNAP thanks to my Gypsy girl.  I used a rounded 4 x4 square as a template to make sure I had everything sized correctly, then laid EVERYTHING out on one mat!  That's right, I got all my cuts done on one mat, in one turn on the Cricut.  Love it!

Sunday, November 14, 2010

Wal Marts Black Friday Ad: Who's Excited???

ME!!!


Friday someone had posted on the Cricut forums that Wal Marts Black Friday Ad had leaked online and there were some KILLER Cricut deals inside.

The ad has since been taken down, but I managed to snag a screenshot from the original blog Don't Tread On Me before it disappeared.


Look at those ADORABLE new Expressions!  I'm still using a hand-me-down Baby Bug, so I am SO EXCITED to snag one of these on Black Friday.  Plus, it comes with TWO new cartridges!  I just can't decide between Aqua and Plum.  I guess I have a few weeks to make up my mind!  :)

Also, can we say NEW LITE CARTRIDGES!  And they're only $20!  I can't make out all of the titles, but I can see Cupcake, Jolly Holidays, Four Legged Friends, and possibly Pet Shop.  I cannot WAIT to see these carts, and hopefully this means the price on the original Lites will drop as well :)

I also heard that EVERY Wal Mart in the country will have an Expression and Lite display, even if they normally don't carry the Cricut Lites.  This is great news for anyone that doesn't have a Wal Mart that carries the Lites nearby!

So what are YOU looking forward to this Black Friday?  Will you be shopping at 12:01 like me?